We Tried Glossier Cloud Paint Blush on 4 Different Skin Tones, and We’re Impressed

Flushed cheeks can mean the difference between looking tired and hollow or healthy and awake. But for those who aren’t makeup savvy, a rosy glow tends only to be seen by select yoga instructors and fellow passengers in the subway car with the broken air conditioner.
From choosing a shade and consistency (powder, cream, gel, or stain) to mapping out where to apply (apples, hollows, or cheekbones), everything about blush can seem daunting.
Glossier has an answer to your dull-skin woes: an $18 cream-gel blush in four universal shades, served up in paintlike tubes. The water-based formula is easy to apply and is sheer and buildable enough that any error — or as a painter would call it, happy accident — can look intentional. Use Cloud Paint to finger-paint your way to a bright and awake complexion with sculpted features.

“Cloud Paint feels creamy when you apply it, but it’s really more gel- or water-based, not as watery as a stain,” says Glossier makeup artist Ingeborg, who did the makeup for the Cloud Paint campaign. “It’s easy to distribute with your fingers. You can really add depth by using more or you can keep it super-sheer and barely there, and it doesn’t move once you apply it and it sets. It’s pretty long-wear.”

Compared with other types of blush, Ingeborg finds Cloud Paint the easiest to maneuver. “Once you apply a lot of powder by accident, it’s really hard to go back. It’s harder to layer and build it because it’s just a lot of color on your brush, unless you have the right tools. It also gets cakey really fast and kind of looks heavy.”
And even though she loves cream blush, she finds that it doesn’t last long enough, particularly in warm weather or on oily skin, and has a tendency to crease, slide, and move. Cloud Paint’s cream-gel formula is a good alternative. “With Cloud Paint you have a lot more time to blend it in,” Ingeborg says. “It doesn’t feel makeup-y or tacky on your face; it doesn’t feel like it clogs your pores [like powder]; and it doesn’t start setting right away, so it’s very easy and user-friendly. It doesn’t get heavy when you build it. That’s the nice thing about its watery gel texture — it never builds to a point where you feel like you look super-made-up,” she says.
“These guys are so sheer that you can basically use all of them on all undertones,” says Ingeborg. “That being said, certain colors, I think, really brighten certain complexions.”
Scroll on to find the best shade for your skin tone and application for your facial structure.
Makeup by Ingeborg using Glossier products.

On medium skin tones, Ingeborg recommends Cloud Paint in Beam, a peachy coral color. “This particular color is the bestselling blush color for most brands,” says Ingeborg. “It’s super-easy to wear, looks good on everybody, and is polished but not too makeup-y looking. It’s really fresh, sunny, summery, goes really well on a bronzed face, and if you use a little bit of it, it also looks really beautiful on a super-pale face as well because it gives it a little bit of warmth.”
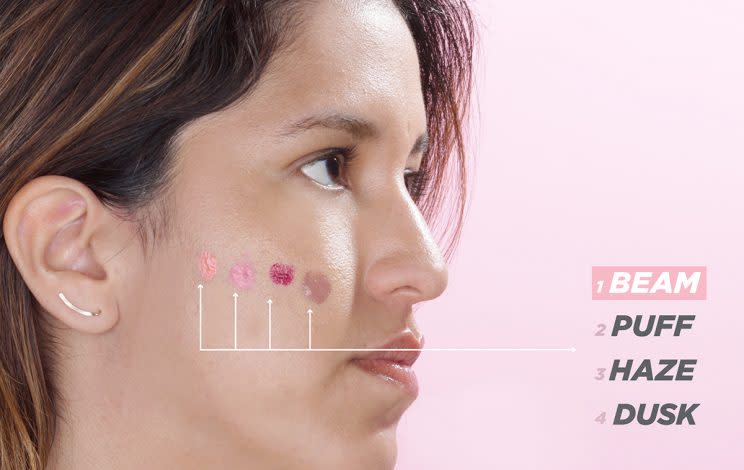
“Her skin tone is absolutely incredible for this color because it really freshens it up and makes it look super-rested and polished and pretty and sunny, and ties in with her beautiful bronzed glow that she has naturally,” Ingeborg adds.
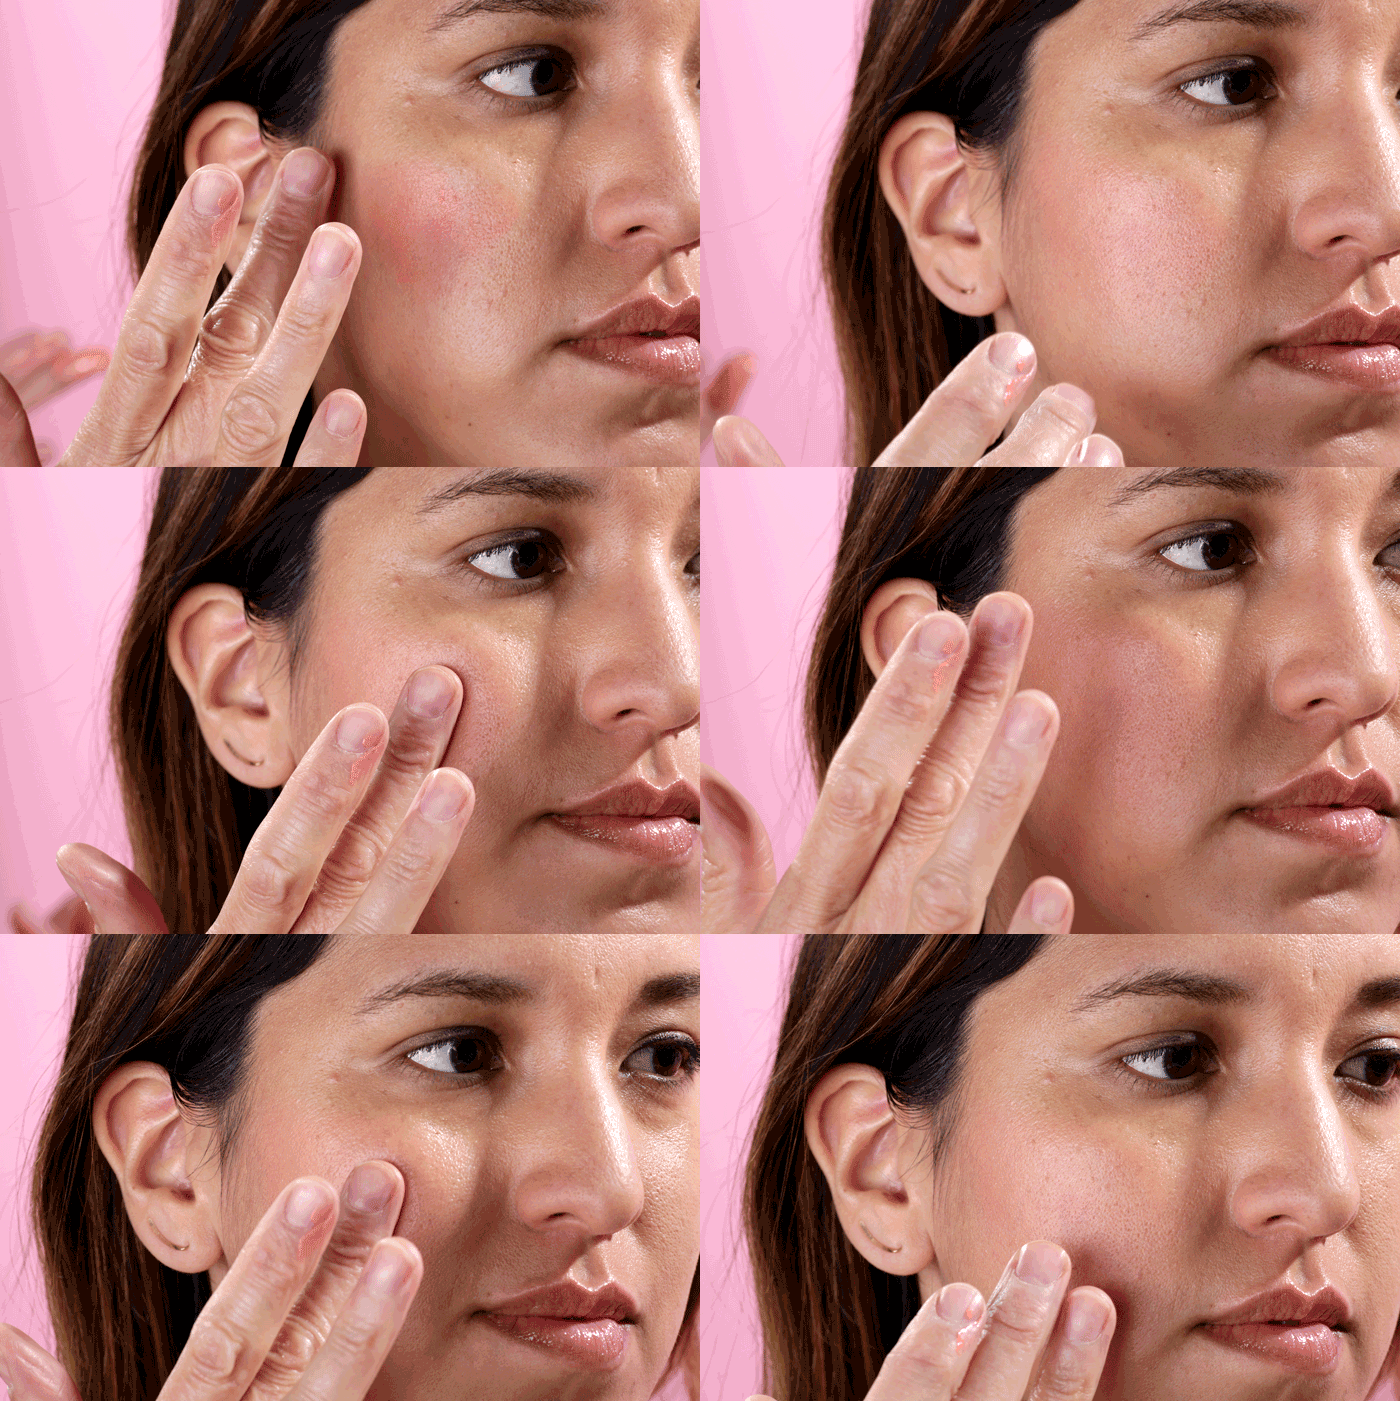
“Her cheekbones are perfect. She has this really beautiful, sculpted cheekbone structure, so I didn’t really have to shape it much,” says Ingeborg. “I applied on the apple of the cheek and then going outwards through the cheekbones a little bit.”
Ingeborg recommends this application for a natural look on oval face shapes, blending out in a half-moon shape toward the temples for a natural emphasis on the cheekbones.
Using the ring finger and middle finger to apply, make circular motions and dab rather than rub. “I never use the index finger; it gives a lot more pressure, and when you apply makeup you want it to meld into the skin,” says Ingeborg. “Whatever you apply to the cheek, whether it’s a highlighter or a cream contour or a blush, you always want to go in there with the lightest possible touch and build it from there rather than make a big bold statement in one application.”
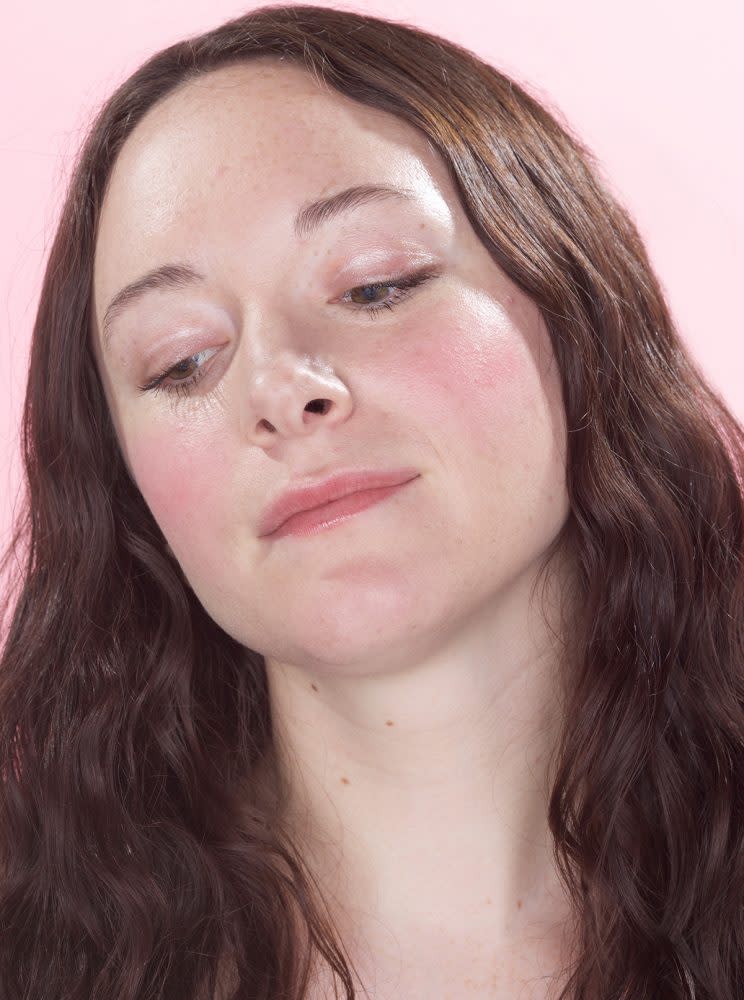
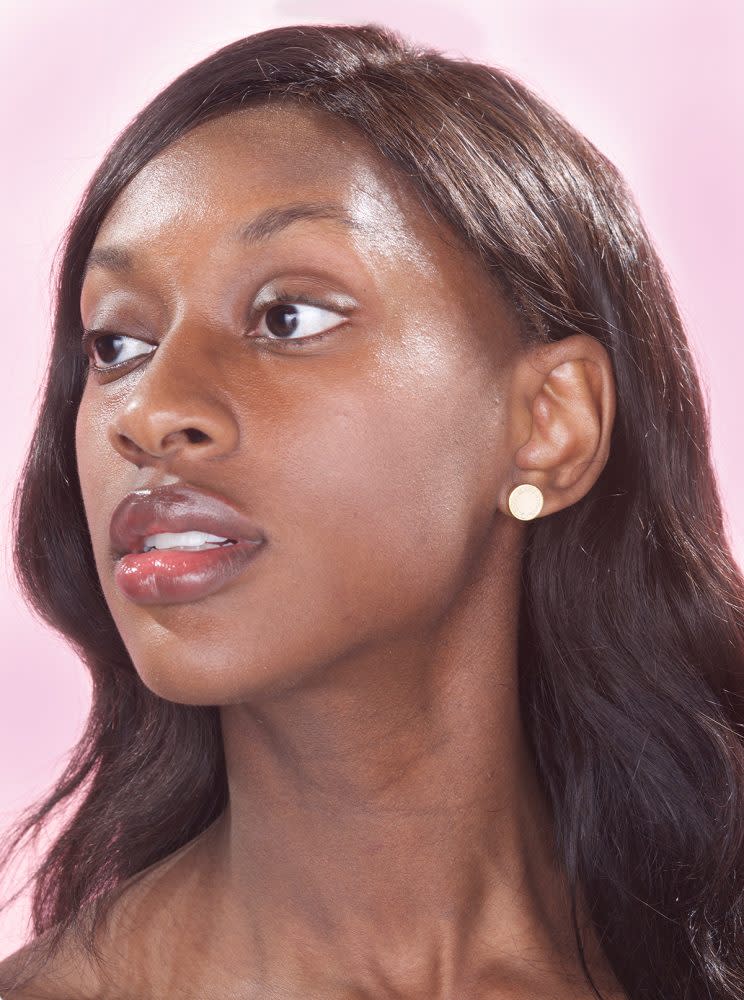
For olive undertones, Ingeborg recommends Puff. “This pink really brightens everything. If I were, for example, to use Dusk on her, it would be a super-earthy, neutral palette. And I feel Haze would work on her, but I felt that Puff was the perfect brightening, spring-looking, beautiful, classic, baby pink color,” says Ingeborg. “It makes her complexion look super-fresh and super-rested, and it’s really subtle.”
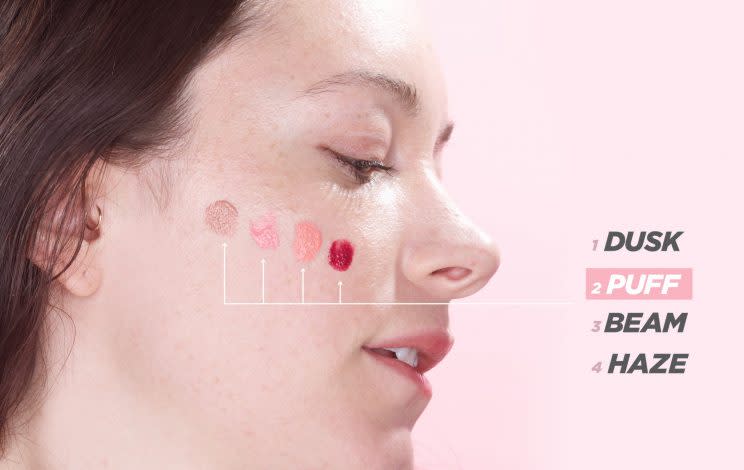
“Puff brightens every skin tone and just makes you look super-fresh, and I associate it with a happy color. It looks like a dusting of pink,” says Ingeborg. “I wanted a light touch, something that you’d apply in the middle of the workday in the office when you feel like you’re fading a little bit and want to look really refreshed but don’t want to do a whole face of makeup to conceal the fact that you’re tired.”
Pink is the color that disappears from the skin when you’re tired or under the weather, so it has a brightening effect. “You get a green or grayish cast when you’re tired,” says Ingeborg. “It’s nice to use something with a pinker undertone because it usually really immediately looks really awake and fresh.”
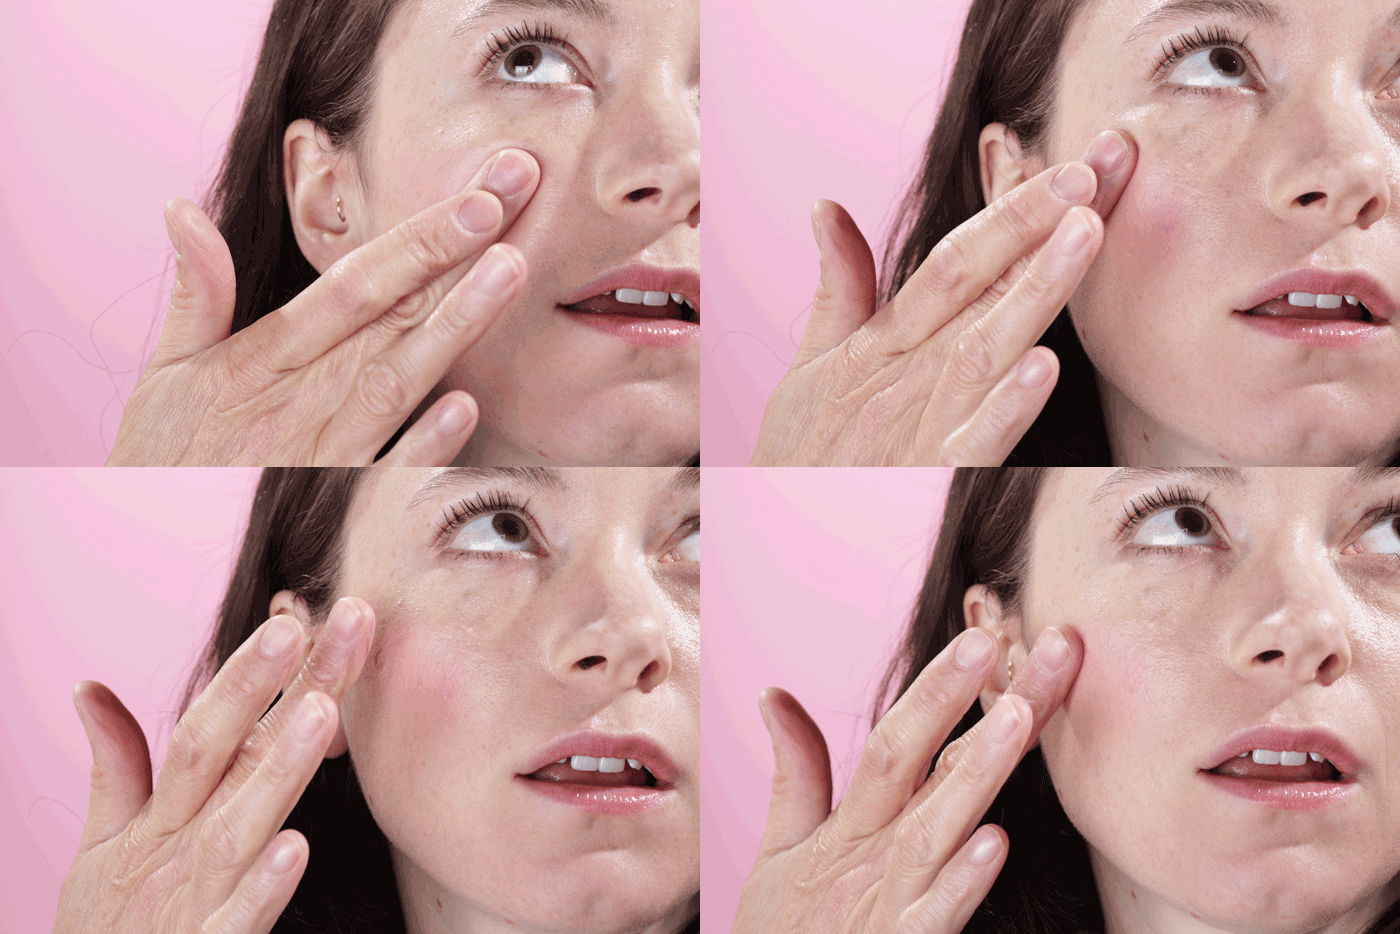
“I used the patting technique with two fingers but I went a little smaller, kind of in a round shape in the center of the apple of the cheek. A really sweet, cute-looking, center-of-the-cheek application,” says Ingeborg. This application enhances heart-shaped faces. “You can get the look purely using product on the center of the apple of the cheek in a rounder shape. Basically the place where you normally get a flush is where it should be.”
For a refined and contoured look, Ingeborg prefers Dusk. “This chic tawny rose color looks subtle and natural on all skin tones,” she says. “It can be a sheer, contouring blush on light to medium tones, and a chic glow on darker ones.”

“This is my favorite color of the four because of its stylish, understated, ’70s glow,” says Ingeborg. “Its brownish color also gives a ’90s supermodel vibe. I think it works on green skin tones as well.”
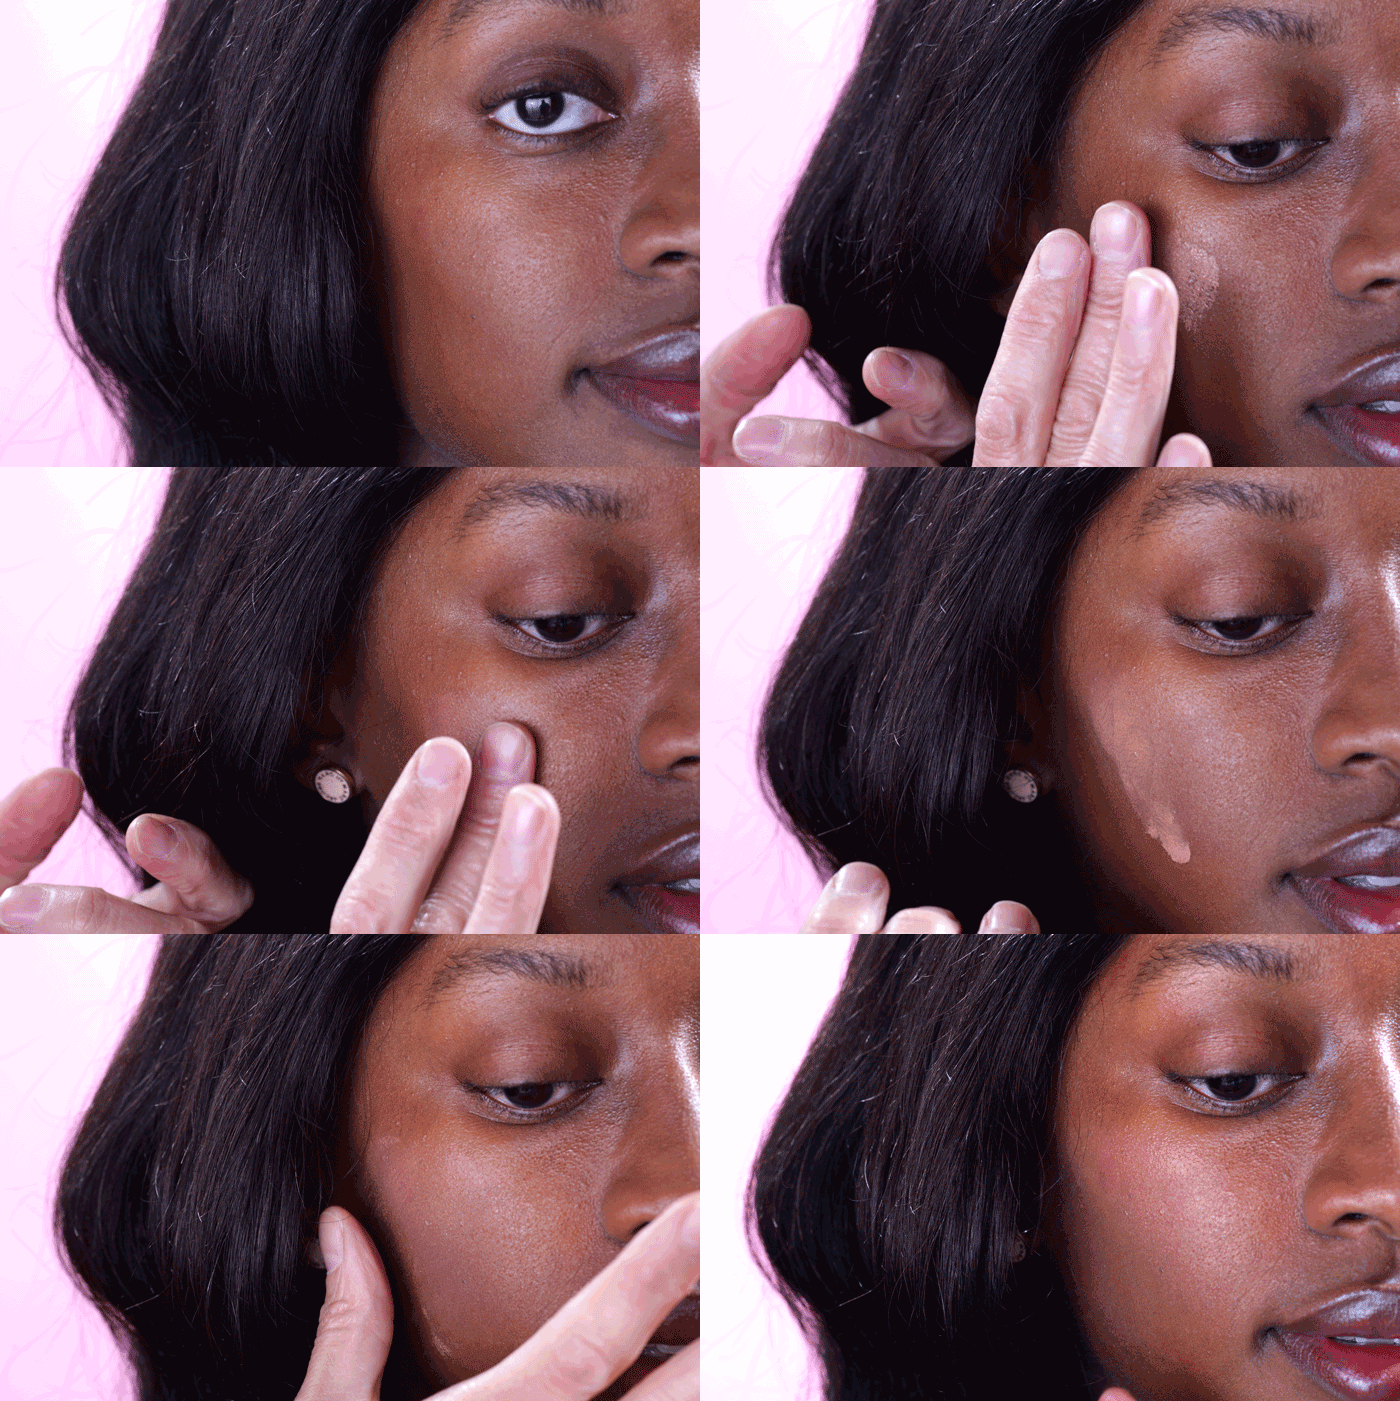
“I used it from the apple to the cheekbones in a circular motions for a good, seamless blend,” says Ingeborg. “You can also really easily apply it with a brush. You can do a more precise application with a brush when you want to do a contour shape, but it’s super-easy to apply with the fingers.”
She created a natural shape in the hollows of the cheekbones to emphasize a diamond-shaped face. “Here, I tapped it up against the ridge of the cheekbone, not too far inwards,” Ingeborg explains.
Opting for a wash of color with a subtle glow, Ingeborg didn’t layer much product for this look. “If you want a really bright pop of color, I always like layering it. Don’t apply just once but kind of add some depth by adding multiple layers. This can either be done on the center of the cheek or all along the cheekbone, going upwards in the hollows of the cheekbone,” she says.
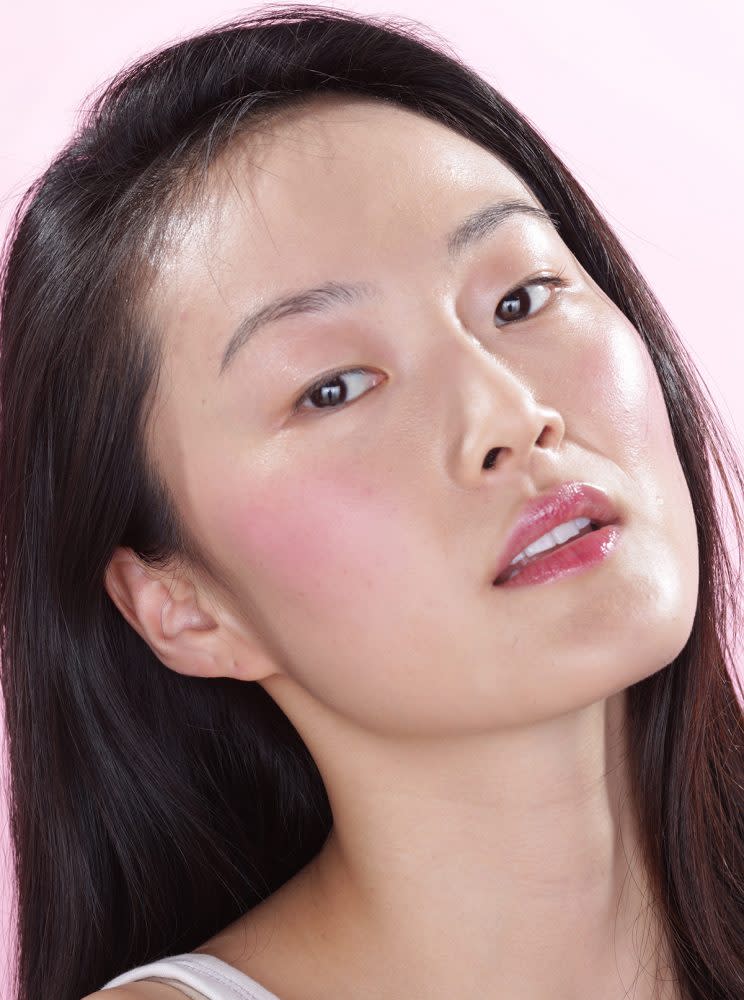
“For her skin tone, which is really beautiful and porcelain with some light yellow undertones, I thought Haze was a really beautiful, fresh color to pick for her,” says Ingeborg. “If I had gone with Beam or Dusk, it would have kind of blended into her own skin tone a little more because of the color undertones, whereas this one really stands out and that’s what I wanted to go for, a blush that really is a standout look by itself so you don’t really need to use a lot of other makeup.”
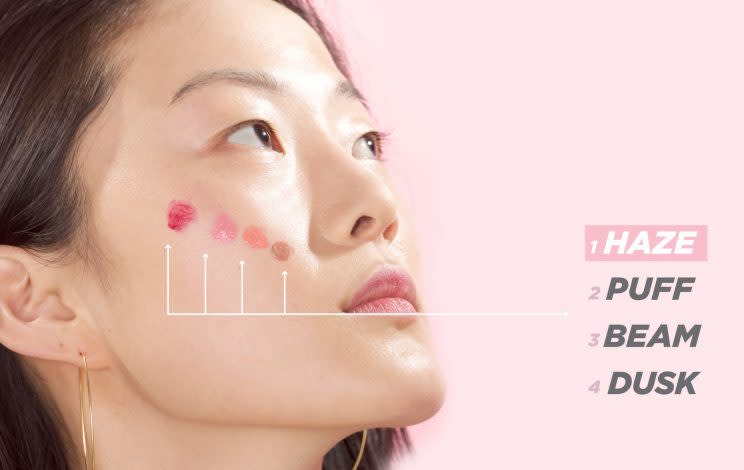
“When you pinch your cheeks, this color will come up on most people,” says Ingeborg, of the berry tone. “On her I used it a little bit more of a dramatic version, I amped it up quite a bit for a more made up look that’s playful and fun.”
The natural pigmentation of the color makes it versatile. “You can use a little bit and have it look like a super-fresh, out of the gym, healthy glow, as if you’ve been working out or have a little bit of sunshine,” says Ingeborg. “As a statement blush, this one works really well. You can either wear it super-natural or as a statement blush.”
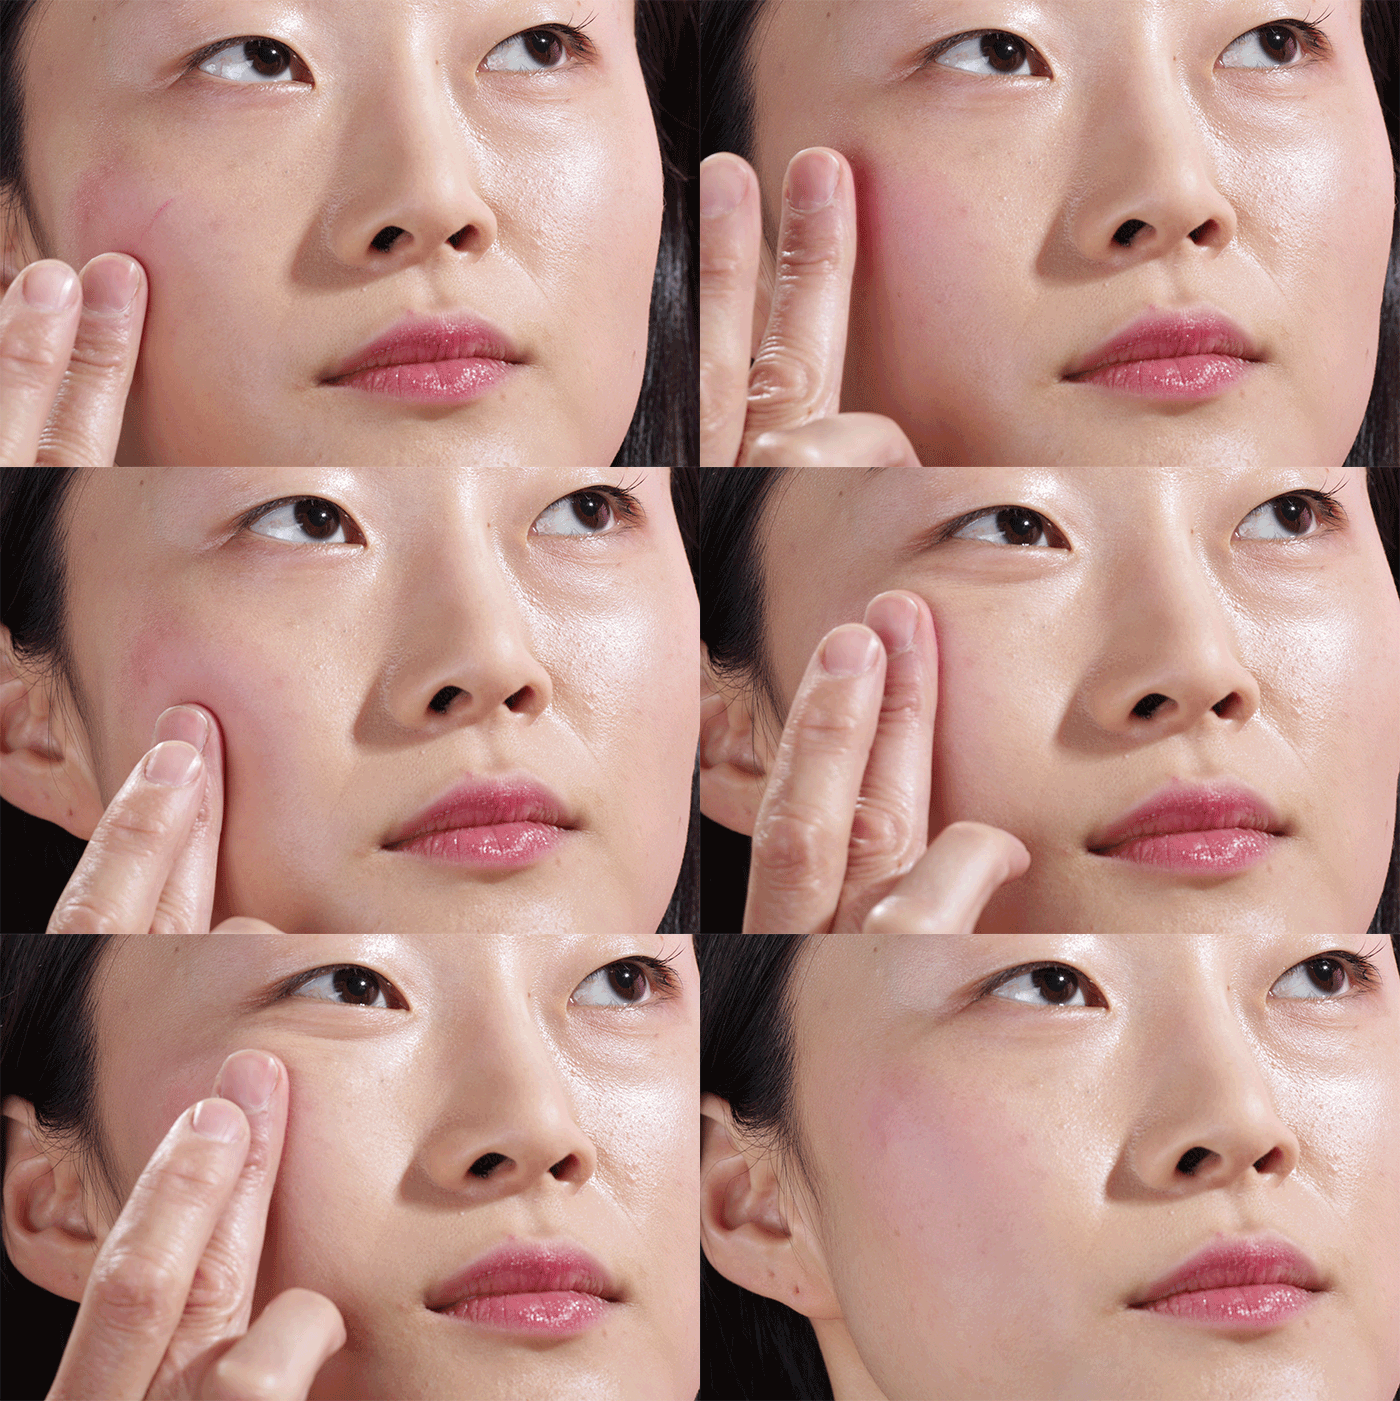
“She naturally has really beautiful, chiseled bone structure so you can kind of just go for it with the blush, wherever you would normally blush, like on the center of the cheek. And I actually went a little bit out towards the sides of the face,” says Ingeborg, opting for a more sophisticated look to play up an angular face shape.
She adds, “Normally for a healthy look I would only stay in the center [of the cheeks], but since it was more of a real, beautiful, classic blush look, I went from center to sides, basing it on the center of the cheekbone and going outward to the side of the cheekbone. And I applied it on her cheeks in a dabbing, circular motion as if you were painting little clouds with your fingertips.”
Read more from Yahoo Style + Beauty:
Follow us on Instagram, Facebook, and Pinterest for nonstop inspiration delivered fresh to your feed, every day. For Twitter updates, follow @YahooStyle and@YahooBeauty.
