Celebrate the Holidays with These Beautiful Gingerbread Cottages
If you're a fan of baking, crafts, or both then there's something about building a gingerbread house that just makes the holidays feel complete. But this year, forget the the generic, prefab constructions on sale at the grocery store. Go for something a little more DIY—and a little more country. Like, for instance, a snowcapped gingerbread cabin, or a rustic little stone cottage with a thatched roof. Both are easier than you think, and can be made simply with a template you can build out of a little extra cardboard, some homemade gingerbread, and a few smart, easy-to-find decorations, like seeds, peppercorns, cereal, and gum. Here, we show you everything you need to build your own rustic little gingerbread getaway. Isn't that much more romantic?
How to Build a Gingerbread Cottage or Cabin

Step One: Make the Dough
1. Create cardboard templates using the shapes shown above. The side parts on the left should be 7 1/2 inches by 3 1/2 inches. The roof parts on the upper right (solid rectangle) should be 4 3/4 inches by 8 inches. The ends on the bottom right should be 3 1/2 by 6 1/2 inches. Cut two of each shape, adding a door to one side, and windows to the sides and ends. If you're making the snow-topped cabin, you'll also want to include a red door (1 3/8 inches x 1 3/4 inches) and a red chimney (four 2- x 1 1/2-inch pieces, two with a 1/2-inch notch).
2. Prepare the dough according to this recipe, and dye a portion red for the door and chimney. Roll out cold dough between parchment paper. With the templates as a guide, cut out shapes with a small knife. Transfer with a spatula to a sheet pan.
3. After baking, cool pieces completely to prevent cracking or breaking. Before assembly, use a microplane to shave any edges that aren't uniform.
Tips for Success
The dough must be kept cool and firm so the cutout pieces retain their shapes. For best results, chill dough thoroughly before rolling it out. Place rolled dough, board and all, in the refrigerator and chill. Cut out shapes and transfer, while still chilled, to a heavy baking sheet. Never use a warped pan.

Step Two: Assemble the Cottage
Find either a clean, flat, sturdy piece of cardboard, a piece of foam core, or a wooden board that measures about 12-inch square. Straighten all edges of gingerbread pieces by trimming on a cutting board using a serrated knife or microplane and a ruler.
1: House Base
Fill a piping bag fitted with a #3 tip with 1 1/2 cups of royal icing. Pipe icing along both edges of one side wall and join it to one end of both the front and back walls. Press to create a tight seal. Place a heavy aluminum can (such as beans or soup) along the inside and outside of each wall to provide support.
Pipe more icing along both edges of the remaining side wall and adhere it to the opposite ends of the front and back wall to form a rectangular box. Take care to face the most attractive sides of the pieces outward as you construct the house. Pipe along the inside joints and along the base to help ensure that the connections are secure. Place heavyweight aluminum cans against the house sides—both inside and outside the box—to support the structure while it dries. Allow to dry completely (at least 3 hours).
2: Assemble Roof
Pipe a thick line of royal icing along the top edge of one roof piece. Secure it to the top edge of the other roof piece so that an A is formed. The distance between the base edges of the should measure about 5 inches. Stand the connected pieces on end on a piece of parchment or waxed paper. Pipe along the inside joint to add extra support to the connection and place heavy aluminum cans against the pieces to provide support while the icing dries (at least 3 hours).
3: Add Chimney to Roof
Form a box with the 4 chimney pieces by piping along the edges and fitting the pieces together. Make certain the two notched pieces are opposite each other. Add more icing along the inside joints and let dry for at least 2 hours. Use aluminum cans for support.
4: Add Roof to House
Everything must be completely dried before beginning this step. Use icing to adhere the candy window panes to the inside of the window cutouts. Place the roof on top of the house base.

Step Three: Decorating
Play architect with easy-to-find candies, cereals, spices, and decorations.

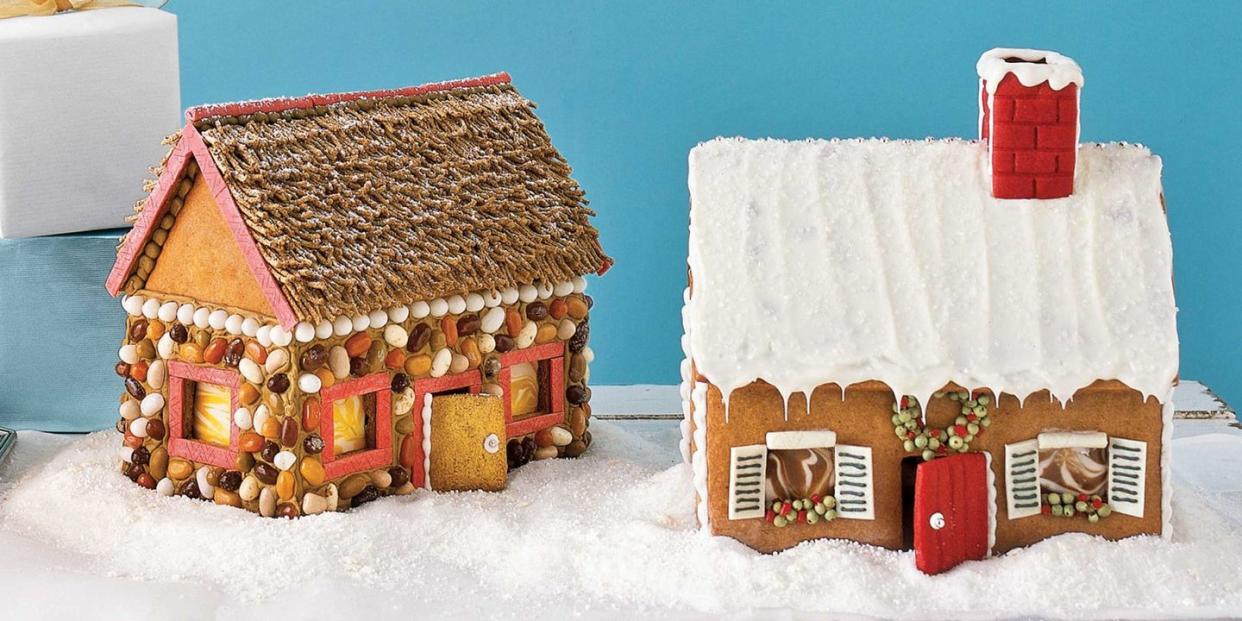
FOR THE SNOWCAPPED CABIN
Snow: melted white chocolate sprinkled with sparkling sugar and lined with silver dragees.
Wreaths and Window Boxes: licorice whips (snipped) can be covered in green peppercorns.
Shutters and Lintels: Use sticks of white chewing gum decorated with fine stripes of green icing.
Red Chimney and Door: Use dough tinted with food coloring (outline them and house joints with royal icing).
Pathway: Use sunflower seeds, puffed millet, and dragees to build a small path.

FOR THE STONE COTTAGE
Thatched Roof: Use All-Bran cereal, secured in place with brown icing.
Eaves and Masonry: Make stones by cutting jelly beans in half horizontally and vertically, then use brown icing as mortar.
Window Frames: Cut sticks of gum to trim these, as well as to trim the door frame and roof.
Doorknobs: Use small silver dragees secured with a touch of white icing.
Windows: To create a warm glow, make windows from melted hard orange cream candies. Place the candies on a lightly oiled nonstick sheet pan at 350°F until melted, 5 or 6 minutes. Do not let the candy bubble; remove it from the oven as soon as it has melted. Then score and break into sizes that can be placed in the windows, and secure with royal icing.
Mortar: Royal icing is the "glue" that holds the gingerbread house pieces together and the embellishments in place.
You Might Also Like
