These DIY Christmas Gifts Will Mean So Much to Family and Friends
"Hearst Magazines and Yahoo may earn commission or revenue on some items through these links."
Sure, they may take a little time, energy, and effort, but that's what make homemade gifts so special. While you can shop for gifts for everyone on your list, DIY Christmas gifts are extra meaningful—not to mention usually a little easier on the budget. That's why we've assembled the best DIY gift ideas you can make for your family and friends this holiday season. From useful gifts for the home, to yummy from-scratch food gifts, and even presents that double as DIY Christmas decorations that they'll cherish for years to come.
Need a gift for Grandpa? How about a DIY photo ornament made with pictures of the kids? We also have the tastiest gift-worthy Christmas treats perfect for everyone from teachers to hostesses, and plenty of projects that result in an ideal gift for her (that snazzy bubble bath gift box) or him (how 'bout those hilarious hand-stitched hankies??).
And what's really awesome about these ideas, there is something for every skill level. From experienced DIYers to those who don't own a single tool (what's the difference in hot glue and Elmer's?). If you are game for something slightly complicated, check out the cross-stitched red truck—complete with a Christmas tree—for the fella in your life. Or, if you prefer to put in minimal effort, try putting together the slippers stuffed with pampering products, like lip balm and nail polish, for your best friend. They are going to love what you make for them no matter what it is!
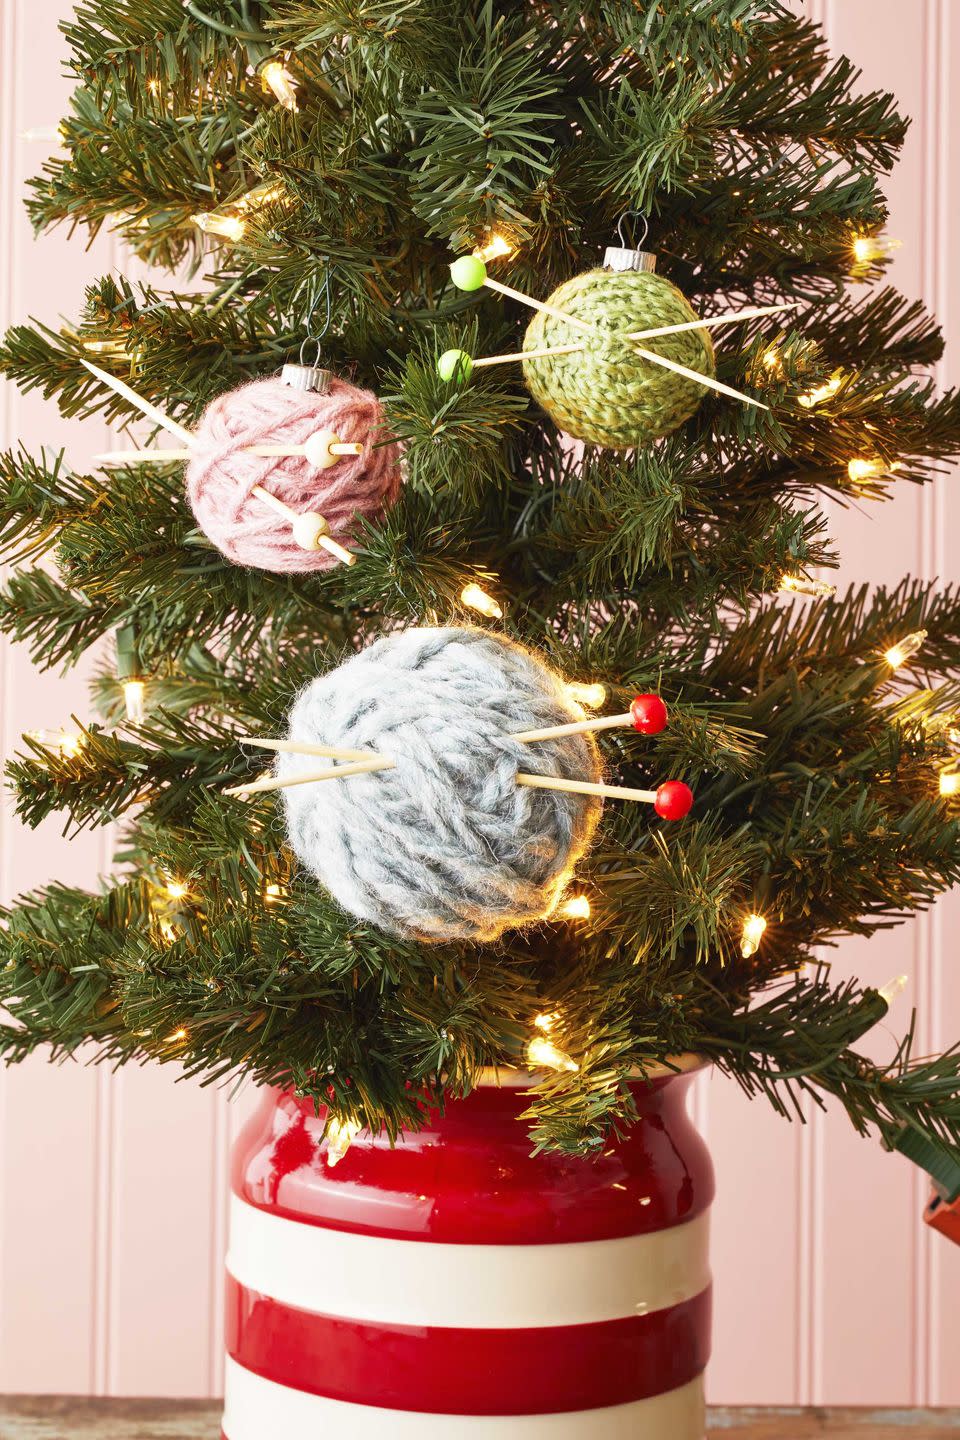
Yarn Ornaments
Use these DIY yarn ornaments as a bonus gift to decorate a wrapped present or craft several and wrap them all up together in a gift bag.
To make: Wrap yarn around a clear plastic Christmas ornament, holding the beginning of the yarn in place with a dab of hot glue, until the ornament is completely covered. Thread bamboo cocktail picks through the yarn to mimic knitting needles. Hang as desired.
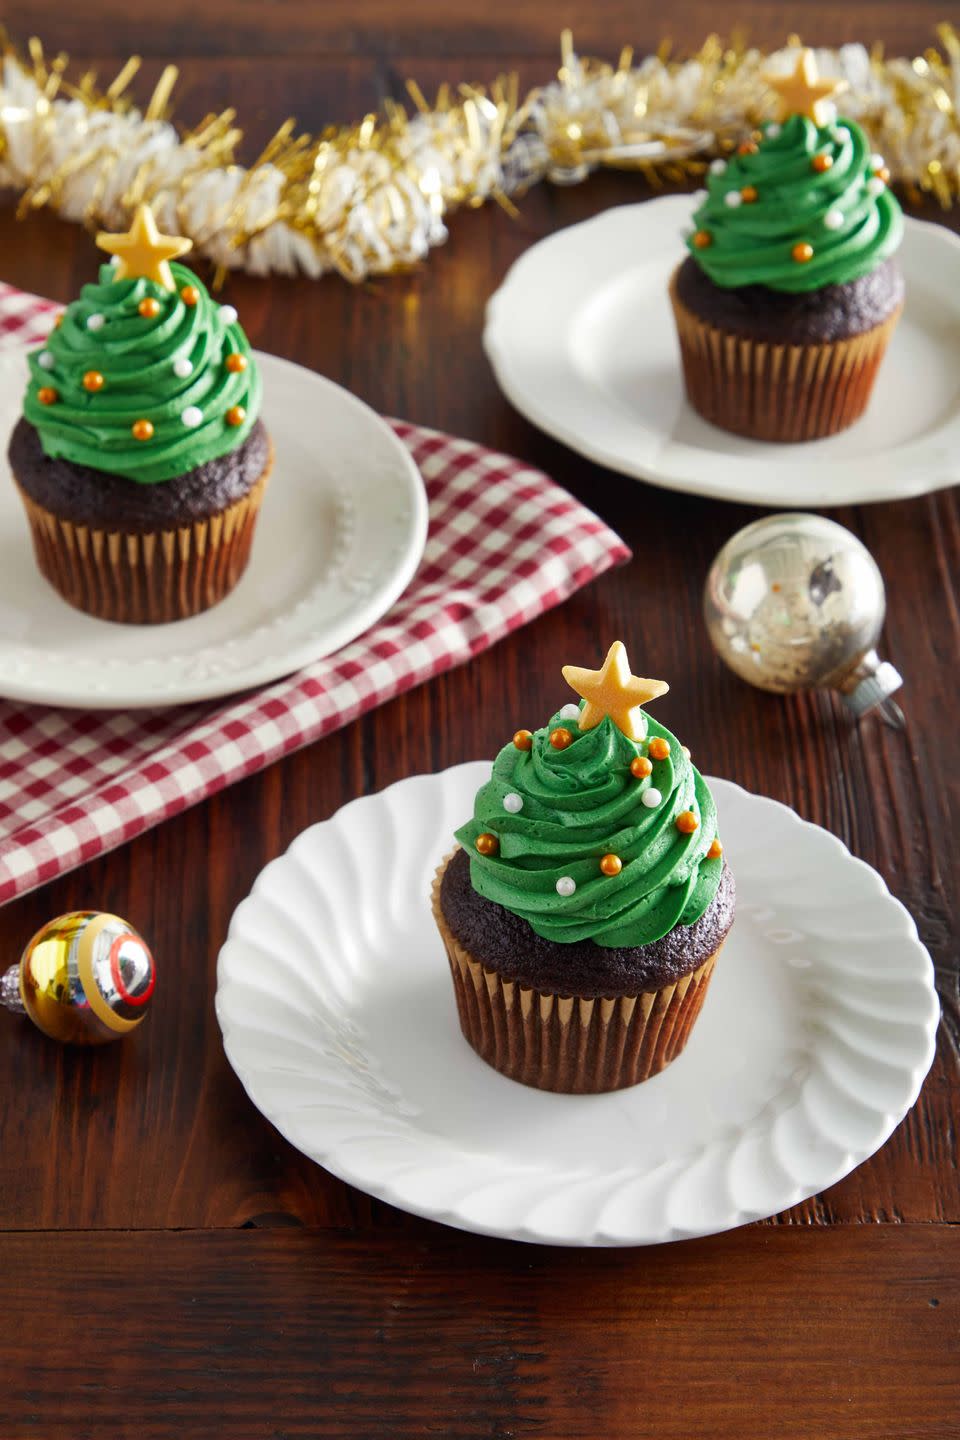
Christmas Tree Cupcakes
The tower of icing on a chocolate cupcake set off feelings of joy to whoever receives these sweet treats!
Get the recipe.
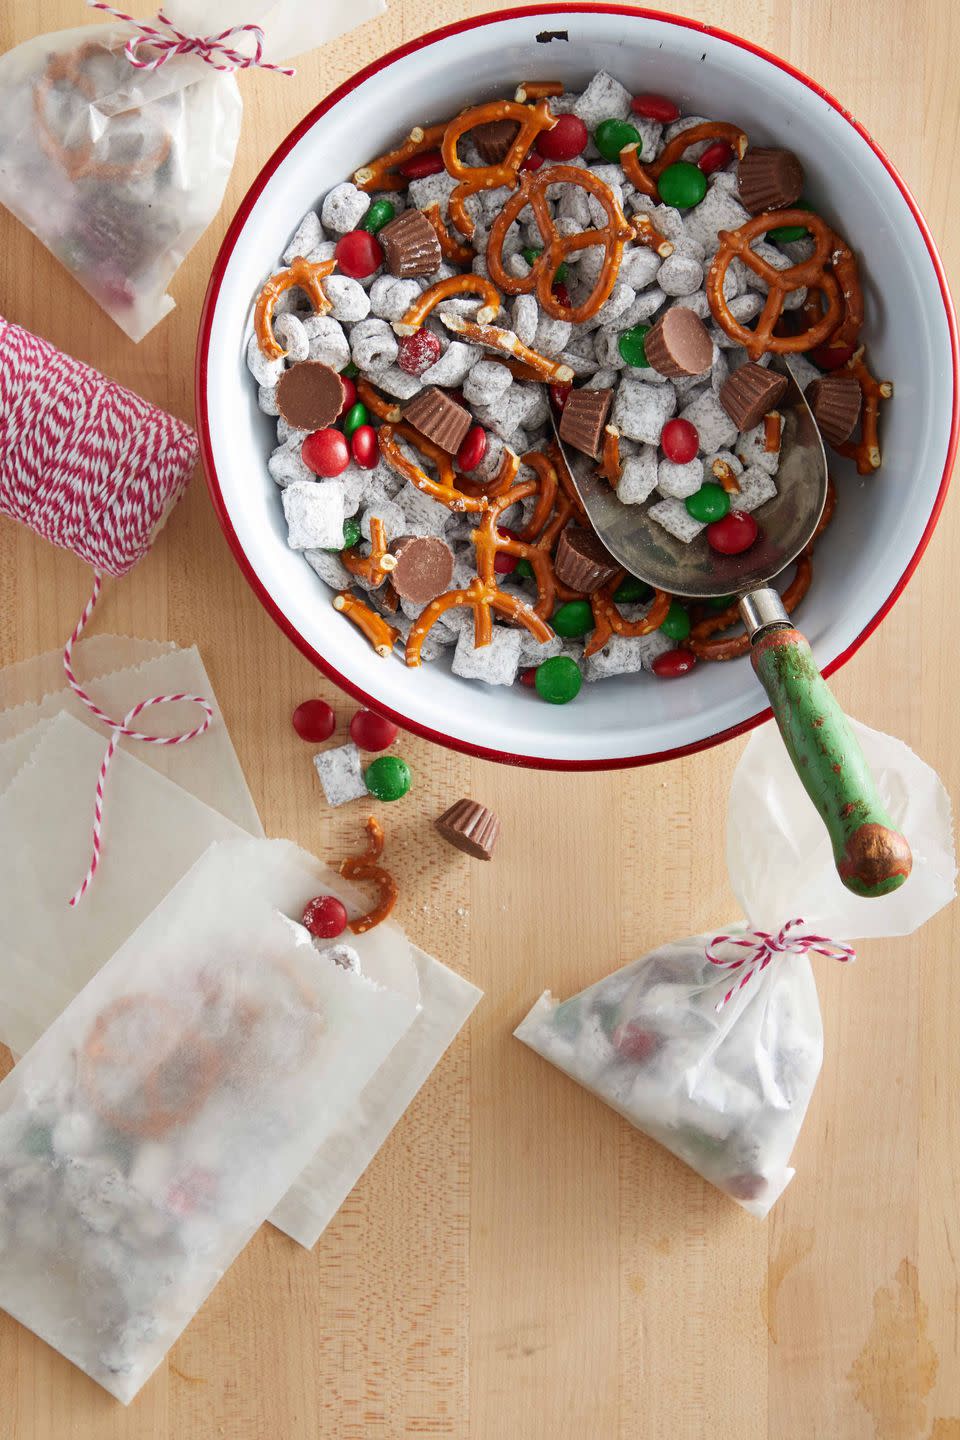
Reindeer Chow
A perfect gift for Santa and his reindeer, the kids classmates, or anyone who loves sweets, really.
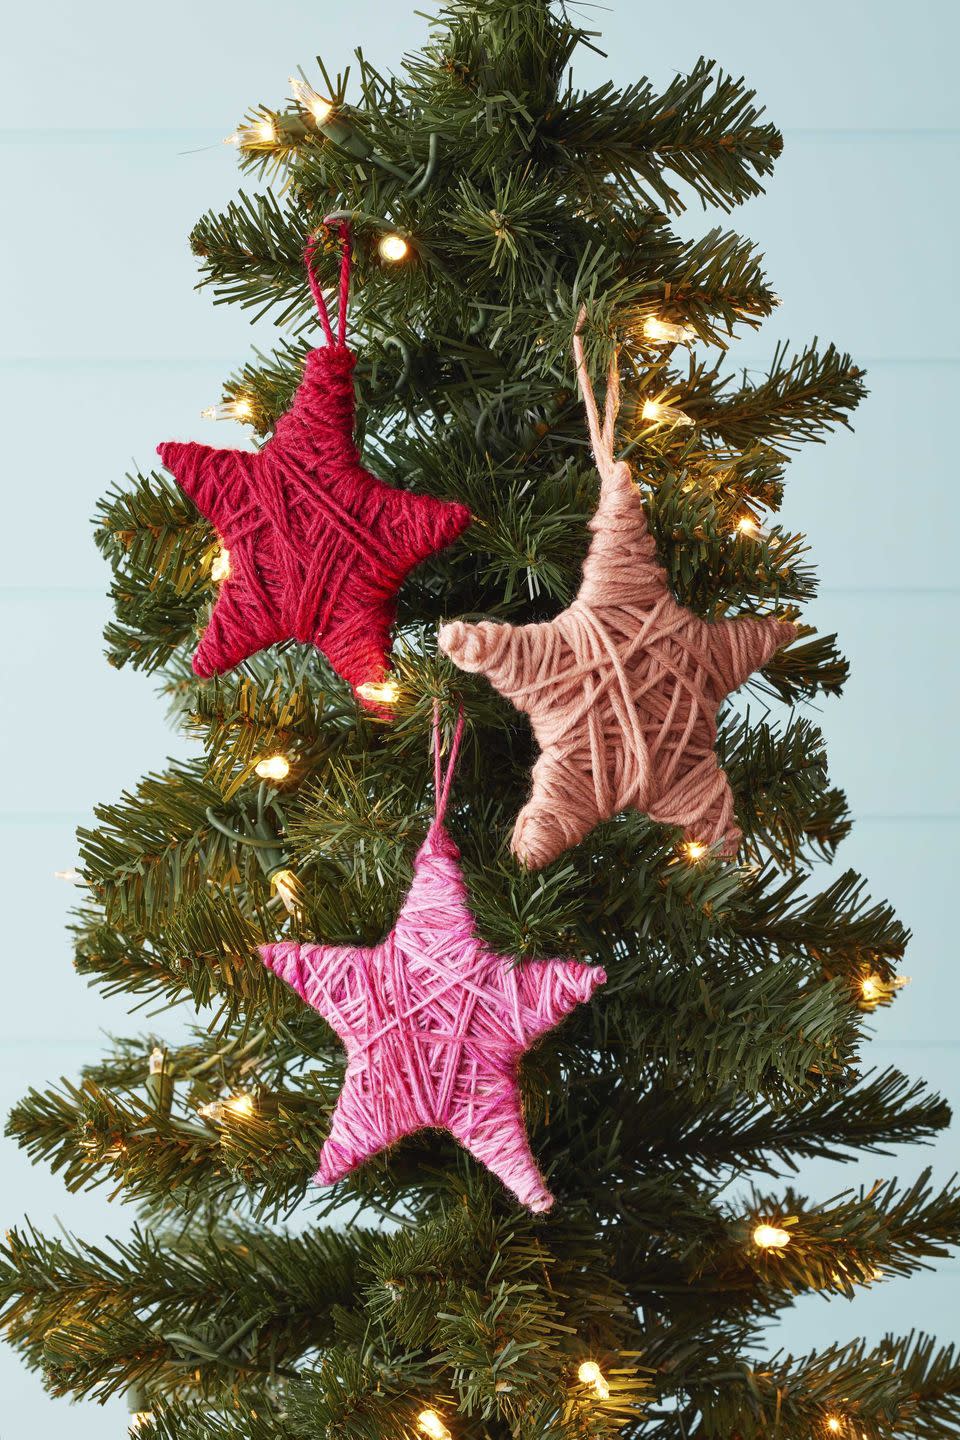
Yarn Star Ornaments
These sweet ornaments only require two supplies (plus a little glue) and come together in minutes. A perfect DIY for the novice crafter.
To make: Cut a star shape from a piece of cardboard using an X-acto knife. Wrap the star in yarn, using dabs of hot glue to help hold the yarn in place near the points of the star, until fully covered. Glue the ends of a length of yarn to the back on one point to create a loop for hanging.
SHOP YARN
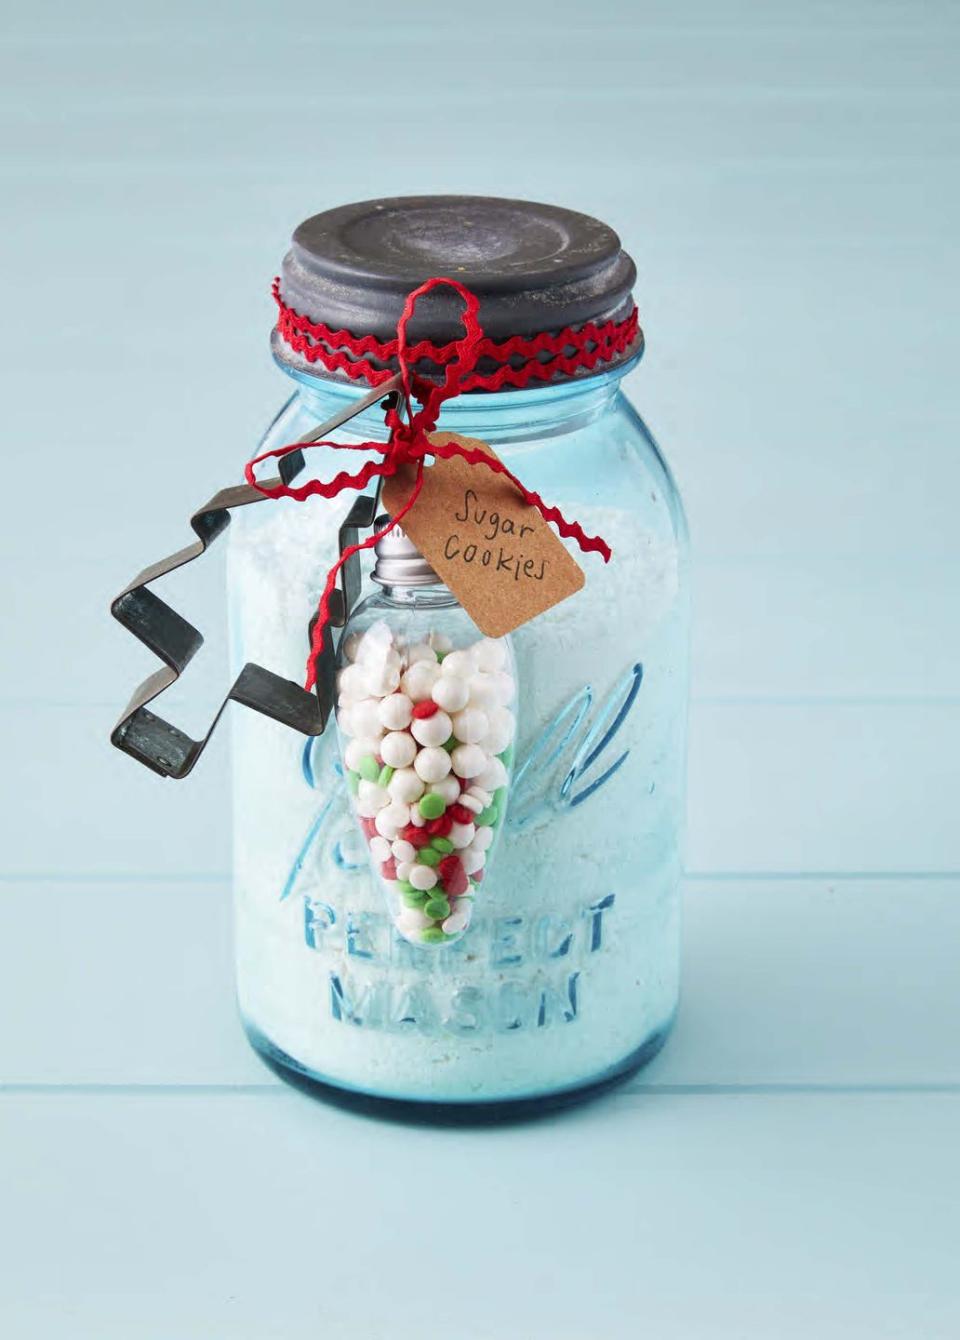
Sugar Cookie Mix Mason Jar Gift
Put together a DIY kit for the baker in your life. Mix up the dry ingredients for your favorite cookie (We love a good sugar cookie.) Attach a cookie cutter, a light shaped ornament filled with cookie decor, and baking instructions.
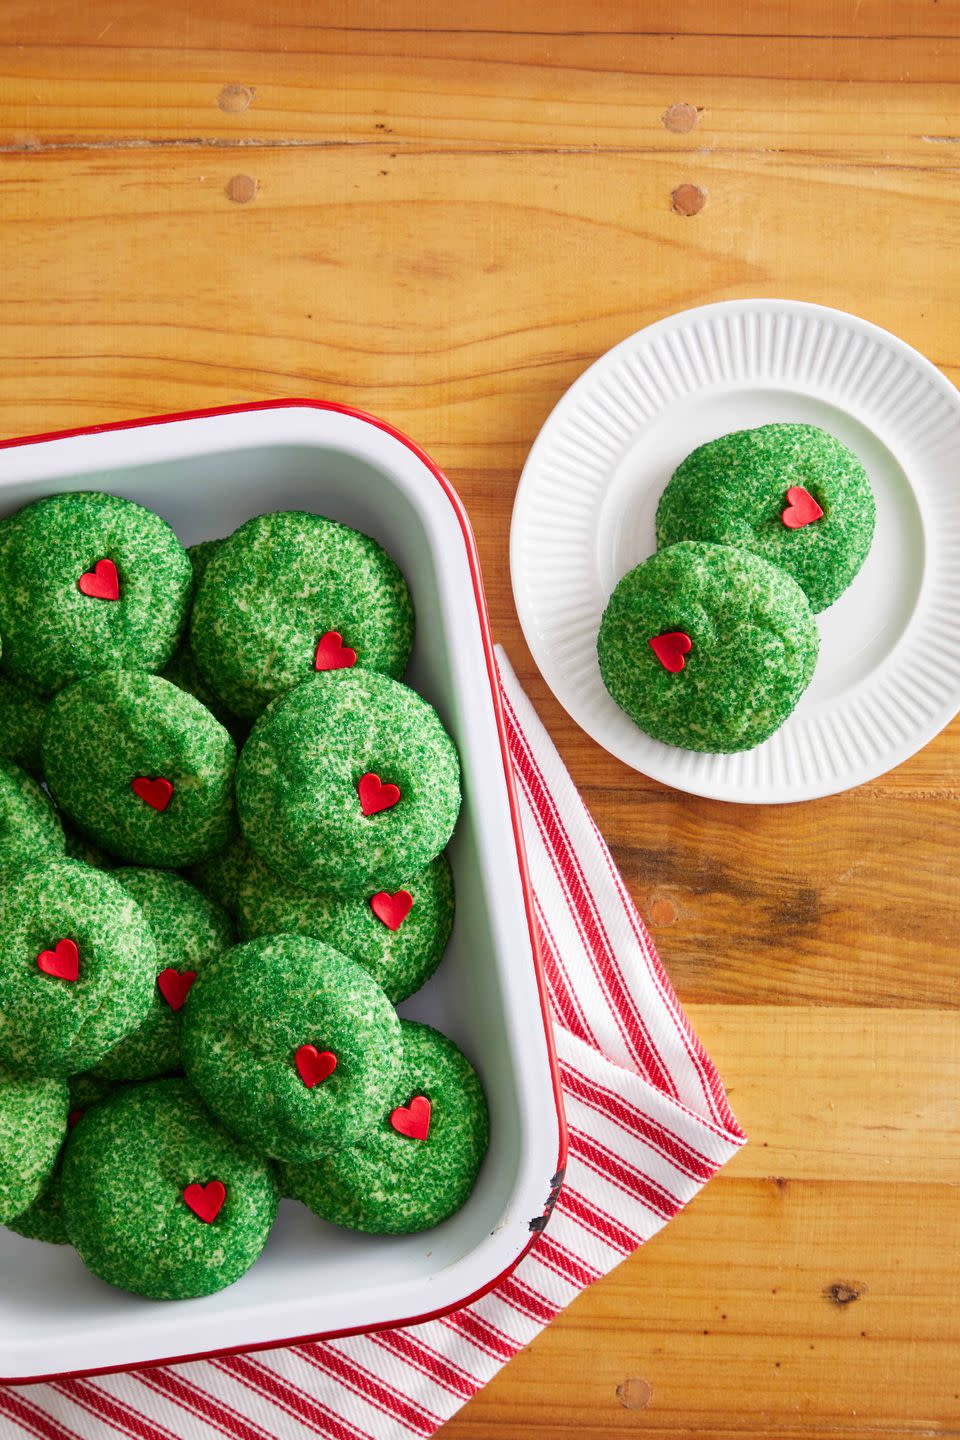
Grinch Cookies
For the grumpy sweet lover in your circle give the gift of green sparkling sugar covered cookies. They might just soften their heart a little!
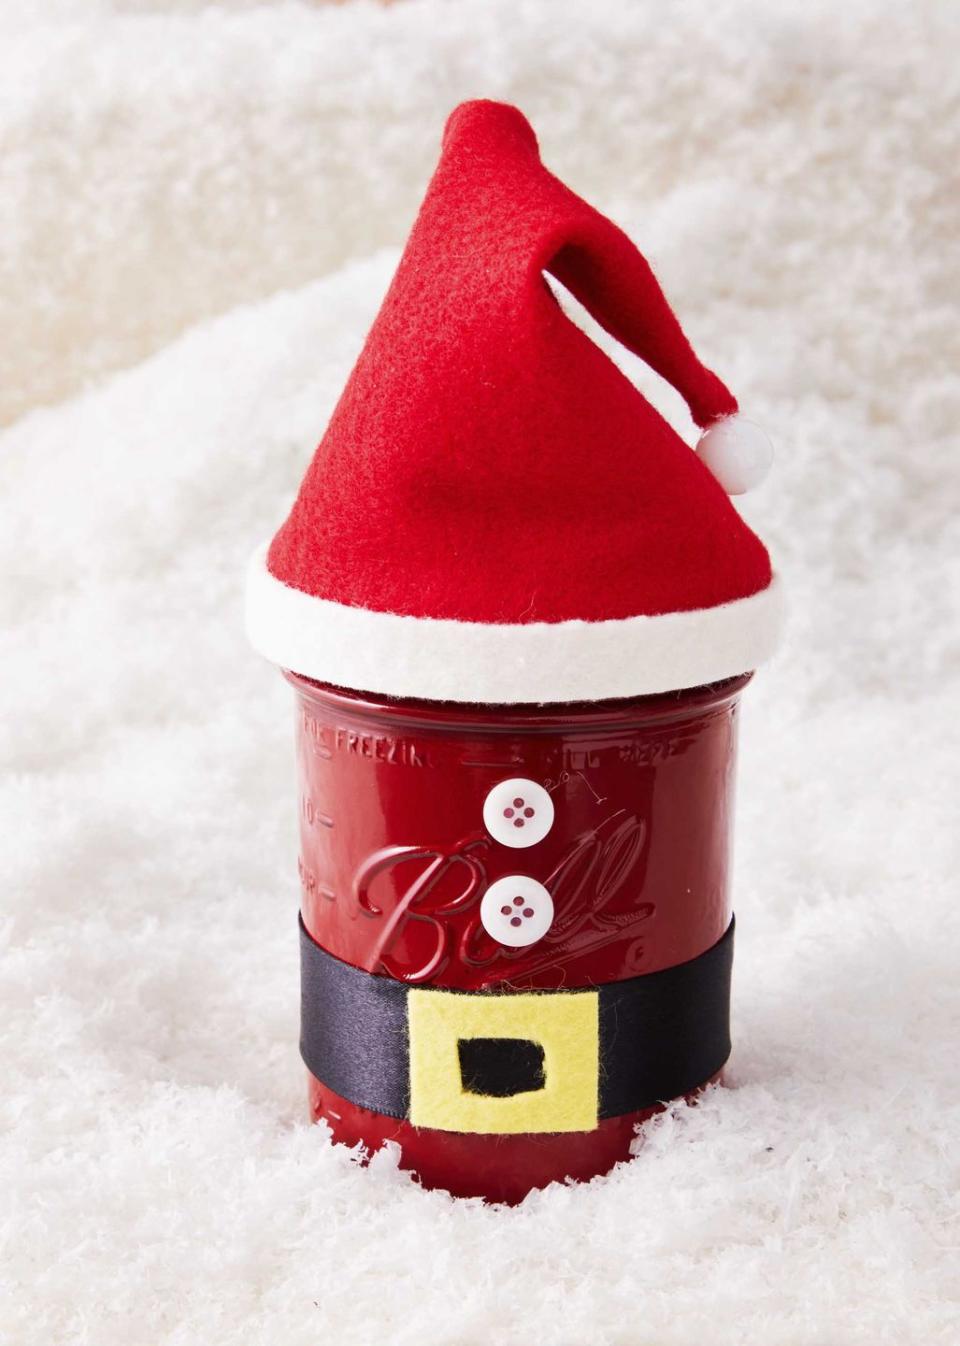
Santa Mason Jar Gift
After crafting this Santa Mason jar fill with the recipients favorite candy, cookie, or snack mix.
To make: Paint the inside of a Mason jar with red craft paint. Cut a piece of red felt into cone shape and glue to the metal ring; shape into a hat. Cut a thin strip of white felt and hot glue to the bottom of the hat. Attach a small white pom pom or marble to the tip of the hat with hot glue. Wrap a length of black ribbon around the lower part of the jar to create a belt. Top with a piece of yellow felt that’s fashioned into a buckle with hot glue. Attach two white buttons with hot glue.
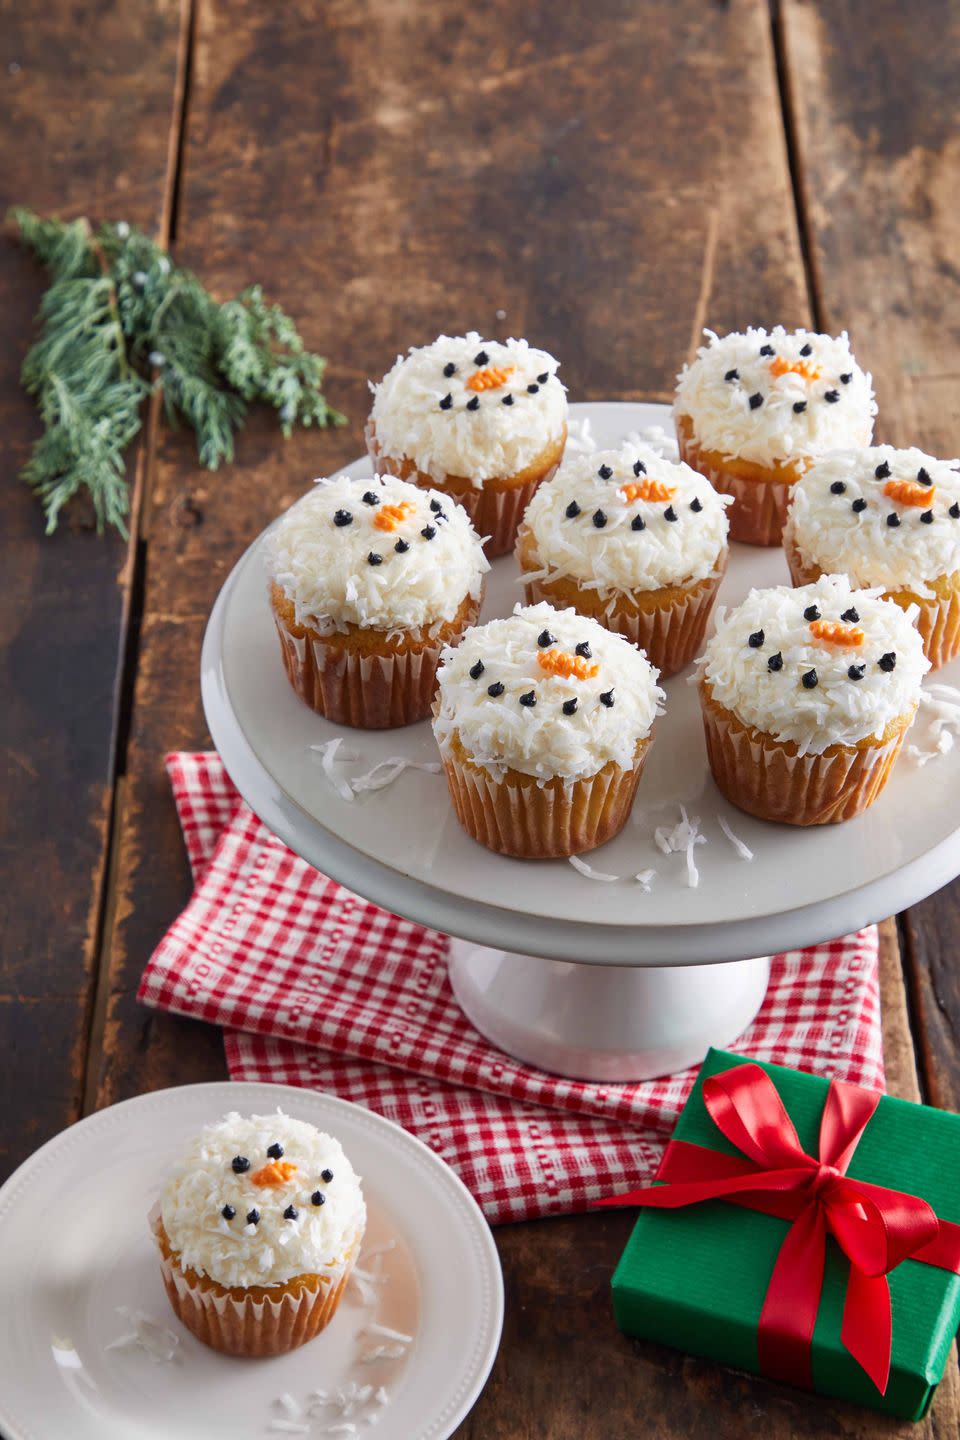
Snowman Cupcakes
No one is ever sad when they receive a sweet treat as a gift and these sweet faced snowman cupcakes will get gobbled right up!
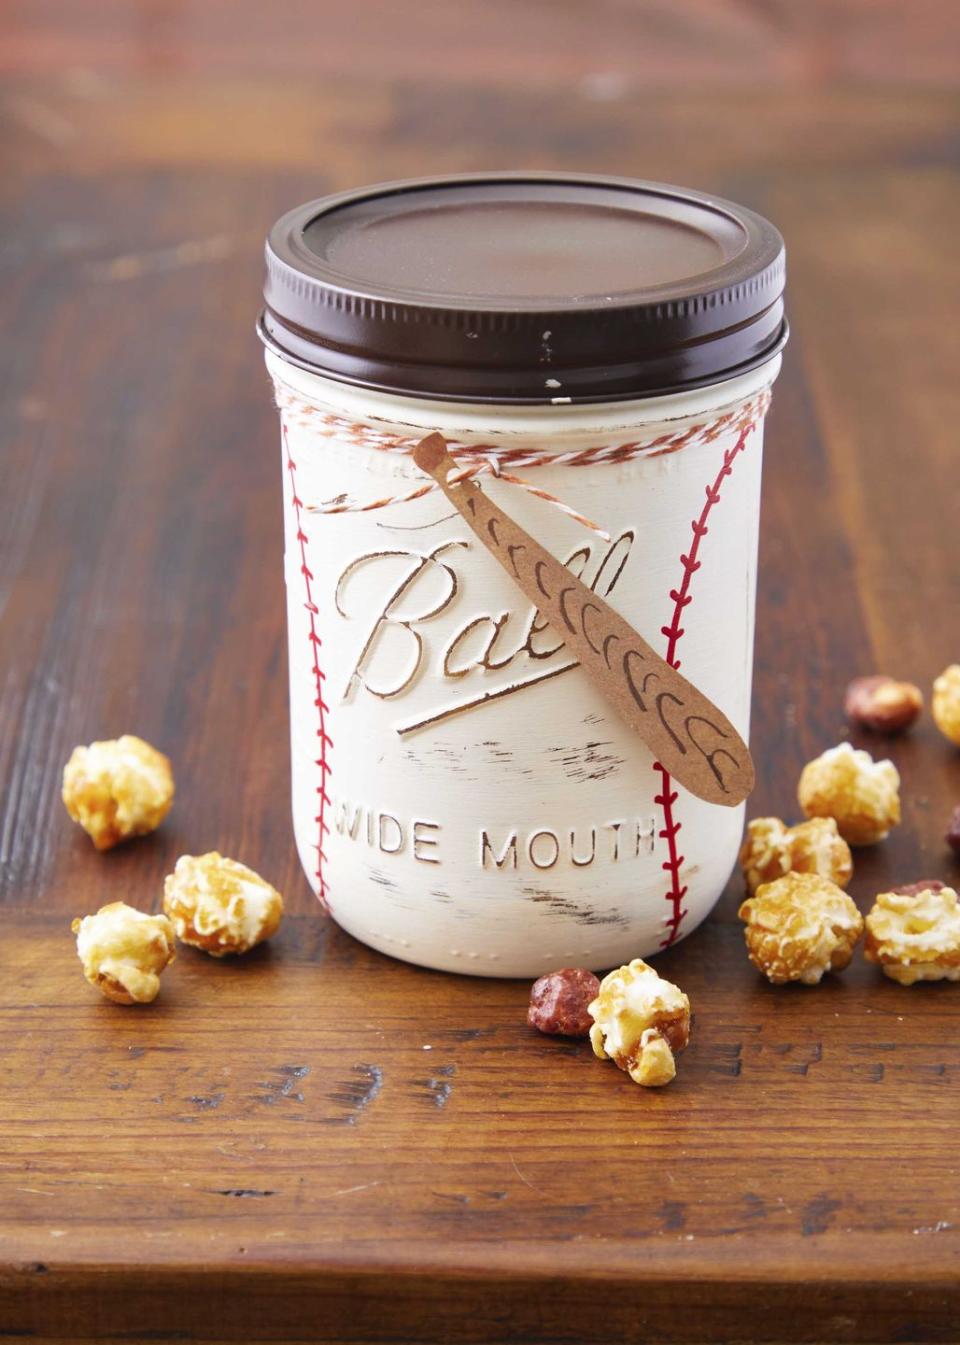
Baseball Mason Jar
You're sure to hit one out of the park when you DIY a baseball mason jar for the major (or minor) league fan in your life.
To make: Paint the outside of a Mason jar with flat white craft paint. Once dry use a fine grit sandpaper to gently scuff up the paint. Use a fine-tipped paint brush and red craft paint to paint on the stitches of the baseball. Use brown spray paint to paint the metal lid and band of the jar; allow to dry completely. Cut a baseball bat from a piece of brown craft paper and use markers to add details, such as wood grain. Punch a tiny hole in one end of the bat and attach to the jar with a piece of baker’s twine. Fill jar with Cracker Jack and attach lid.
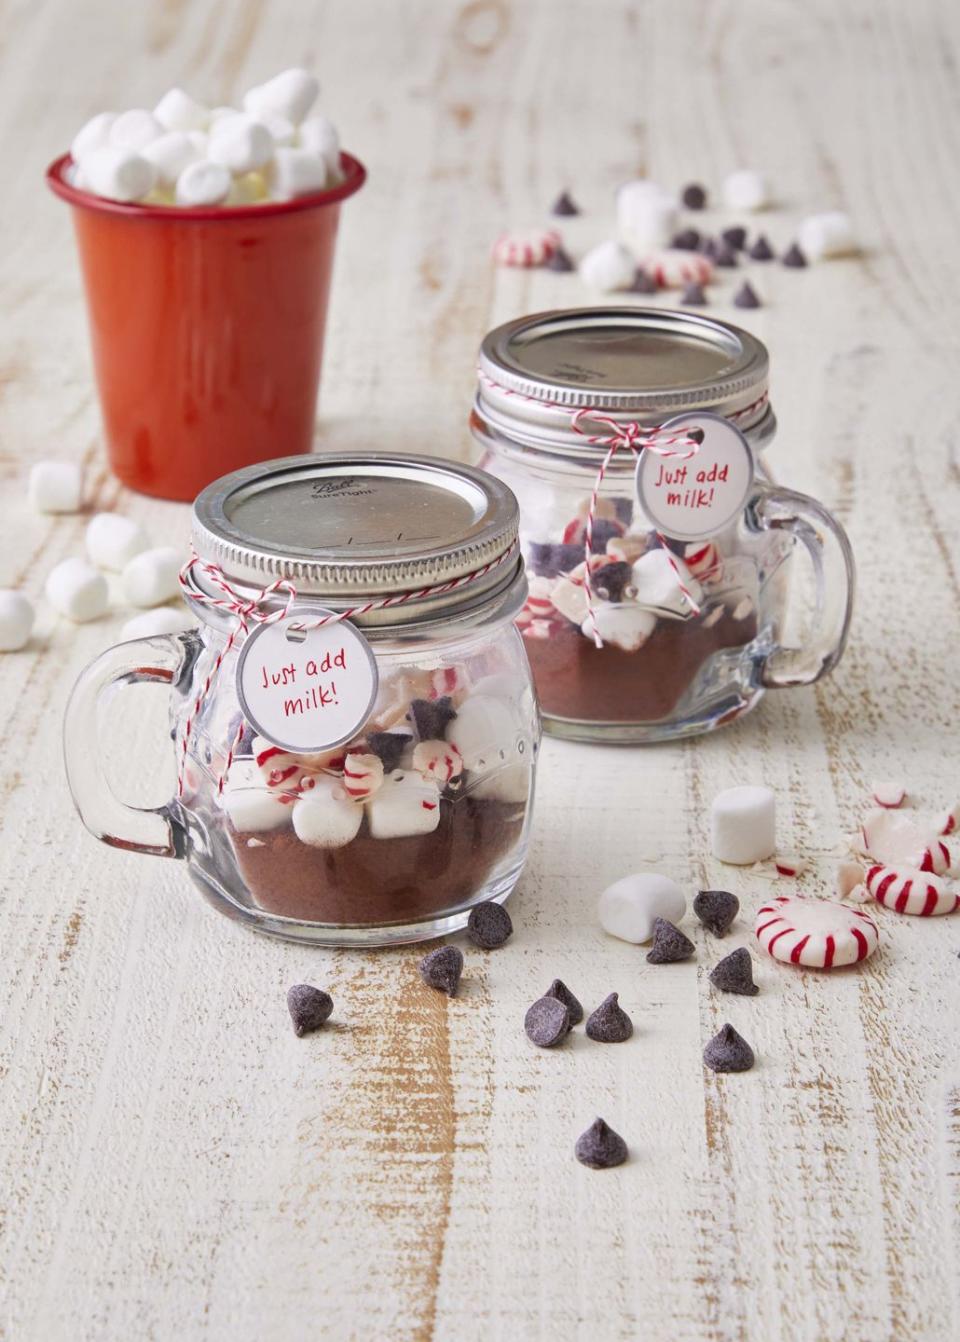
Hot Chocolate Mugs
A perfect DIY for kids to put together for Santa or for you to gift to the sweet lovers in your crowd.
To make: Place hot cocoa mix in the bottom of small mug Mason jars. Top with mini marshmallow, chocolate chips, and crushed starlight mints. Attach lid. Attach a tag with red baker’s twine
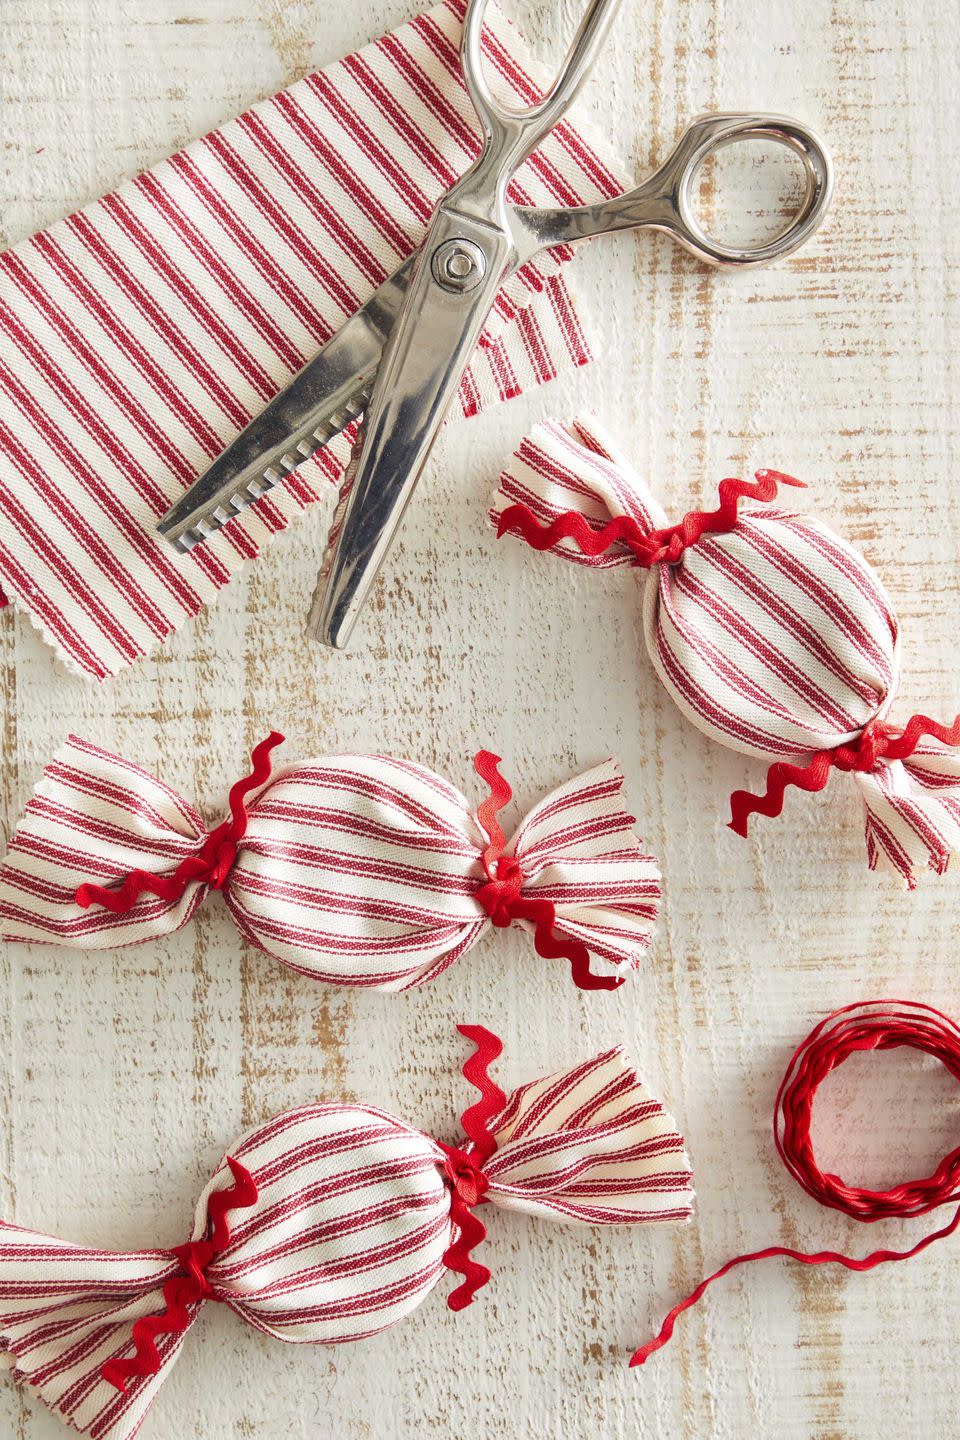
Cloth Peppermints
Gift a gaggle of oversized cloth "mints" to a friend or family member that loves to decorate for the season. They will look great gathered together in a silver bowl or scattered throughout the holiday table centerpiece.
To make: Cut a piece of red and white ticking striped fabric into a 6.5-inch by 4-inch rectangle. Use pinking shears to cut a decorative edge on the short ends. Glue two 2.2-inch wood craft rings together with hot glue (you can cut pieces of cardboard into rounds and glue them together). Wrap fabric around rings and tie ends tight with red rickrack.
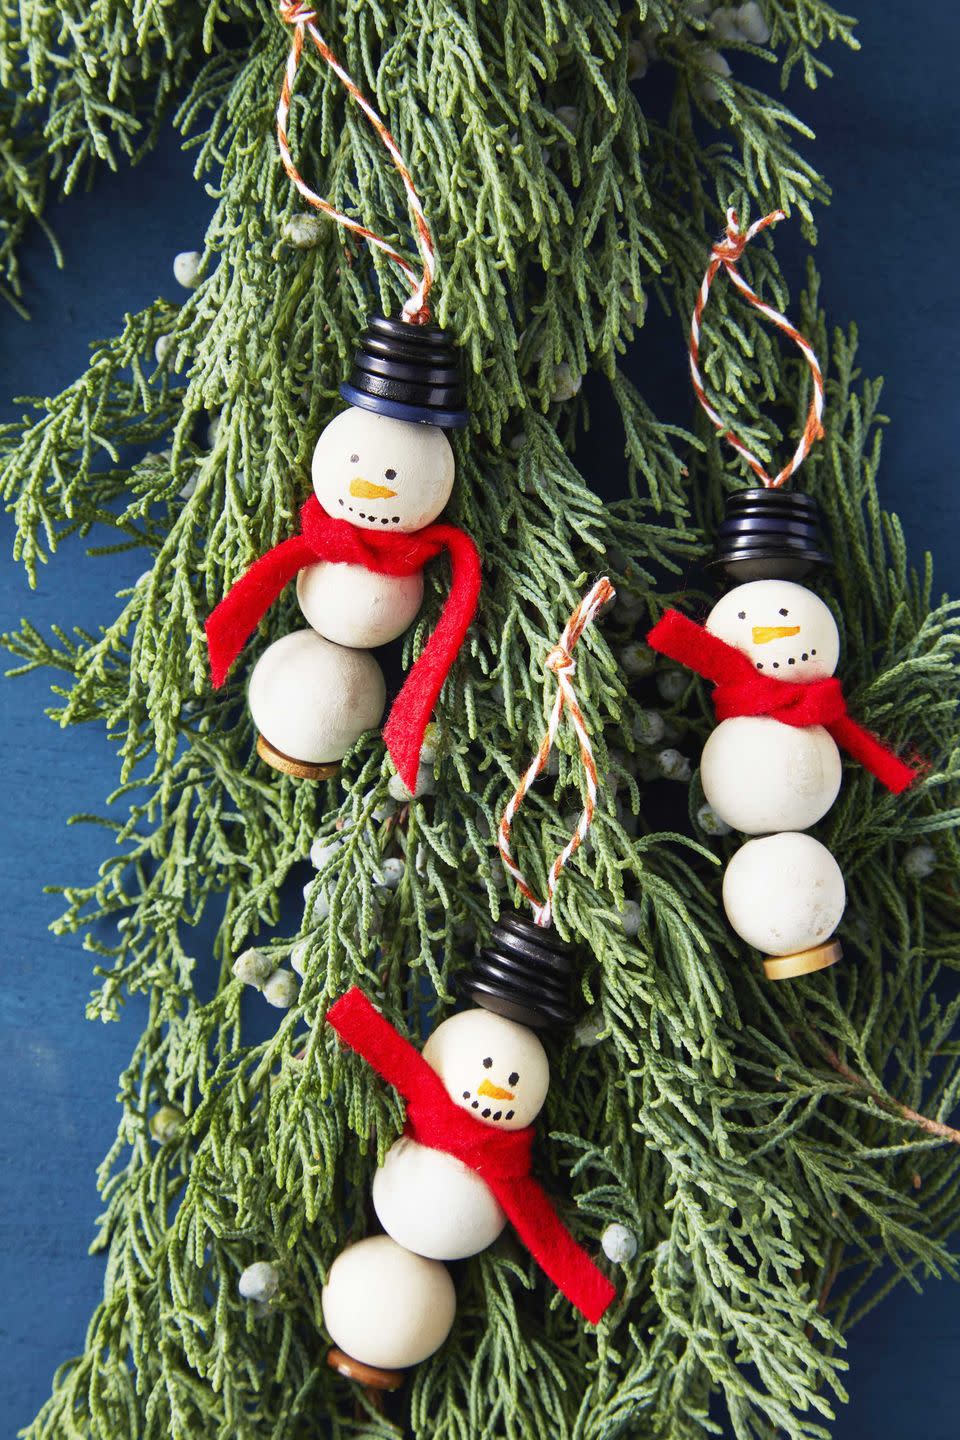
Craft Bead and Button Snowman
These little cuties come together quickly with the just a few simple craft supplies so make multiples and gift to all your friends and family.
To make: Draw snowmen faces on wooden craft beads with markers. Thread a length of baker’s twine through a brown button. Thread both ends of the thread twine through two plain buttons then through the button with the face. Thread twine through 5 to 6 black button to creating a hat. Tie twine close to the top button to hold everything together, then tie again about 2-inches up to create a loop for hanging. Cut a thin piece of red felt and tie between the top to buttons for a scarf.
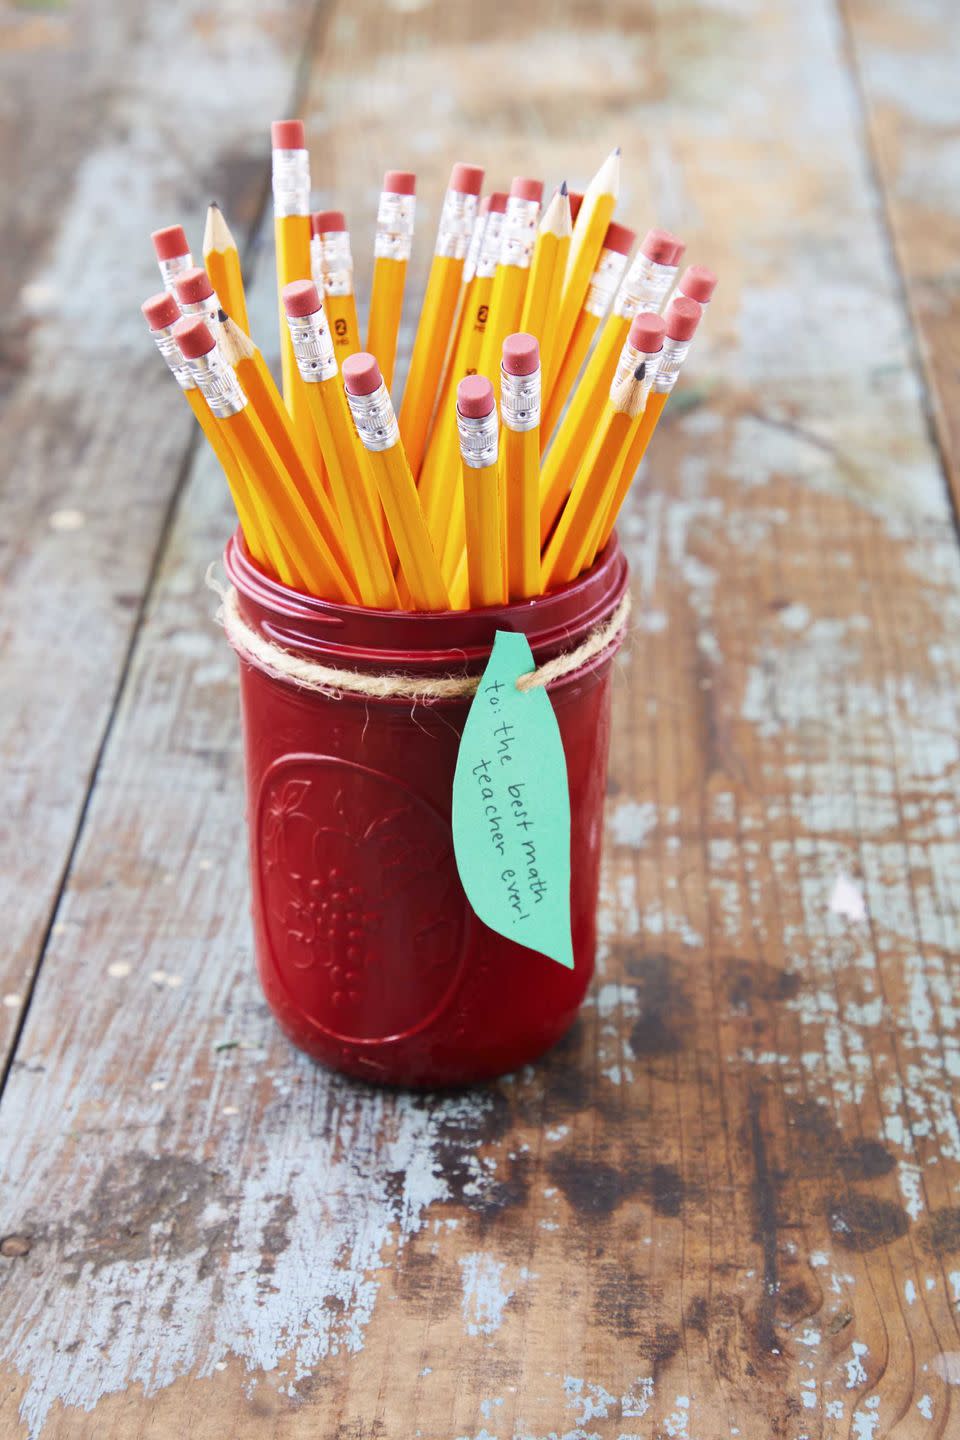
Apple Mason Jar
For the teacher who has made your child's life a delight day in and out, craft an "apple of your eye" mason jar pencil holder.
To make: Paint the inside of a Mason jar with red craft paint. Cut an apple leaf from green craft paper and punch a small hole in one end. Write a note to teacher on the leaf and attach to the jar with a length of twine. Fill jar with pencils, colored pencils, or pens.
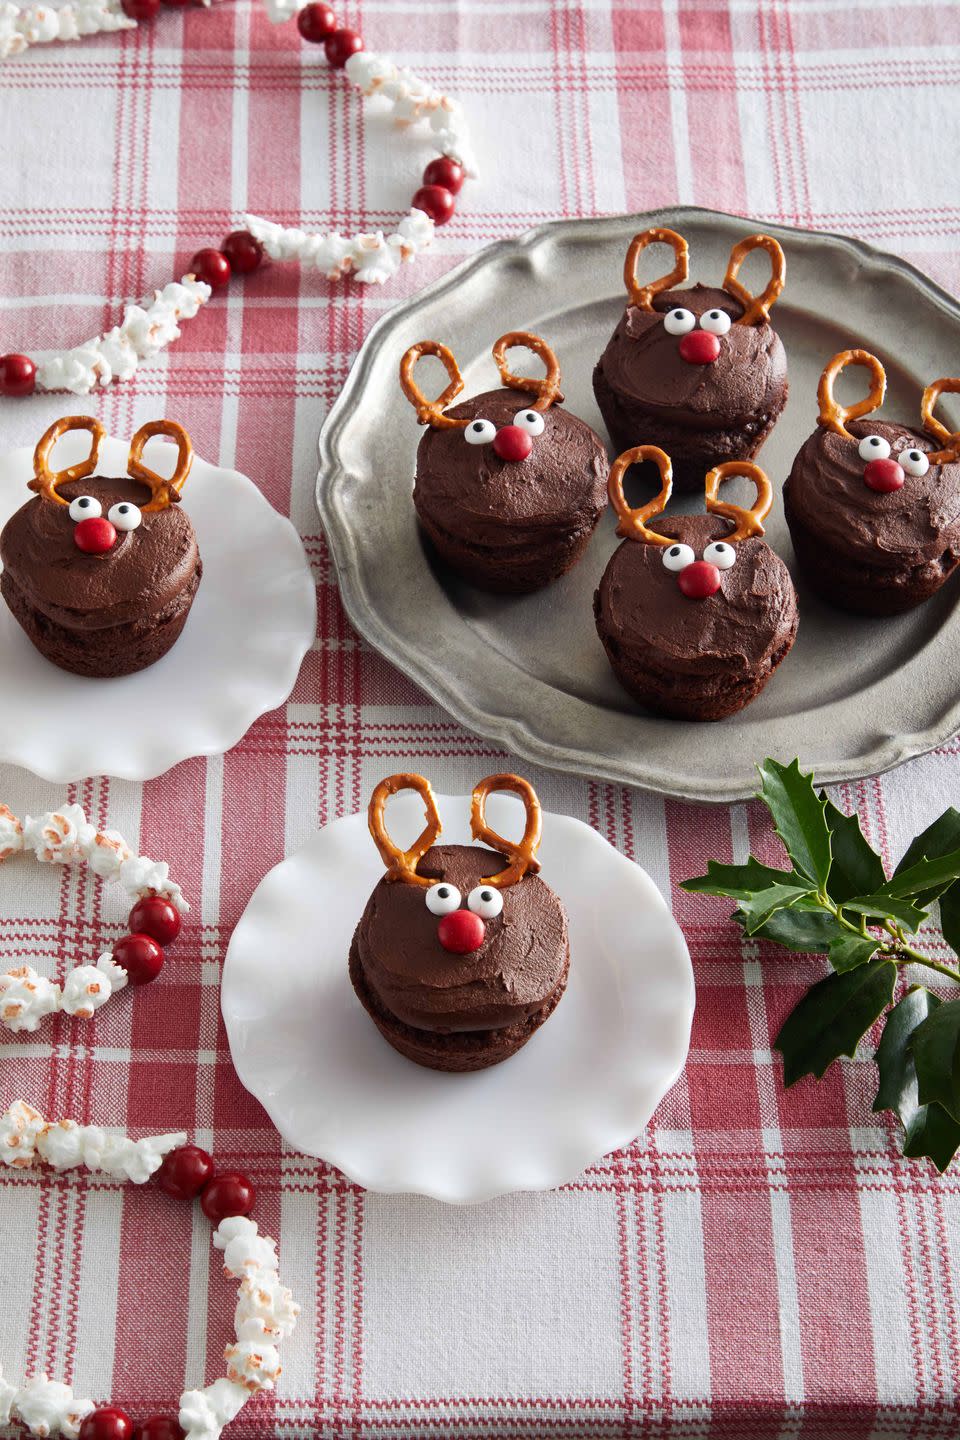
Reindeer Brownies
Brownies baked in a muffin pan and topped with icing and candy transforms a common treat into the cutest one in the sky.
Get the recipe.
SHOP MUFFIN PAN
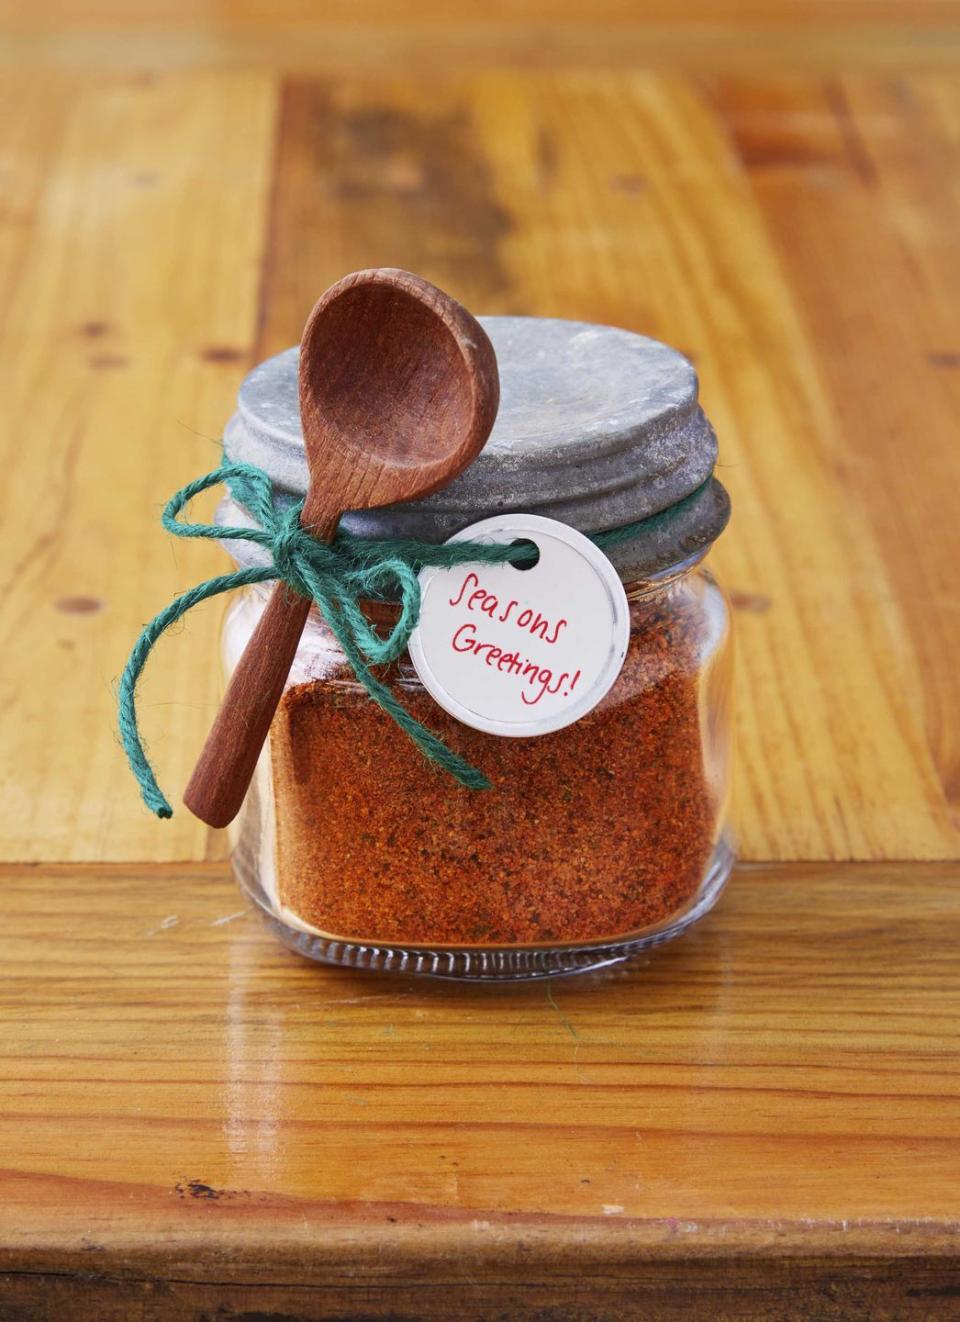
Spice Rub Mix
Mix up a batch of your famous spice rub (or use our recipe) to gift to the grill master or cook in your life.
To make: Fill a small Mason jar with your famous spice rub. Attach a small wooden spoon and gift tag (you can write ways to use the rub on the back of the tag) with colorful twine.
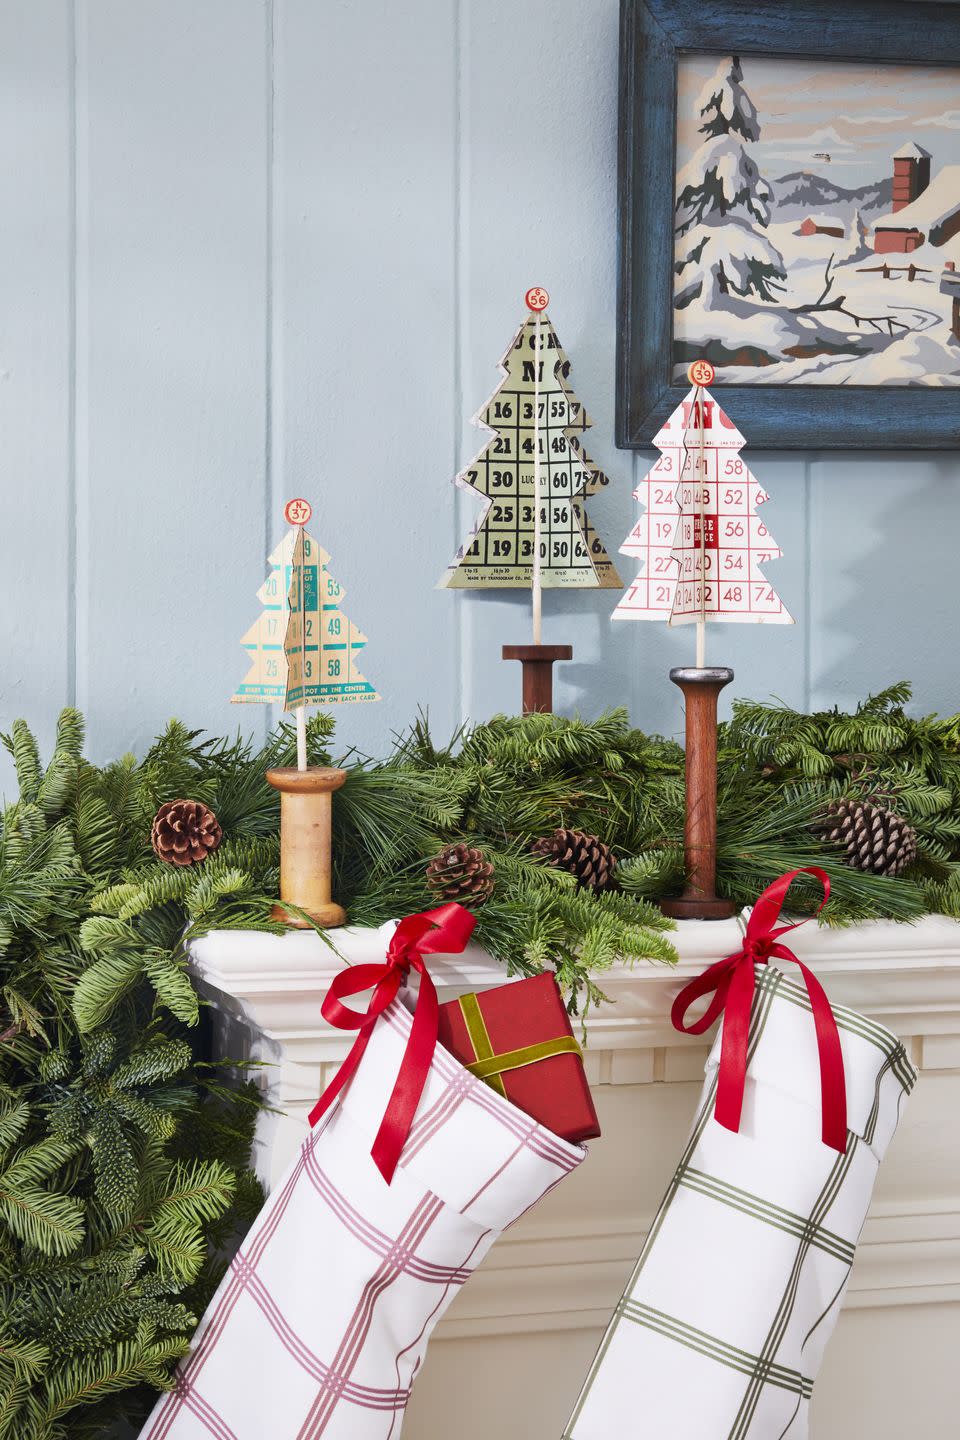
VIntage Bingo Card Trees
The ultimate gift for a friend who loves to deck the hall plus all things vintage.
To make: Cut three to five half-tree-shaped pieces from matching bingo cards (with one edge flat and the other jagged). Hot-glue the flat edges to a 3/8-inch dowel, fanning them out to create a 3D tree shape. Finish with a bingo tile topper using hot-glue. Place dowels in tall wooden spools for easy display.
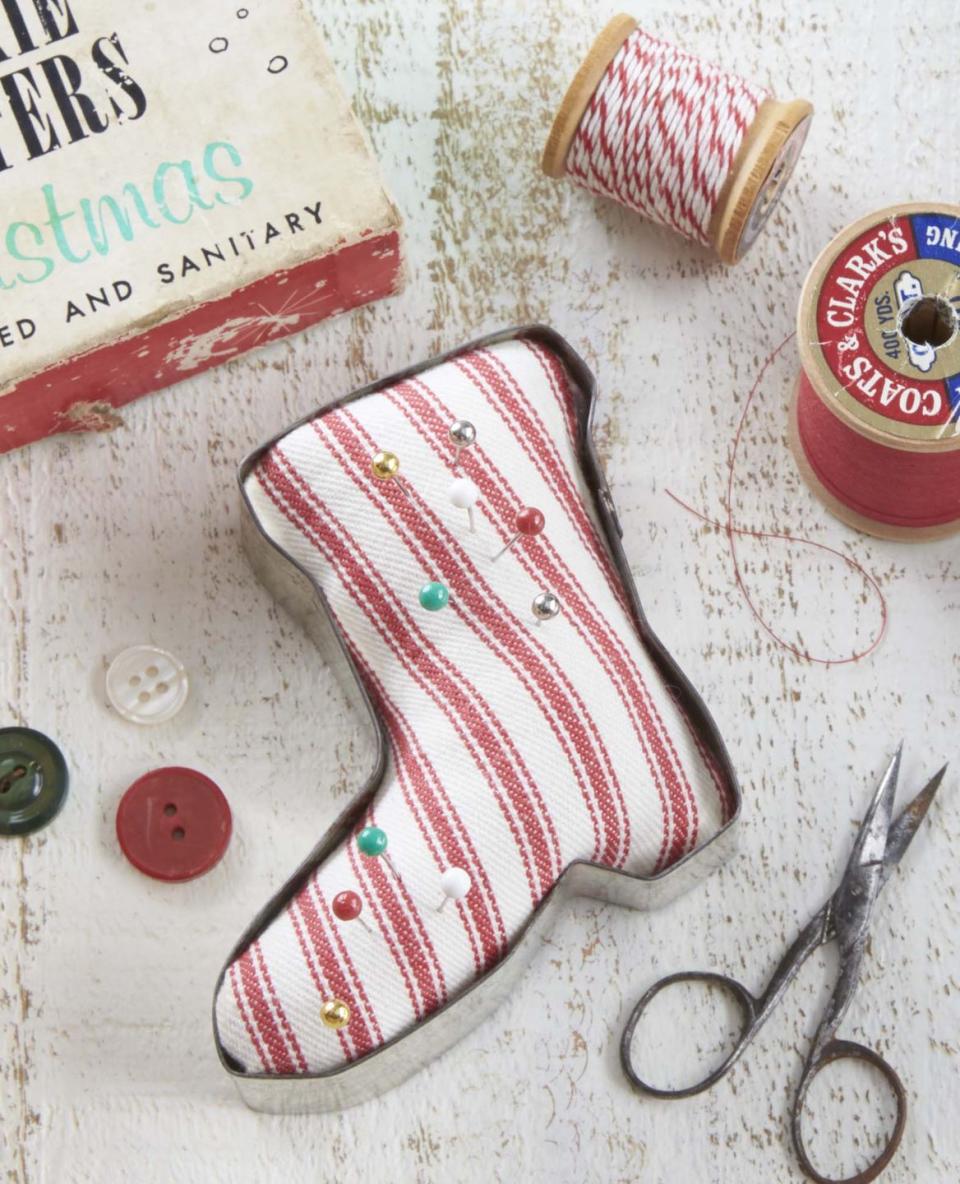
Santa's Boot Pin Cushion
For the sewer in your group, this pin cushion will be right at home on their craft room.
To make: Trace the inside of the cookie cutter on a piece of cardboard and cut out. Trace the cutout on the back of a piece of fabric and cut out, leaving an extra 1-inch of fabric around the outline. Hot glue poly-fil to the cardboard. Top with the fabric and wrap the excess fabric around to the back of cardboard and glue in place. Slide the cardboard into the cutter and hot glue in place.
Vintage Map Wall Art
Commemorate a vacation, hiking excursion, rowing adventure, or road trip with a loved one for a sentimental and easy DIY Christmas gift they won't soon forget.
To make: Begin with a vintage or new map. Outline the route traversed with ribbon or twine. Use hot-glue to hold the ribbon or twine in place on the map. Frame in a pre-made frame.

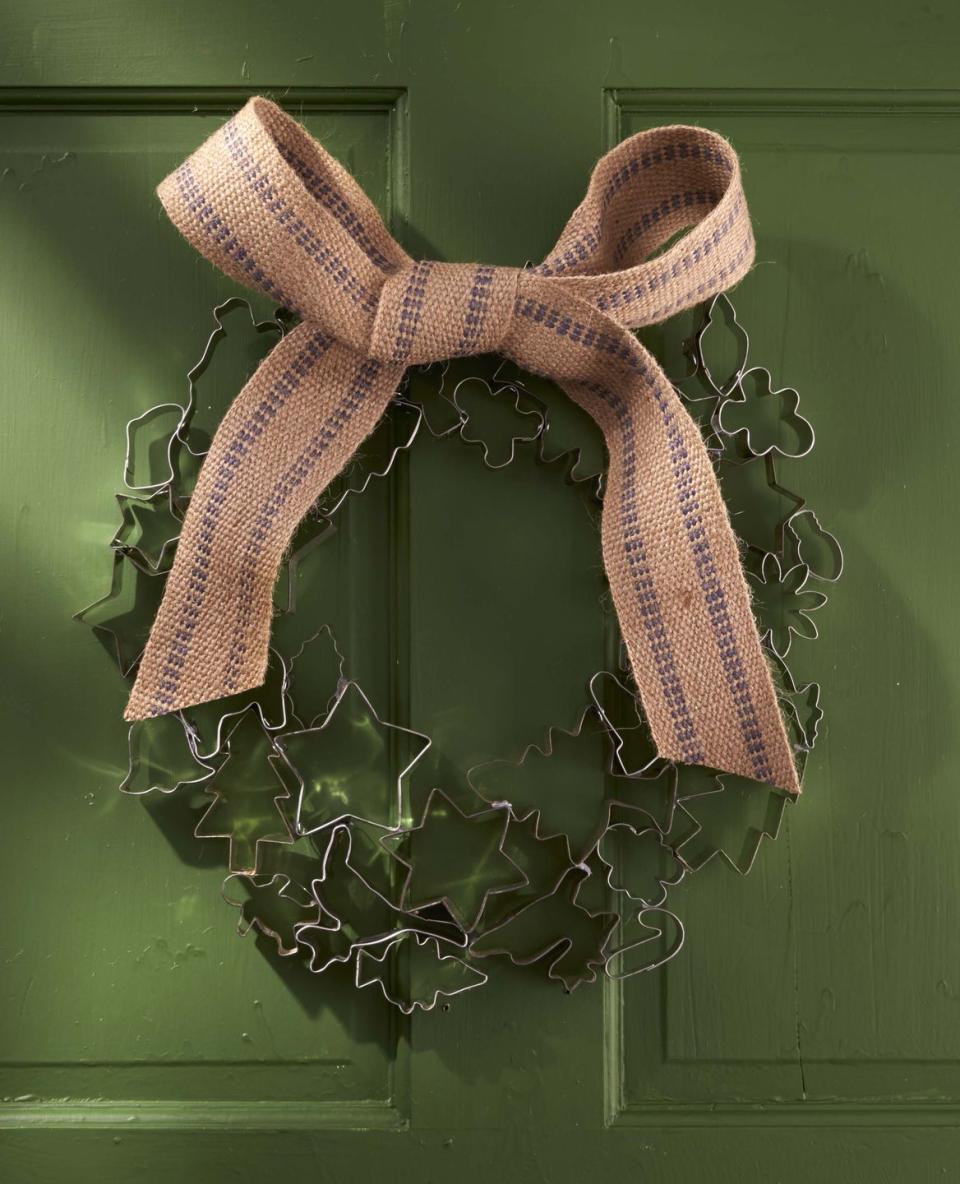
Shapely Cookie Cutter Wreath
This wreath makes the perfect gift for the friend who loves to decorate every inch of their house for the holiday.
To make: Arrange a mix of cutters in a circular shape. Once they’re placed as desired, secure to one another using a two-part epoxy (such as J-B Weld). Add a bow (ours is jute ribbon), and hang.
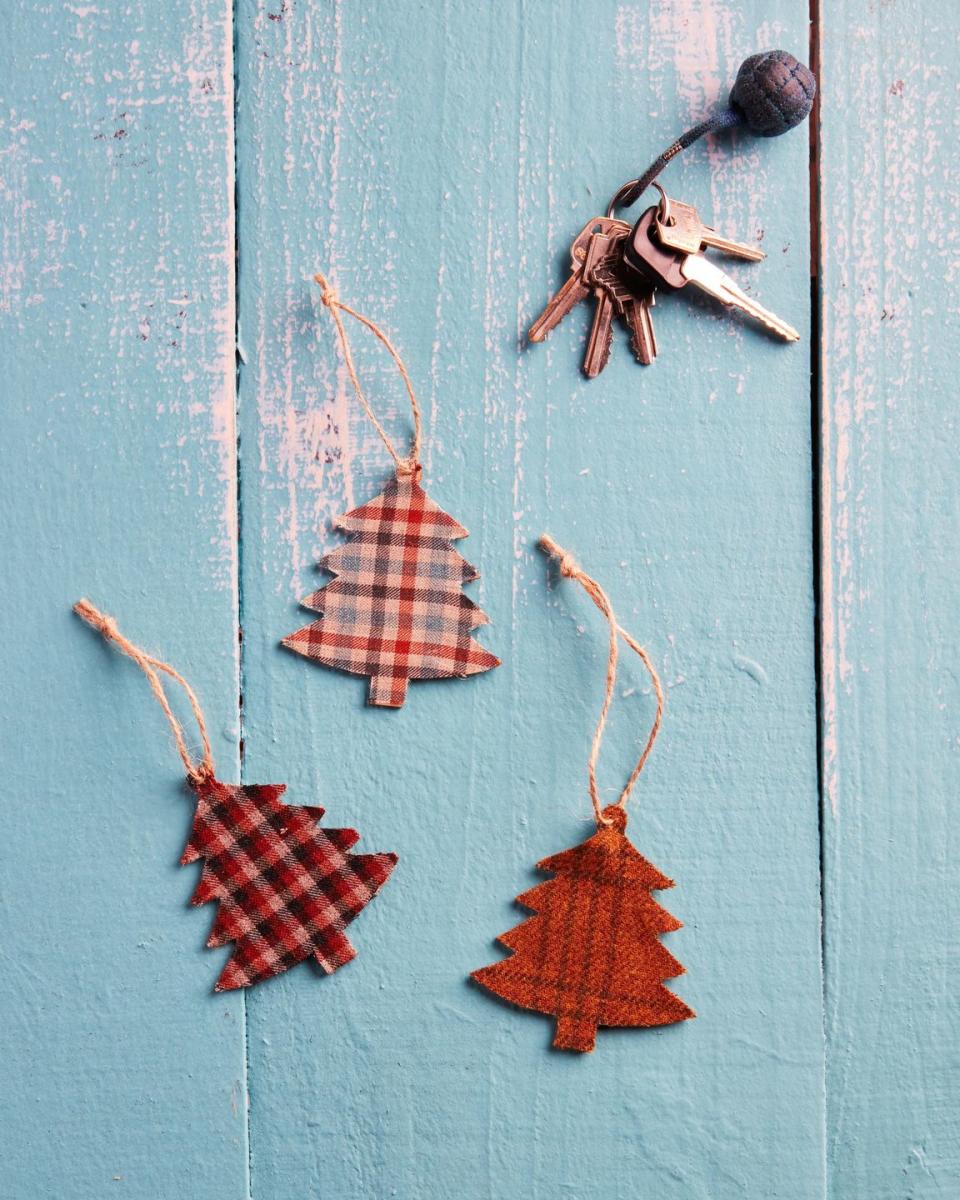
DIY Air Fresheners
One of these DIY Christmas tree-shaped air fresheners will keep a car, closet, or office smelling fresh. Added bonus—they are made with essential oils, so no nasty chemicals involved.
To make: Trace the shape of a wooden Christmas tree ornament on a scrap of fabric twice. Cut out and glue to the front and back of the ornament. Once dry, soak the fabric with an essential oil of your choice (we used cedar). Thread twine through the ornament loop for hanging.
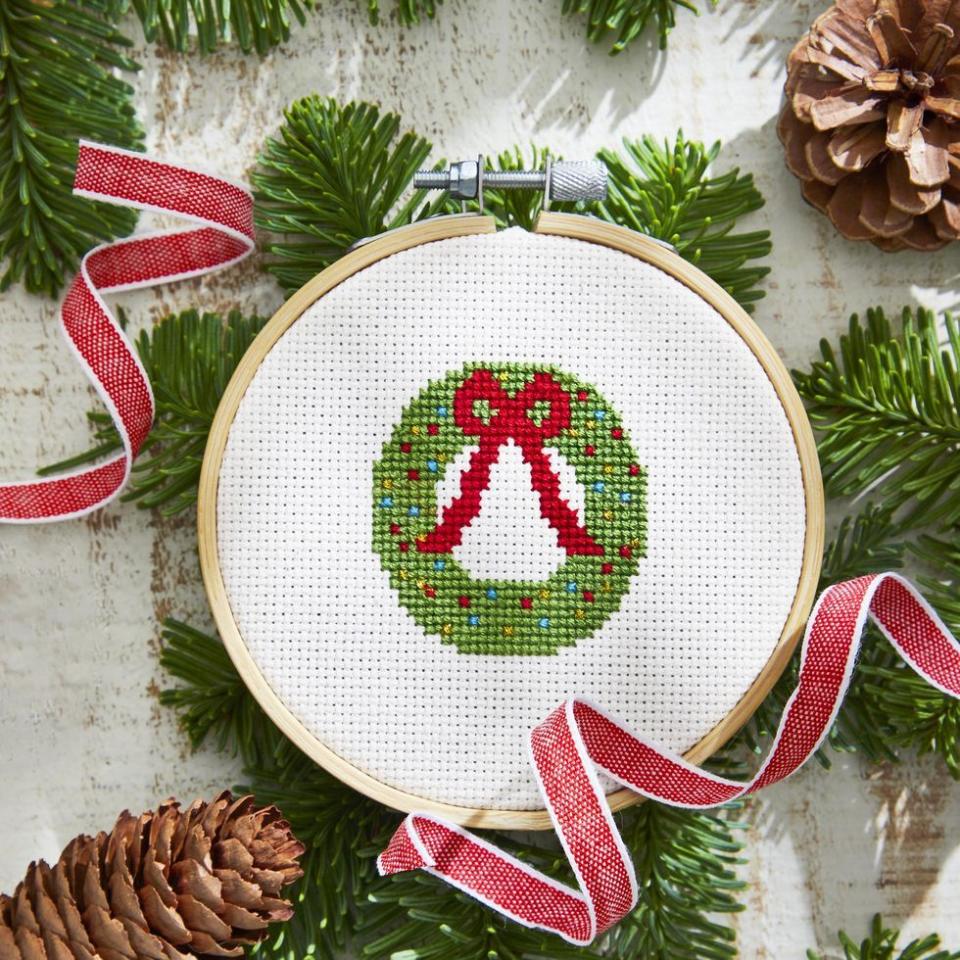
Wreath Cross-Stitch
If you're a cross-stitch hobbyist, you can complete this easy Christmas wreath pattern in no time. (If you're a beginner, here's how-to cross-stitch.) Bonus: The embroidery hoop itself can serve as a rustic frame—just trim the extra fabric.
See all of Country Living's free cross-stitch patterns.
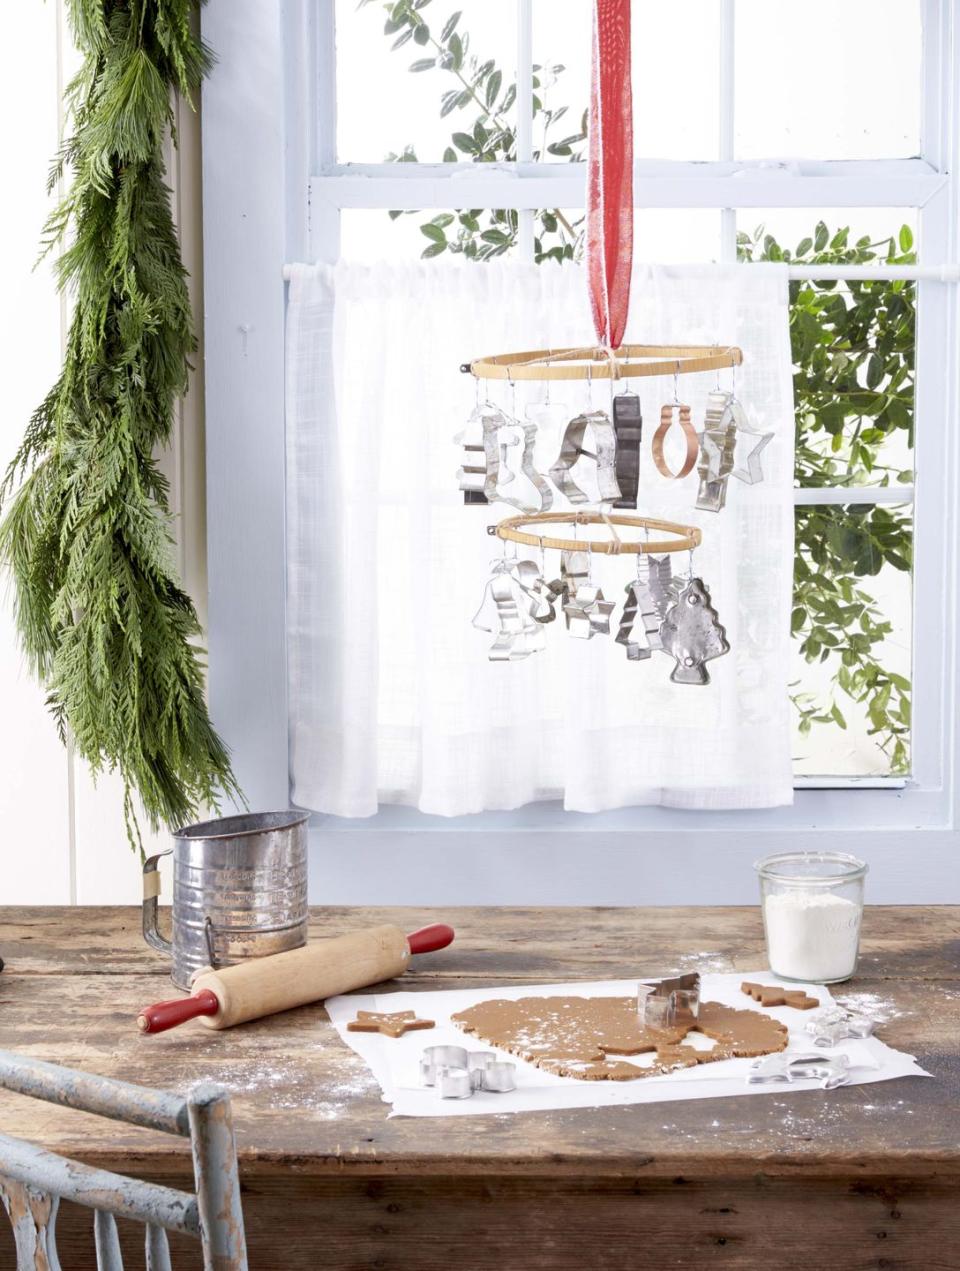
Merry Little Mobile
Friend and family will love setting a festive baking scene with a DIY cookie cutter mobile.
To make: Wrap two embroidery hoops (we used 9- and 10-inch) with gold ribbon. Tie two lengths of twine across each hoop so they cross in the middle. Cut a piece of craft wire about 8 1/2 inches long; bend the ends into hook shapes. Connect the two hoops by hooking the wire to the twine where it meets in the middle. Hang cutters from hoops using twine, adjusting as needed to hang evenly.
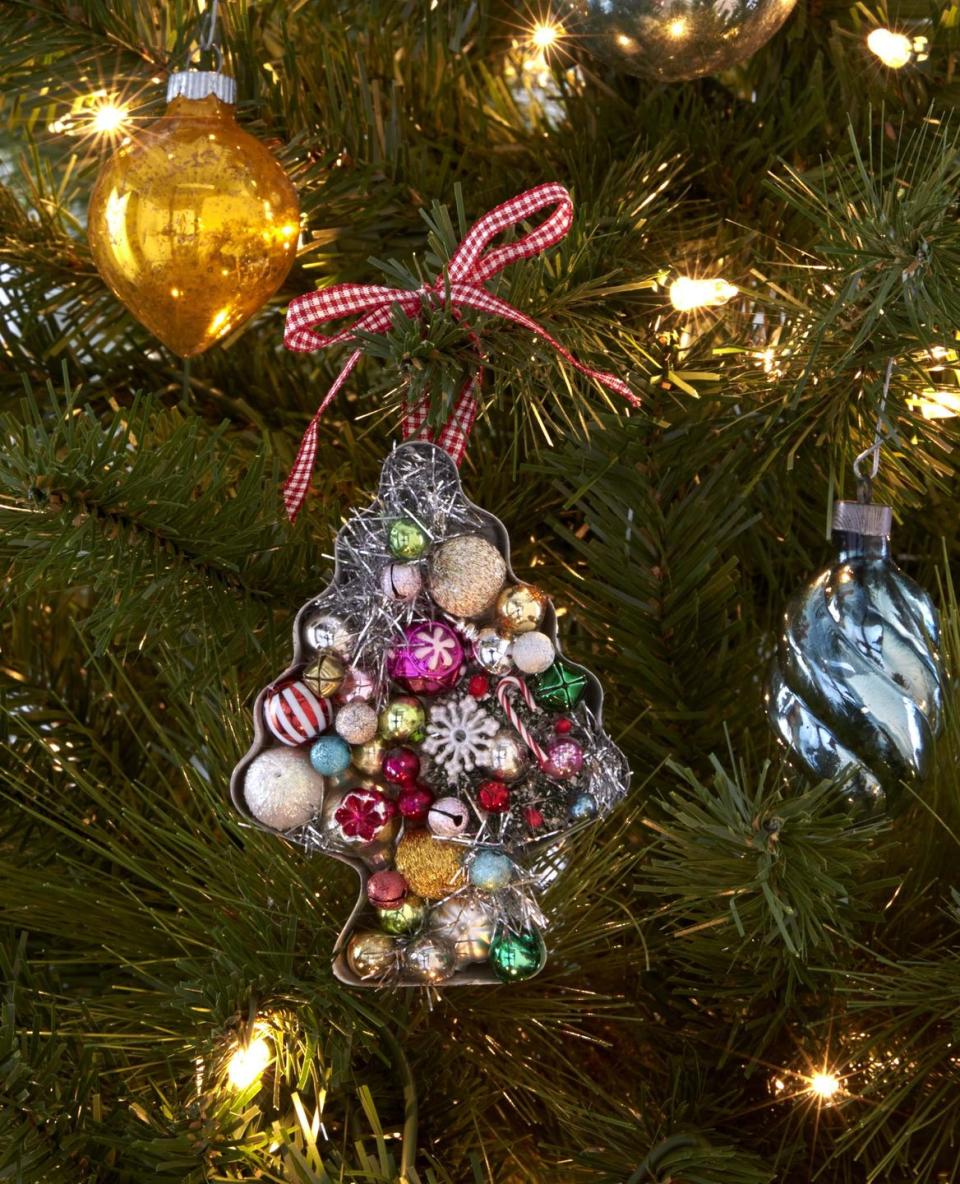
Cookie Cutter and Notions Ornaments
Everyone loves an ornament packed tree so a sparkly DIY ornament is a gift that can't go wrong.
To make: Hot-glue tinsel and mini Christmas notions in solid backed aluminum cutters. Tie or hot glue a length of ribbon to the back for hanging.
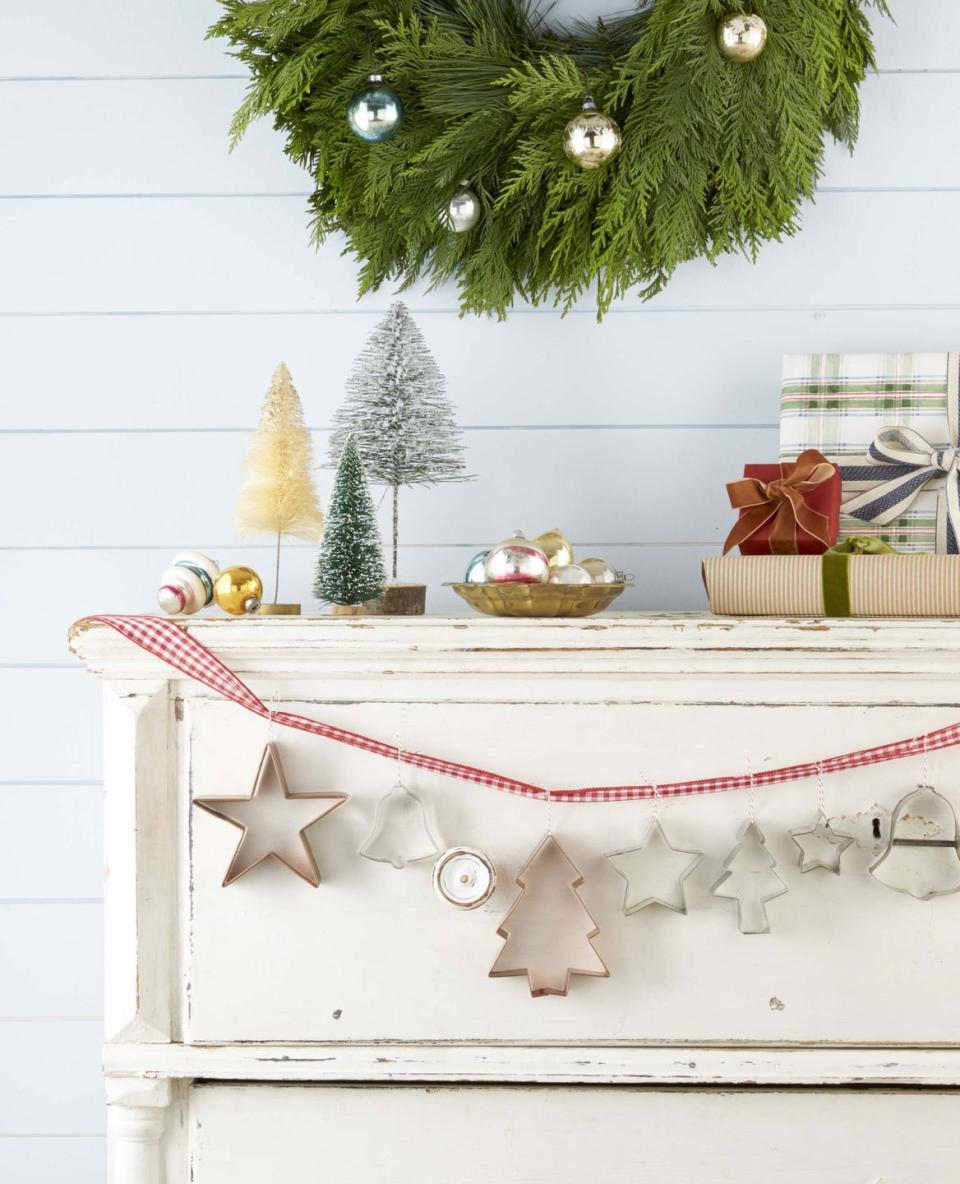
Seasonal Garland
Gift a holiday garland that the recipient can use year after year to add charm to their house.
To make: Use short loops of baker’s twine to hang cookie cutters along a single long ribbon. Display on a mantel, shelf, cupboard, or even a headboard.
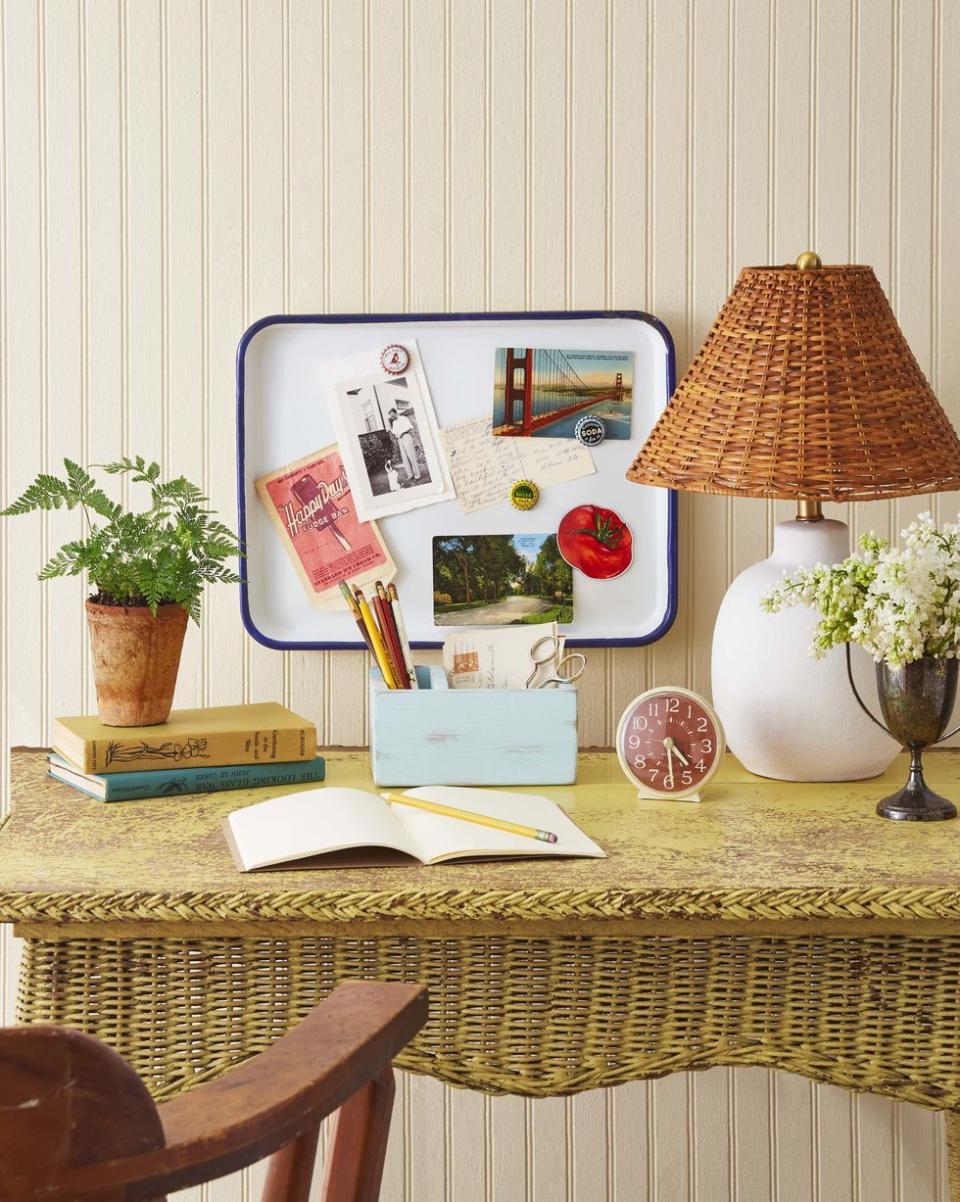
Memory Board
Hit the flea market to search for a vintage enamelware tray. Its magnetic properties make it a perfect way to celebrate the cherished memories you share with a family member or best friend.
To make: Choose some fun magnets to attach photos and other mementos, such as old ticket stubs. Include Command Strips with your gift or attach double-sided Velcro to the back so your recipient can hang it on the wall.
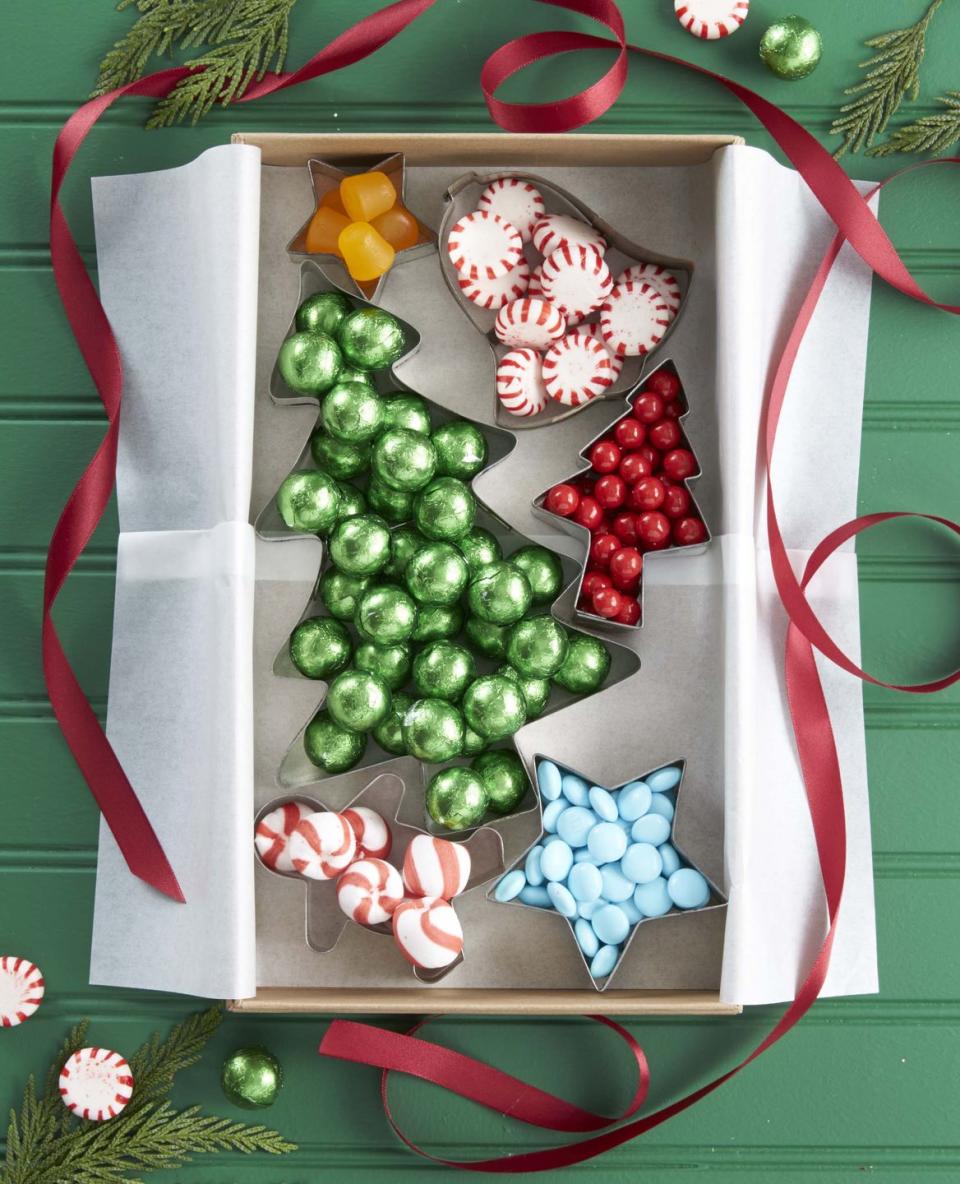
Cookie Cutter Candy Containers
Gift an assortment of candy using cookie cutters to stylishly separate each sweet. Line a box with parchment paper, place cookie cutter, then fill with candy.
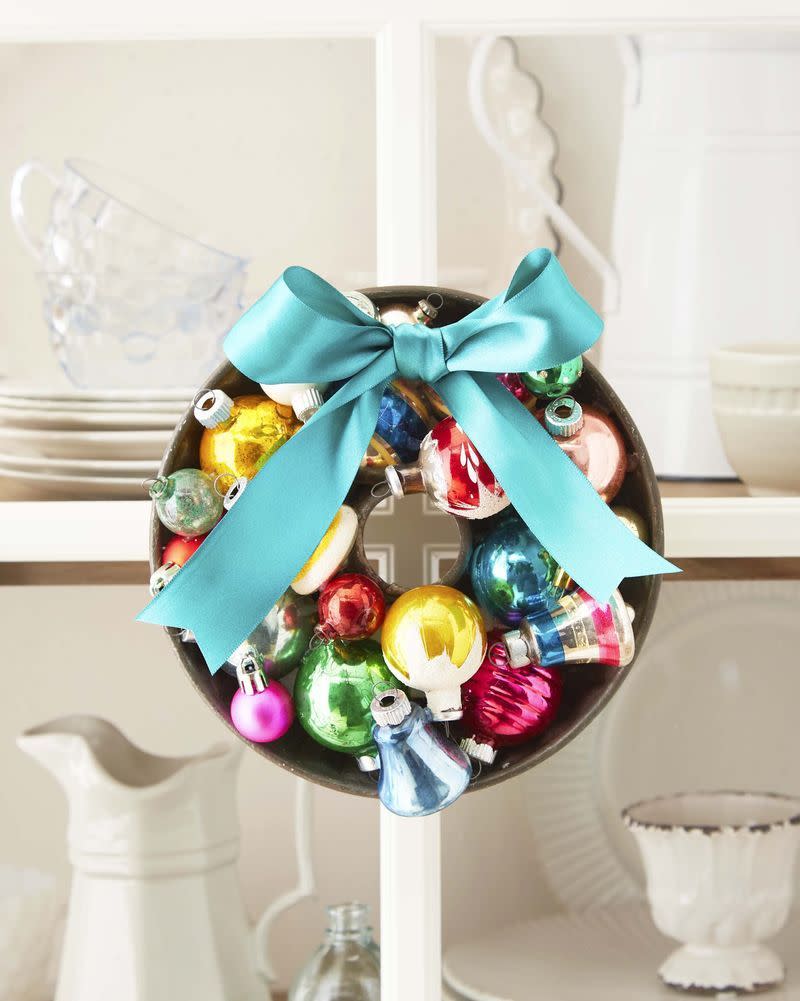
Bundt Pan Wreath
Fill a vintage Bundt pan with ornaments for a shiny and bright holiday display.
To make: Line a Bundt pan with Styrofoam, cutting to fit and attaching with hot-glue. Secure ornaments to the Styrofoam using hot-glue. Finish with a large bow.
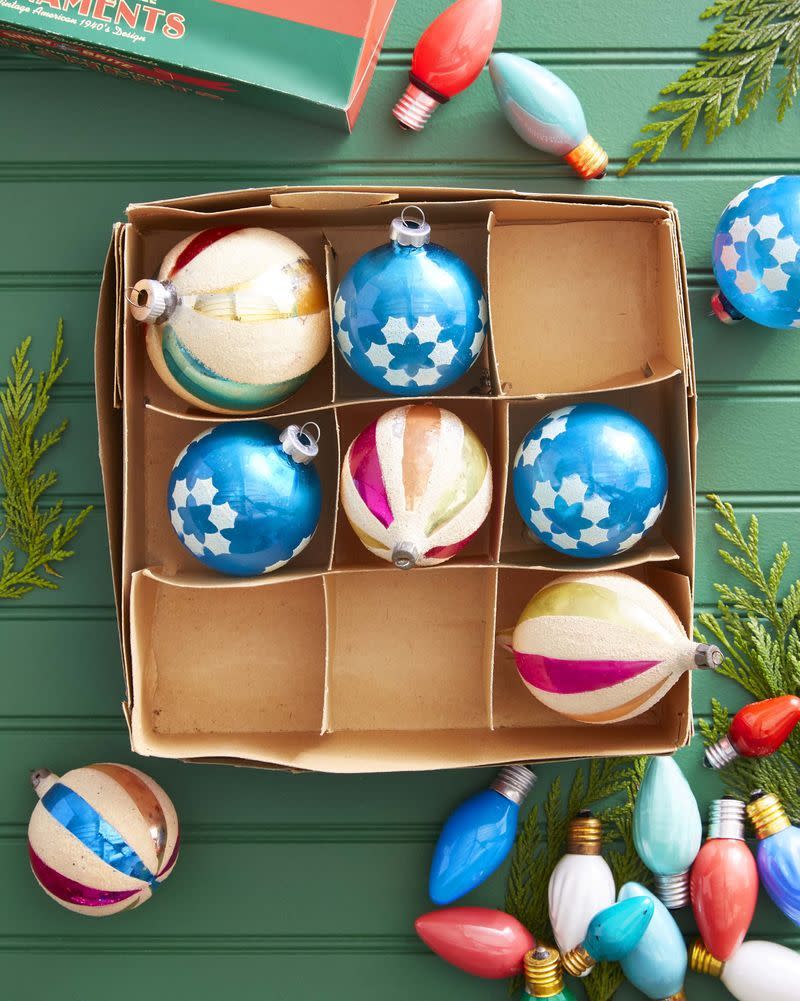
Ornament Tic-Tac-Toe
A 9-by-9 ornament box and two sets of ornaments are all it takes to make the sweetest gift for the little ones in your life.
Shiny Brite Candlesticks
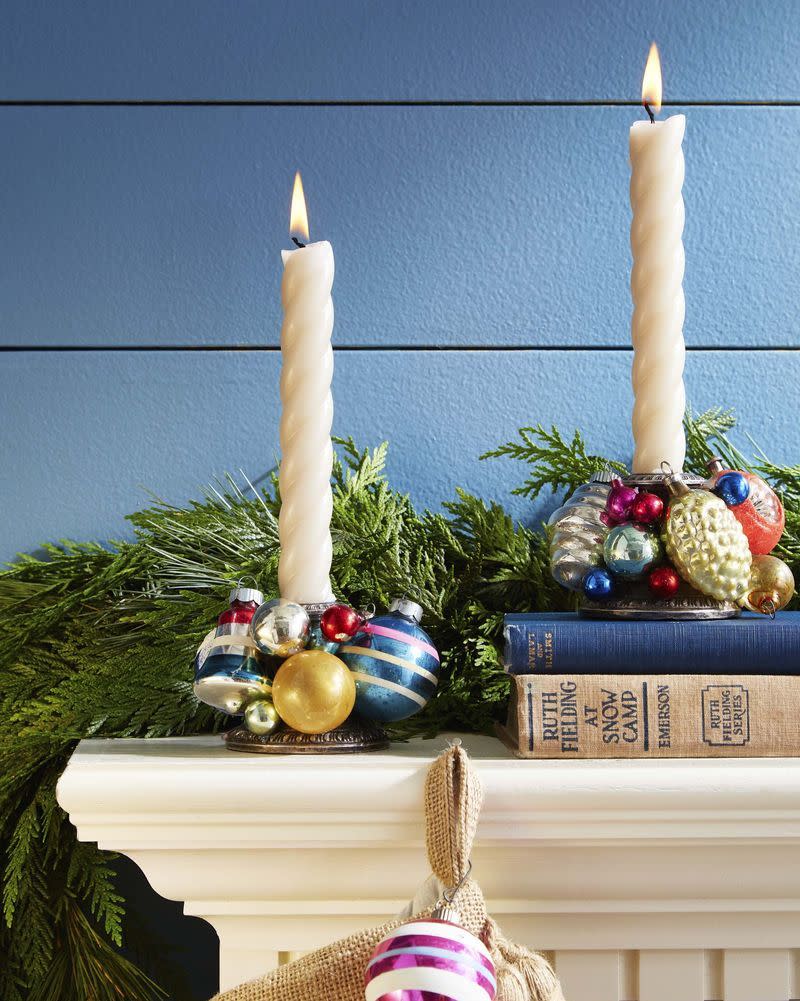
Add bling to a mantel or holiday table by cover candlestick with vintage Shiny Brites.
To make: Hot-glue ornaments in assorted sizes to silver or glass candlesticks.
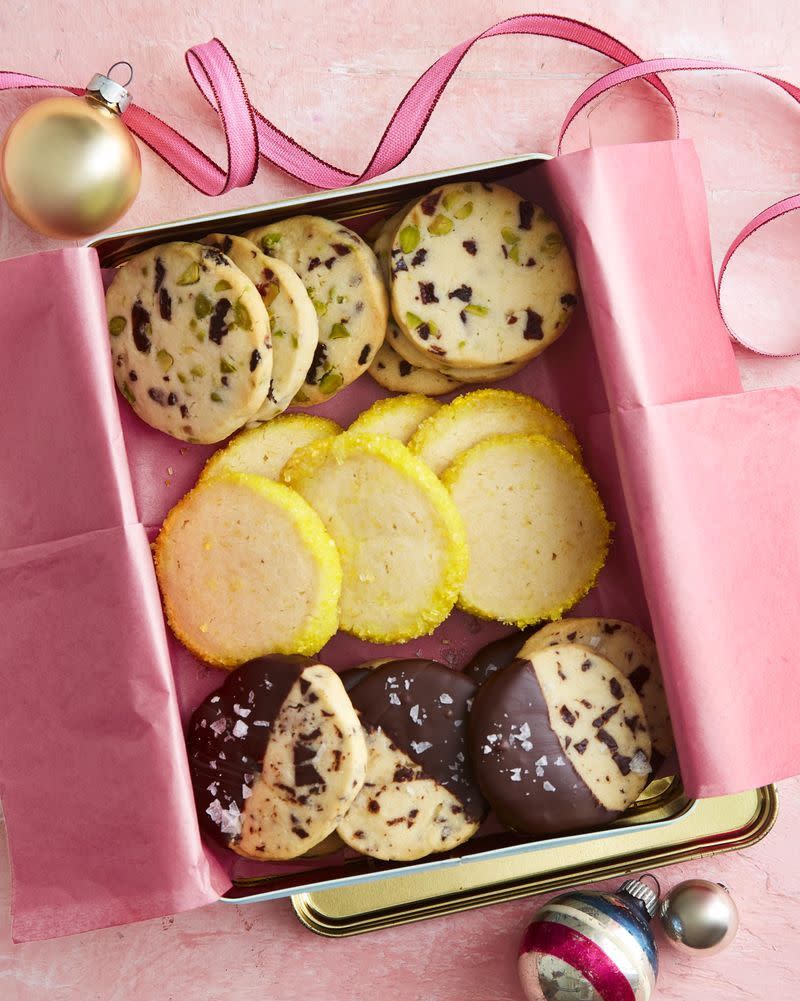
Slice-and-Bake Shortbread Cookies
Choose from three flavors—fruit and nut, lemon, or chocolate (we recommend making them all!)—and package up the perfect cookie box for all your friends and neighbors.
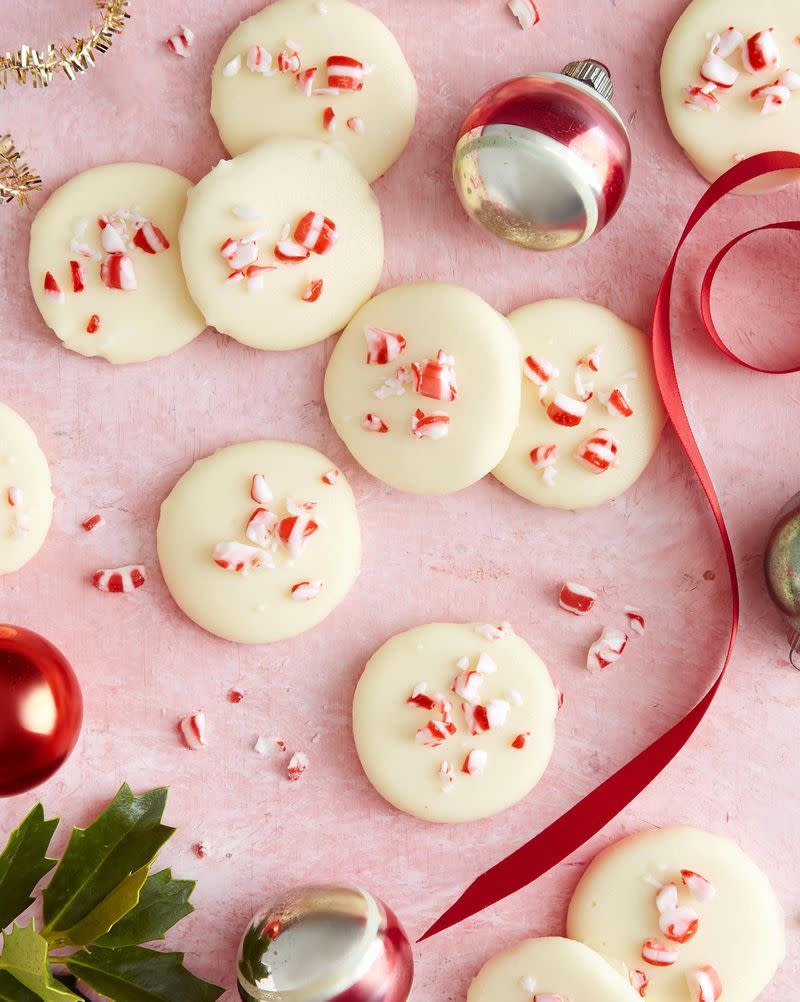
White Chocolate–Peppermint Patties
That classic peppermint patty taste but with snowy white chocolate. The recipients of this sweet treats will gobble them up in no time.
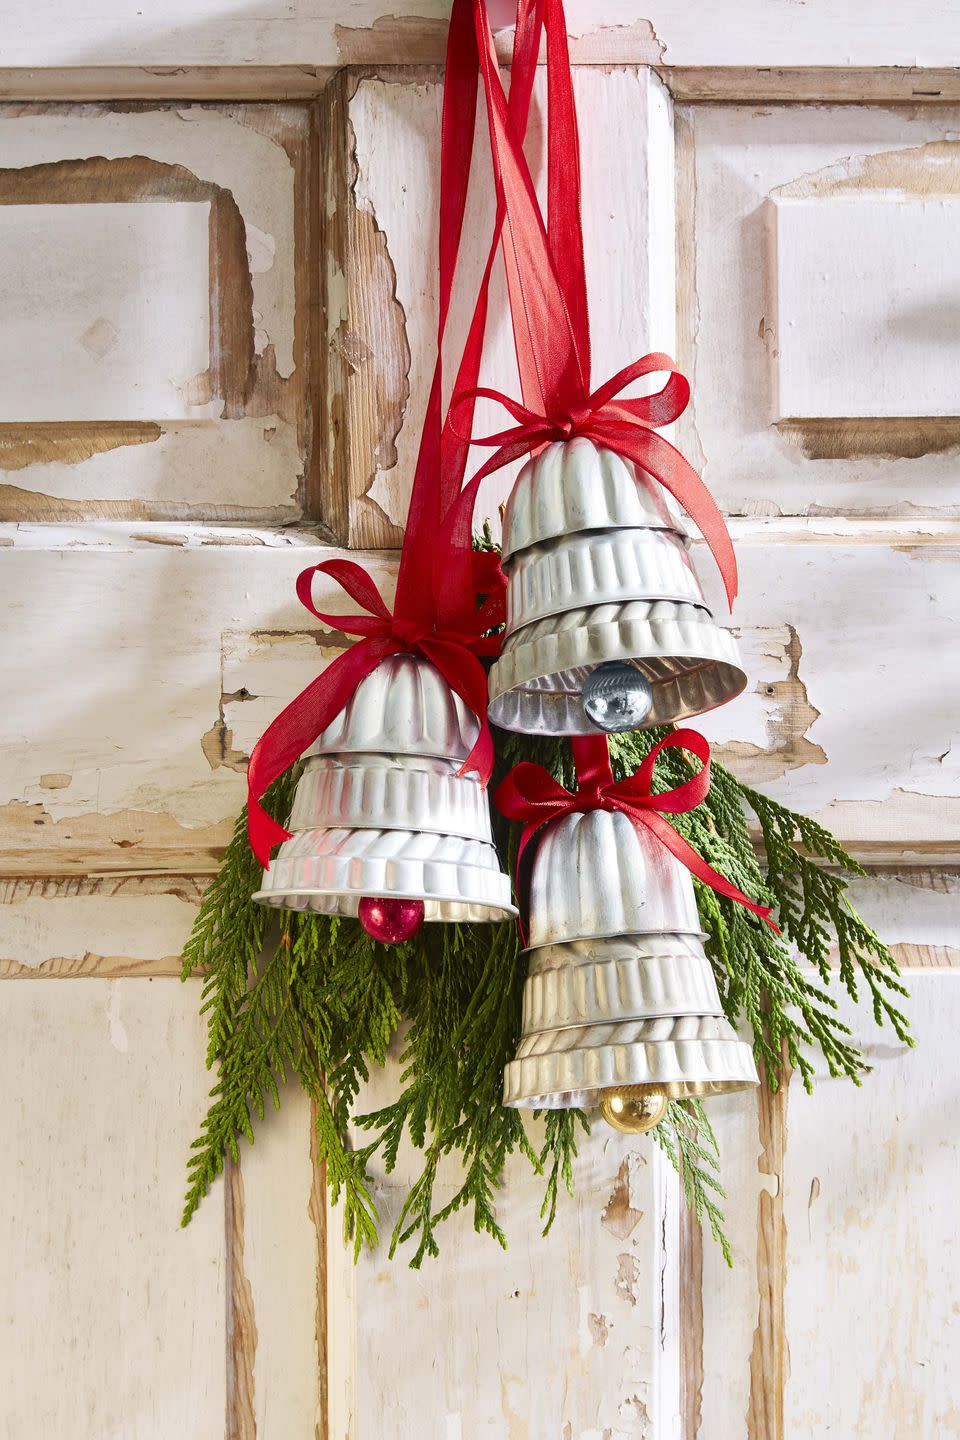
Door "Bells"
The perfect gift for the friend who loves to cook. Hang on the stove hood or in the kitchen window, there cooking mold bells will help ring in the cheer.
To make: Stack mini molds and Bundt pans to form bell shapes; affix together using epoxy. Hot-glue small ornaments to the bottom to create the clappers. Glue ribbon loops and a bow to the top for hanging. Add a swag of greenery, if desired.
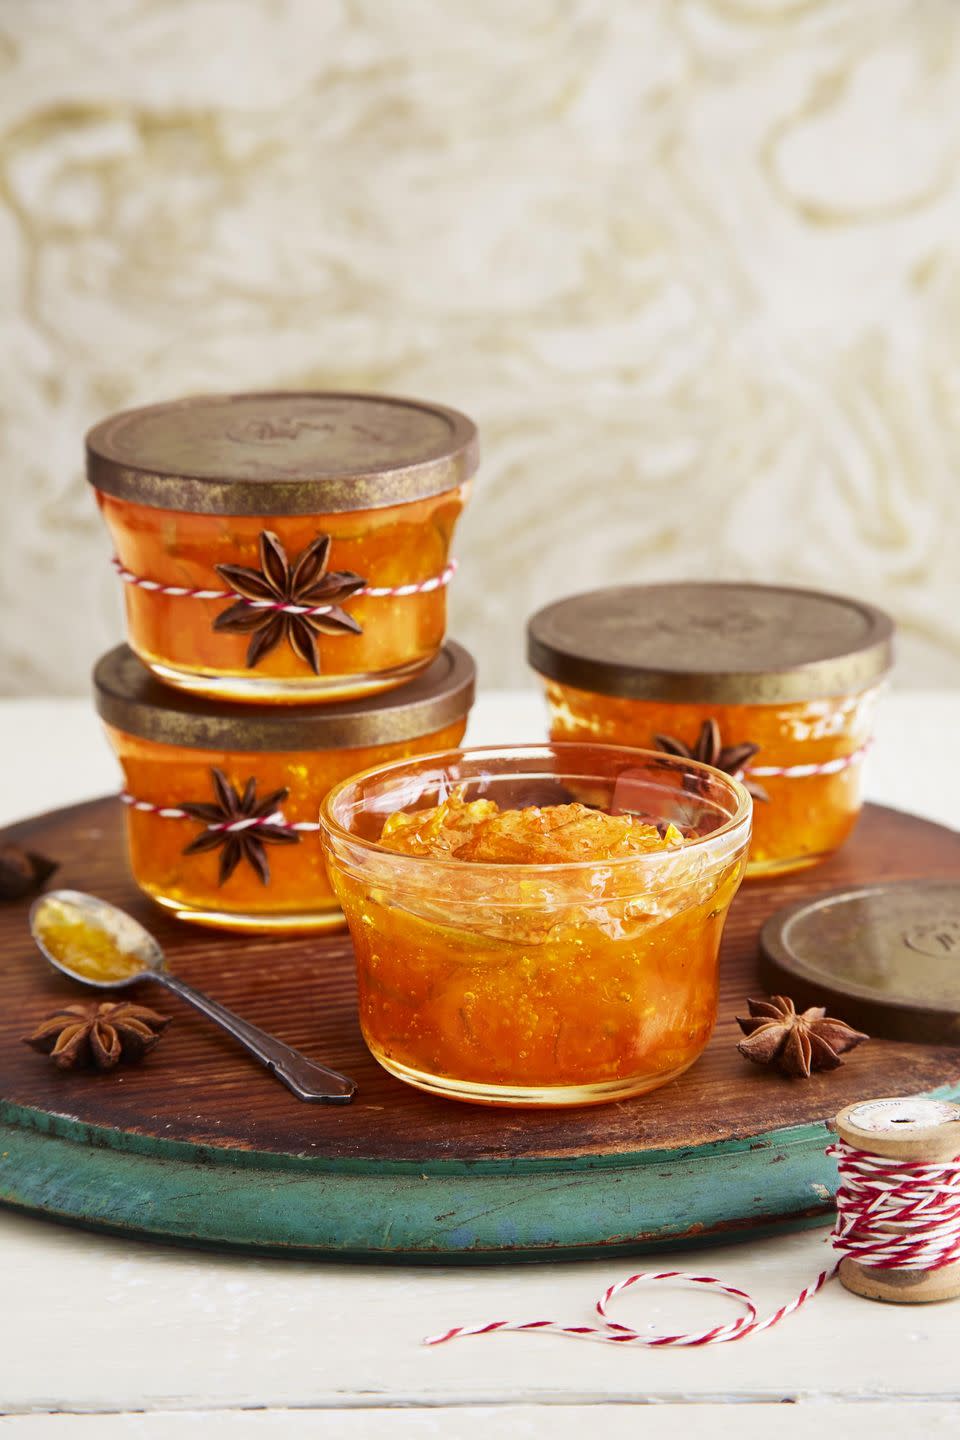
Citrus Marmalade
Flavored with ginger and star anise friends and loved one will be snacking on this marmalade into the new year.
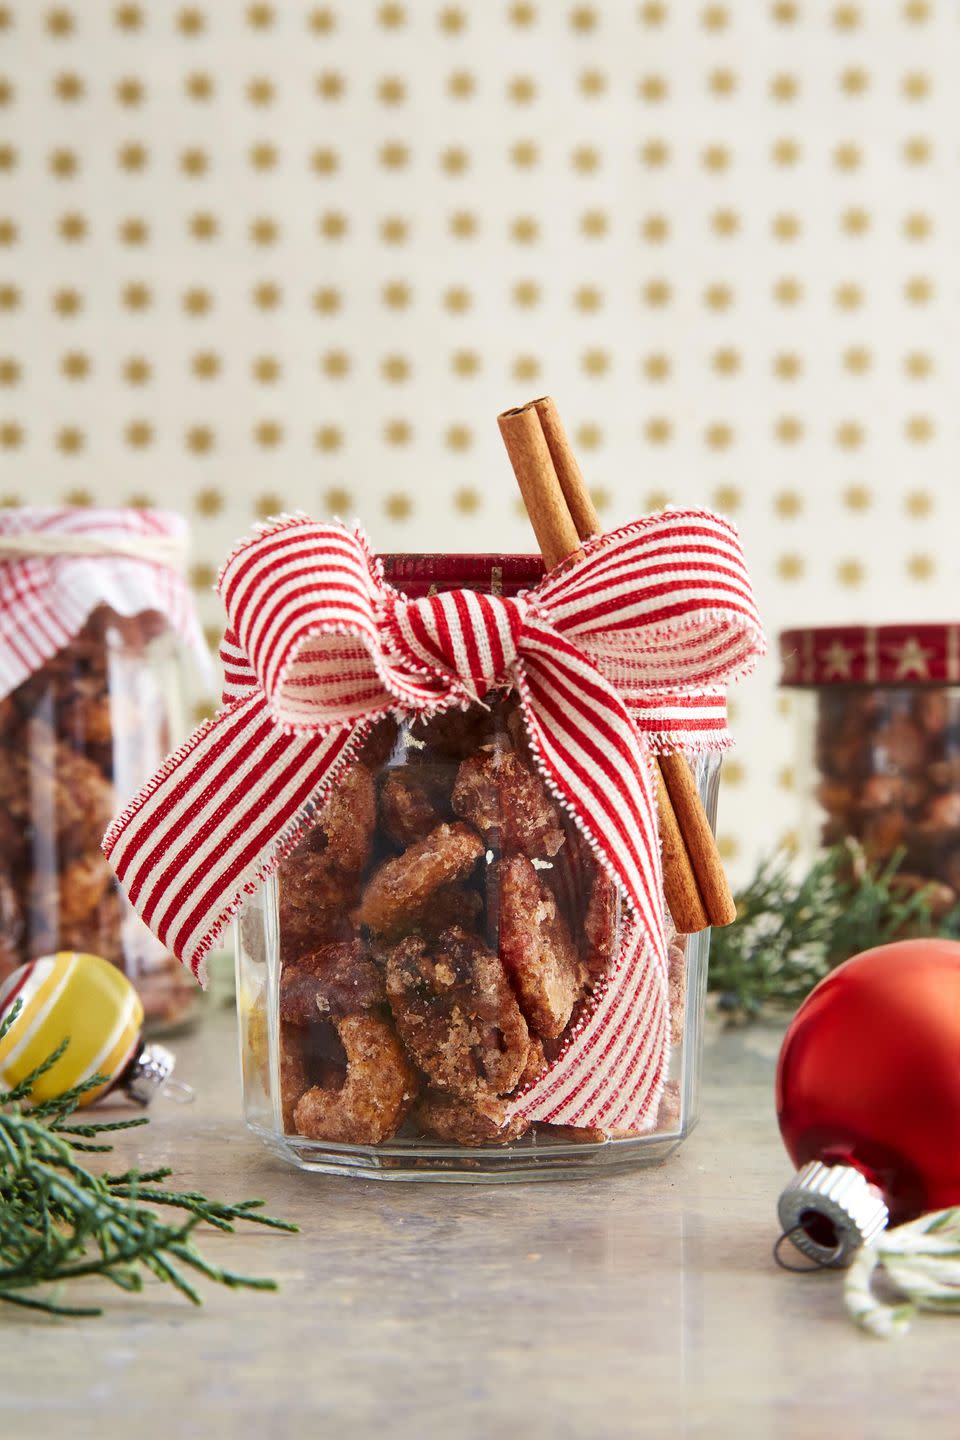
Sweet & Spicy Coated Nuts
The perfect gift for those that love salt and sweet.
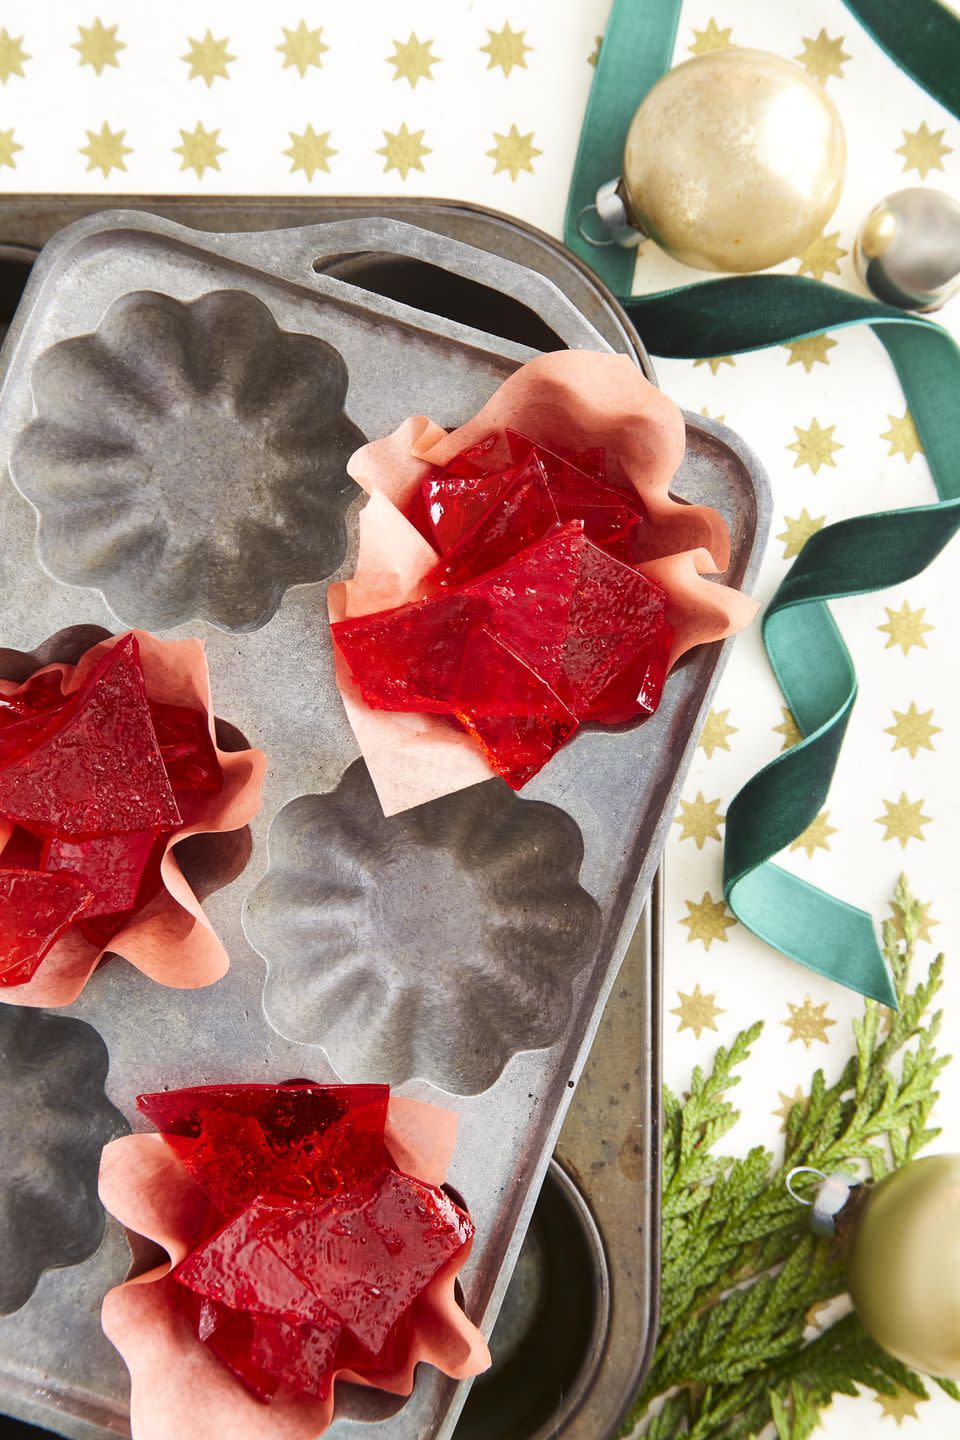
Cinnamon Hard Candy
Spicy and sweet this homemade hard candy put forwards one of the seasons most iconic flavor—cinnamon
Get the recipe.
SHOP CANDY THERMOMETERS
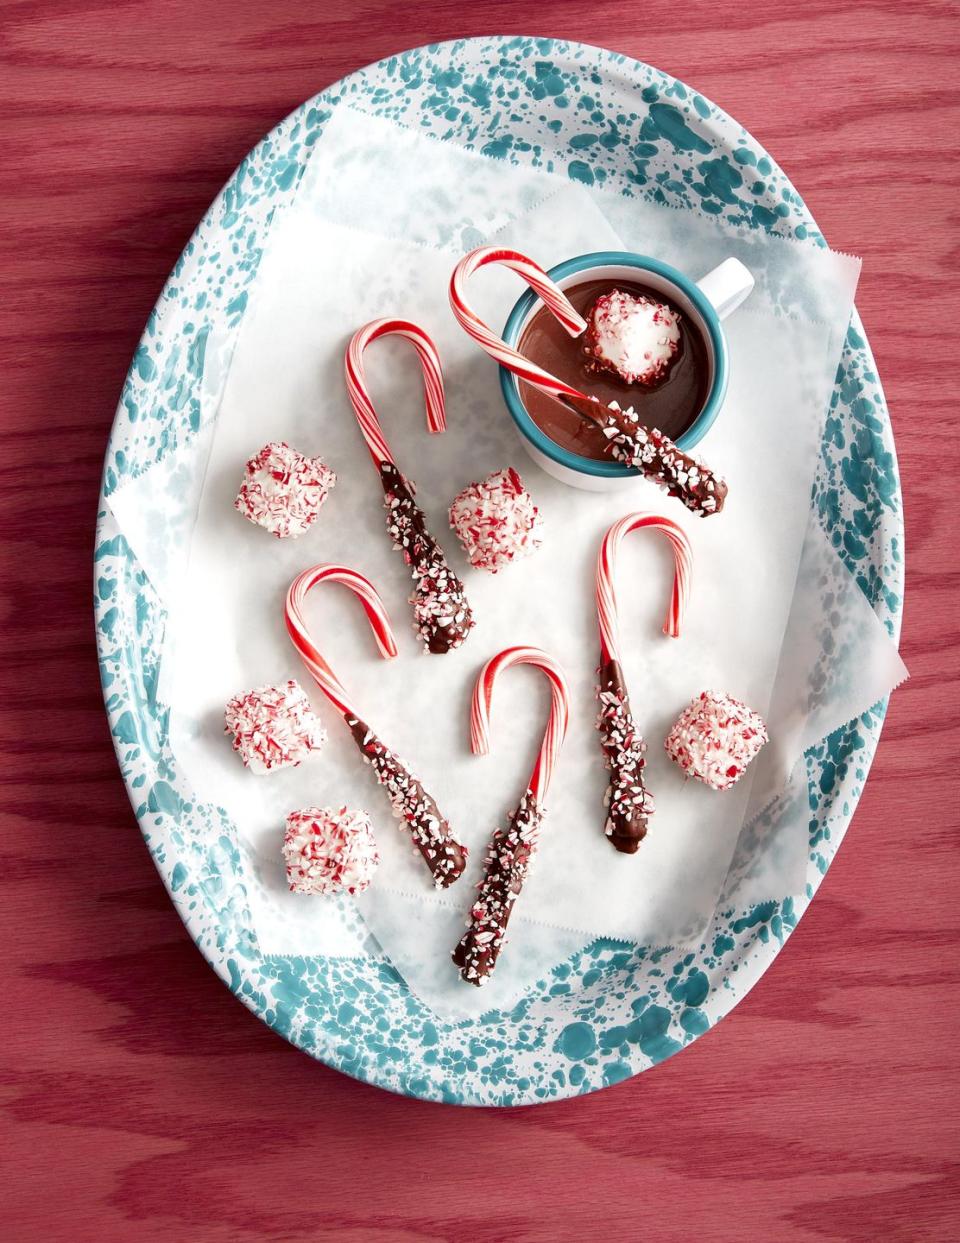
Hot Chocolate Stirrers
Gift a sweet treat that's perfect for celebrating the holidays on cold, nippy nights.
To make: Dip ends of candy canes in melted semisweet chocolate. Sprinkle with crushed candy canes; place on a parchment paper–lined plate, and chill. Lightly mist large marshmallows with water. Sprinkle with crushed candy canes.
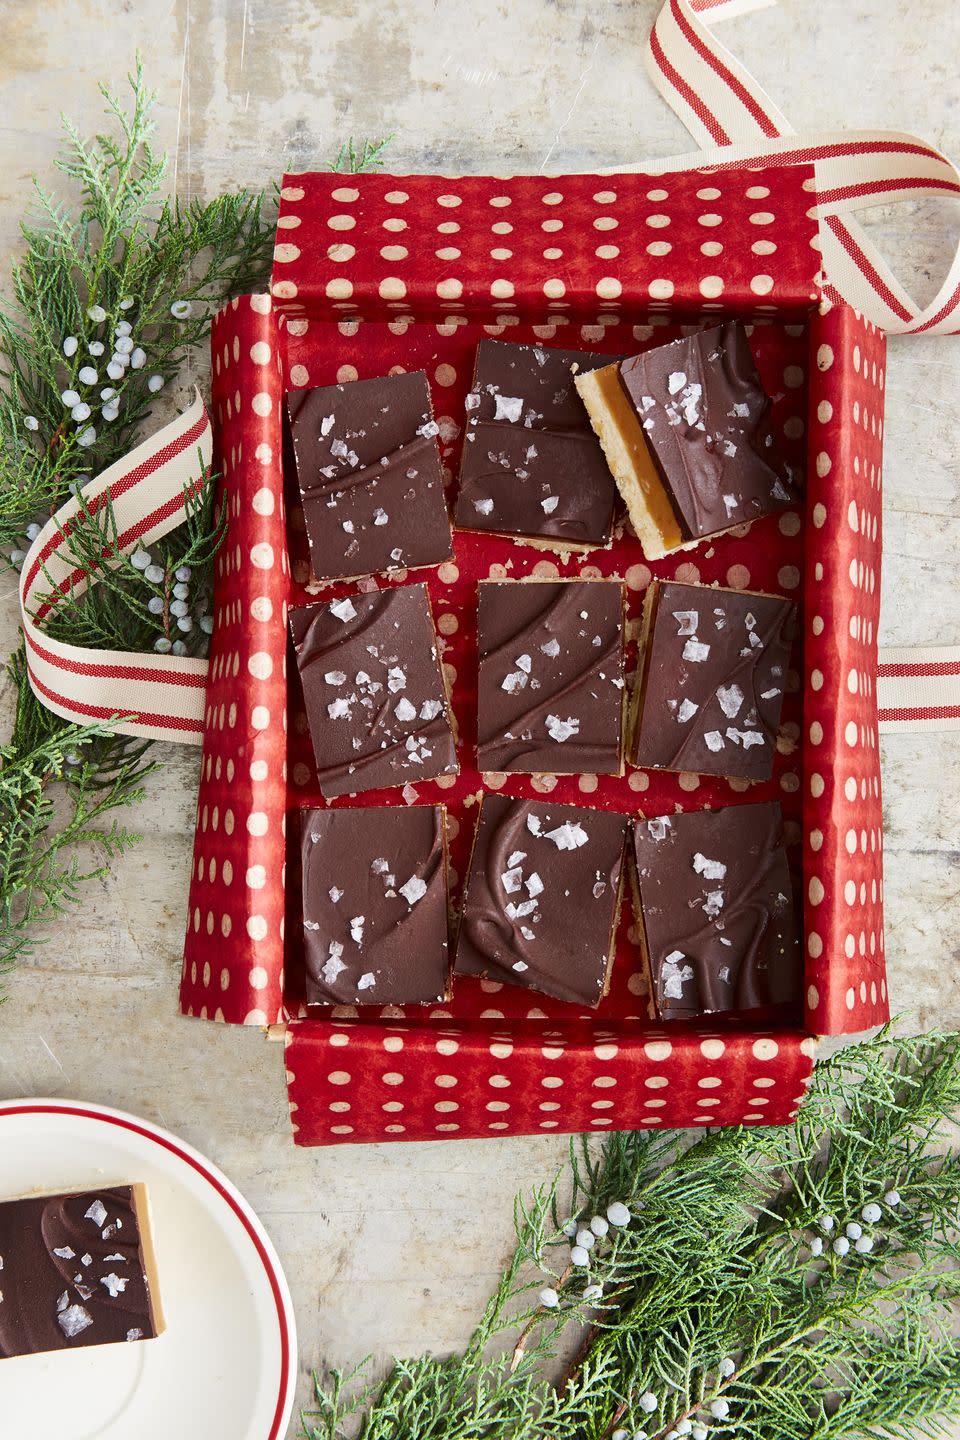
Millionaire Shortbread Bars
You'll make 'em feel like a million bucks when you gift these rich and delicious 3-layer bars.
Get the recipe.
SHOP BAKING PANS
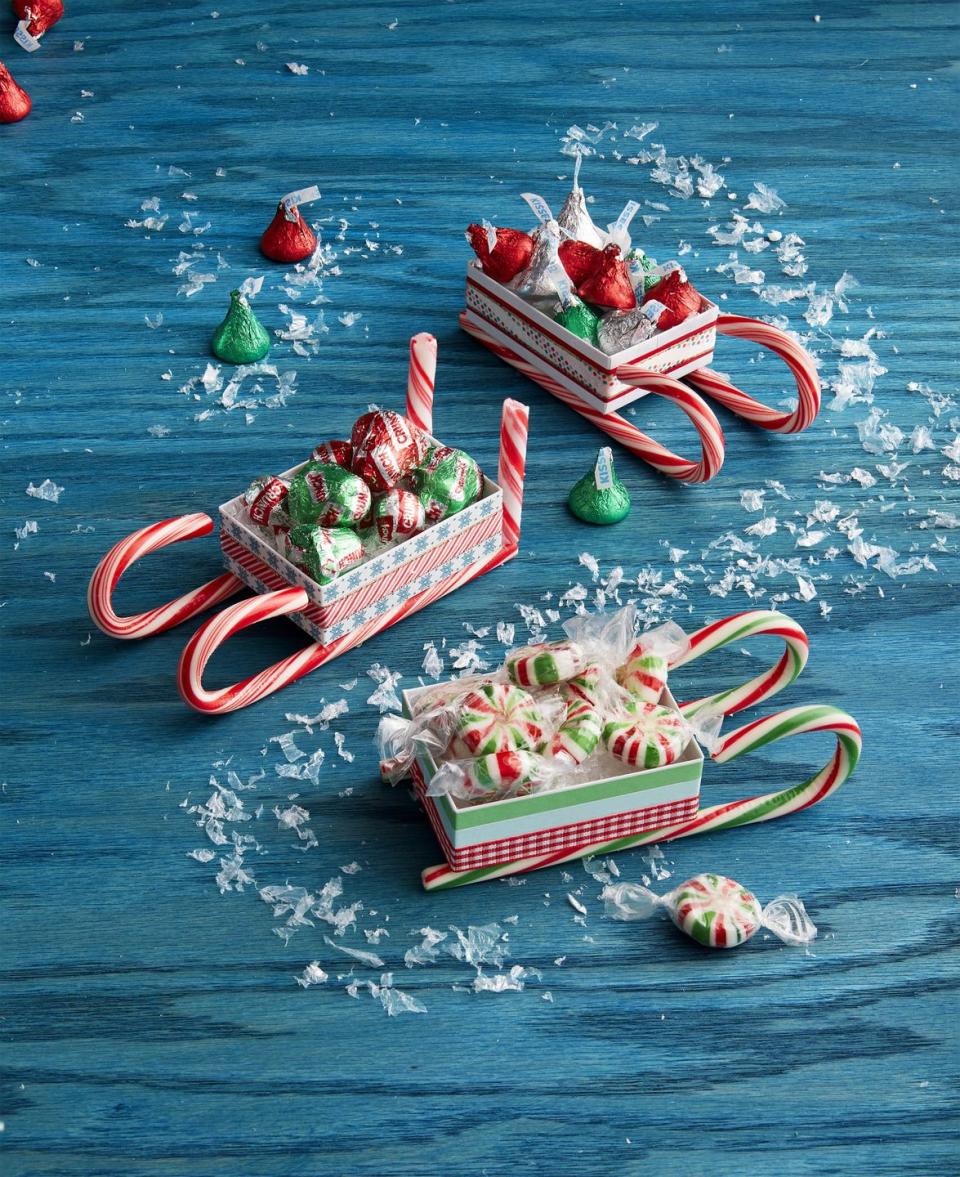
Candy Cane Sleighs
Everyone loves candy and when it comes delivered in a custom made candy cane sleigh it's even more special.
To make: Wrap small white jewelry boxes in thin holiday
ribbon, holding it in place with double-sided tape. Attach two candy canes to the bottom of each box with hot-glue. Attach candy cane sticks (if desired) to the back of the box. Fill with candy.
SHOP JEWELRY BOXES
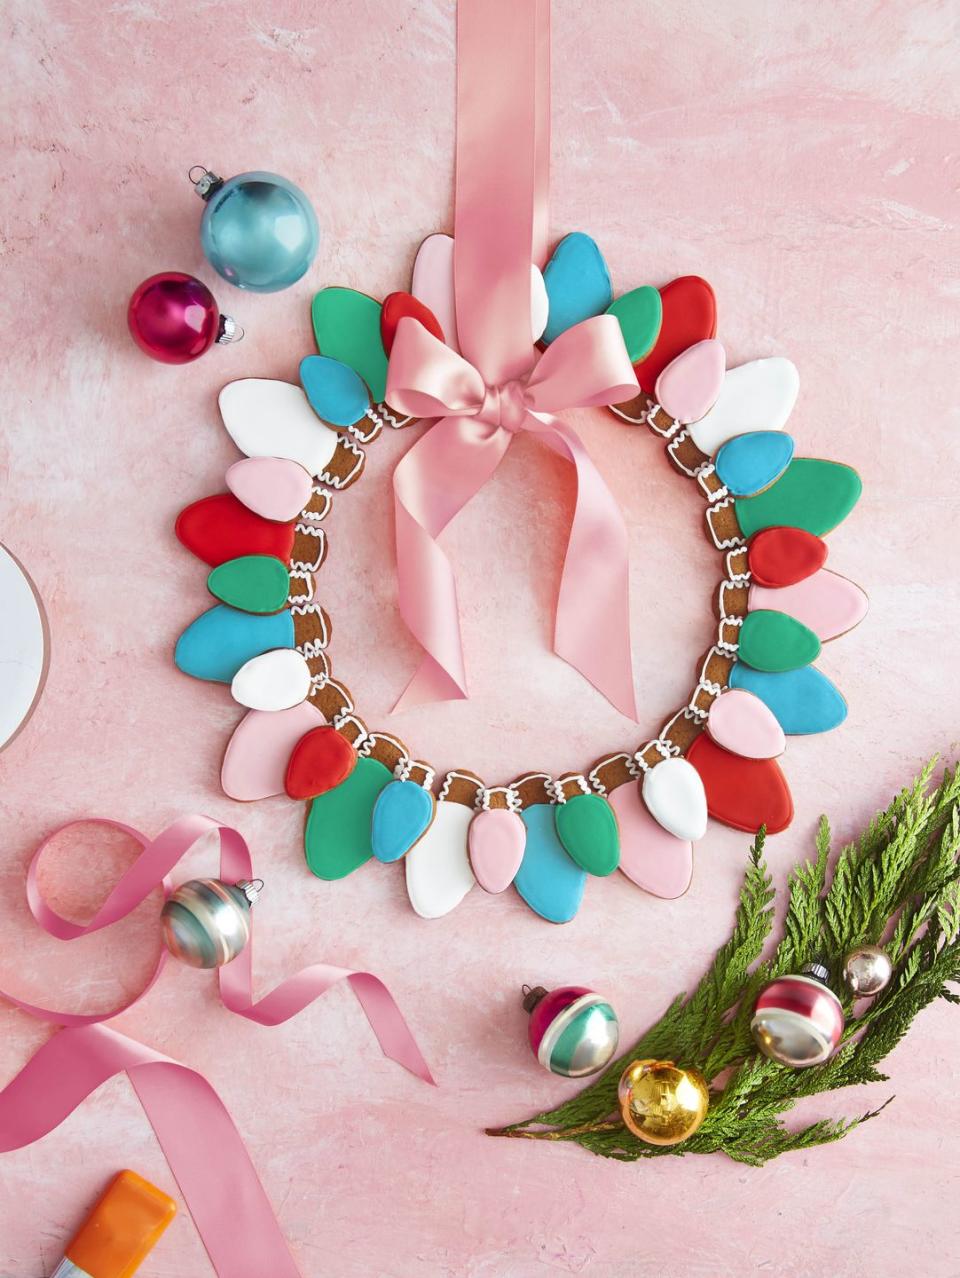
Christmas Light Gingerbread Cookies
Fashion homemade Christmas bulb gingerbread cookies into the shape of a wreath and gift with a tag reading, "Hope your season
is merry and bright.”
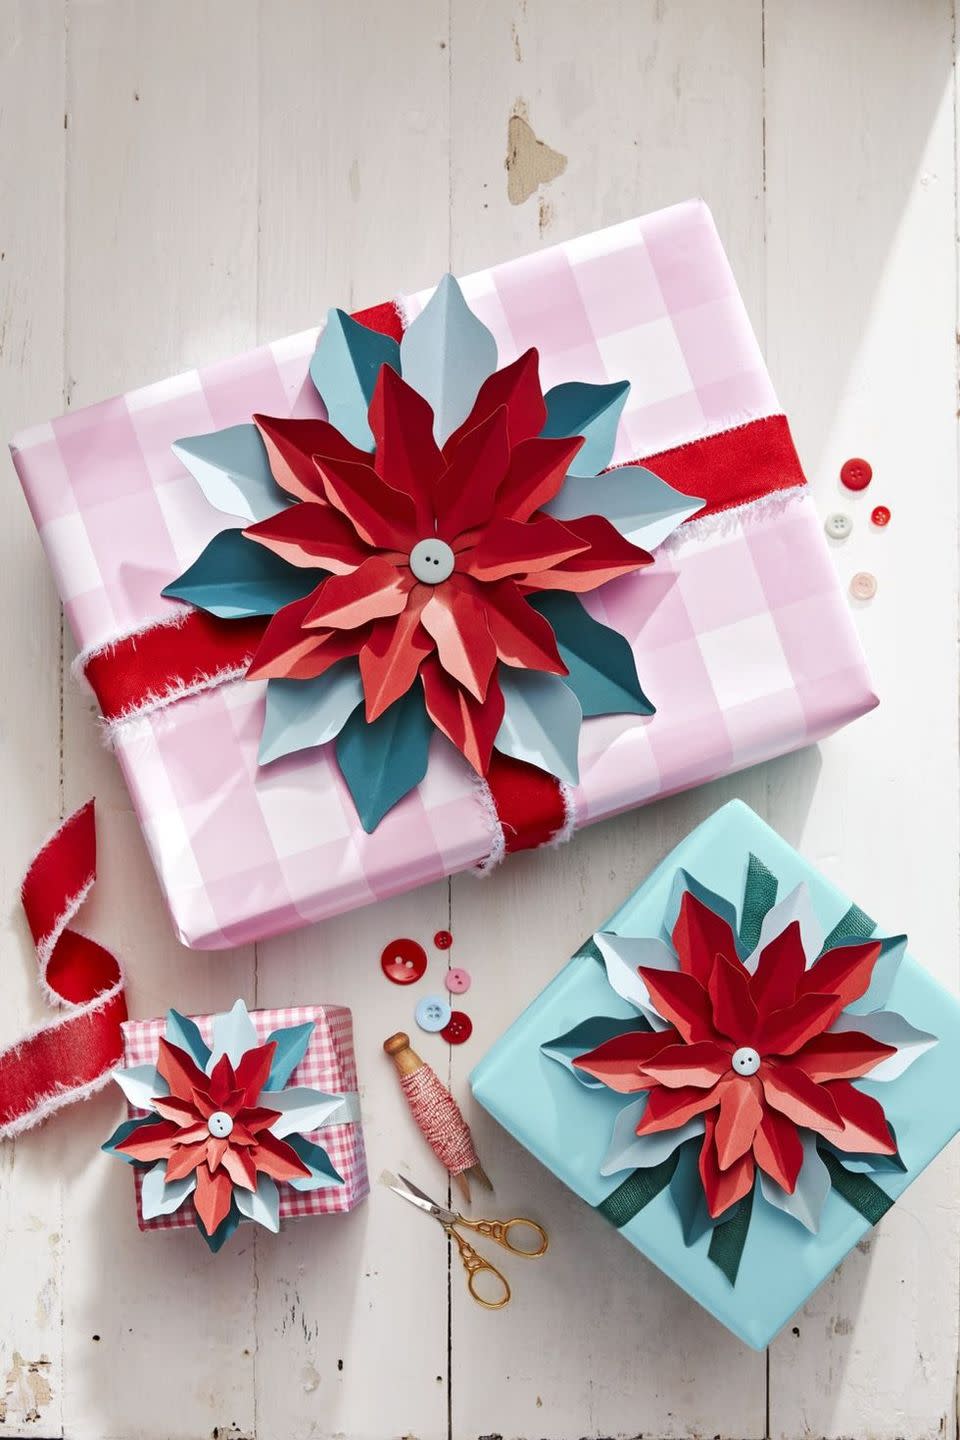
DIY Paper Poinsettia Gift Wrap
How gorgeous are those cardstock poinsettias? Not only are they a fabulous gift topper, but they look just as pretty all on their own. Bring them to life by cutting cardstock by hand (find the template here), then secure with a button and finish with a fringed ribbon.
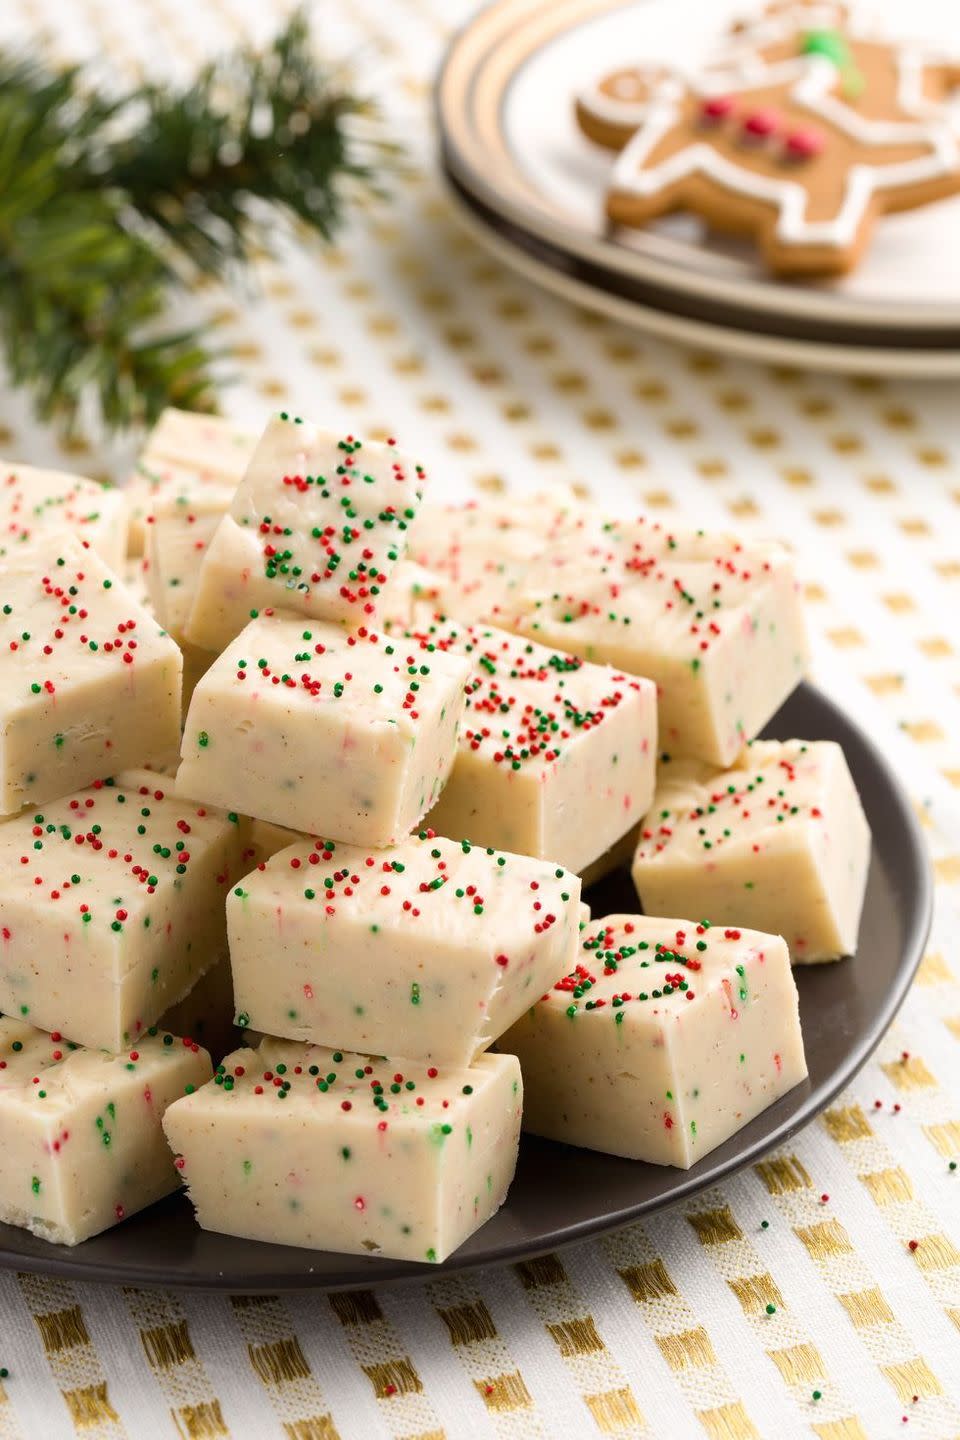
Gingerbread Fudge
Here's a treat that'll make you wish you could reach through your screen and try a bite. Yum. Our favorite part? Those adorable, Christmas-themed sprinkles.
Get the recipe at Delish.
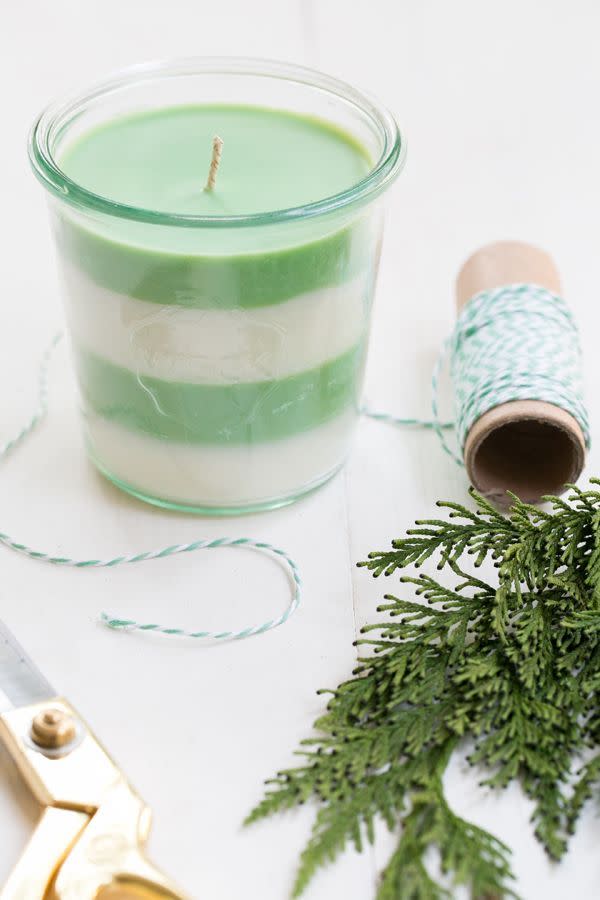
Pine-Scented Candles
These striped candles smell positively delightful (like pine!), but they're also just really, really pretty. And that mint and white design will look lovely in your recipient's home all the way until springtime.
Get the tutorial at Sugar and Charm.
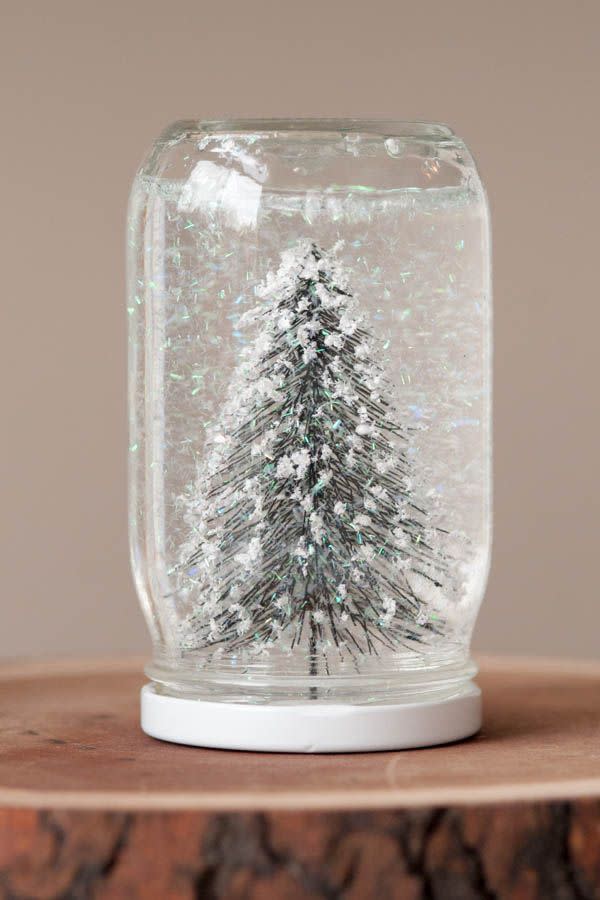
Snow Globe
Okay, hold the phone. Handmade snow globes are such a good idea! They also happen to be as inexpensive as they are nice to look at.
Get the tutorial at The Sweetest Occasion.
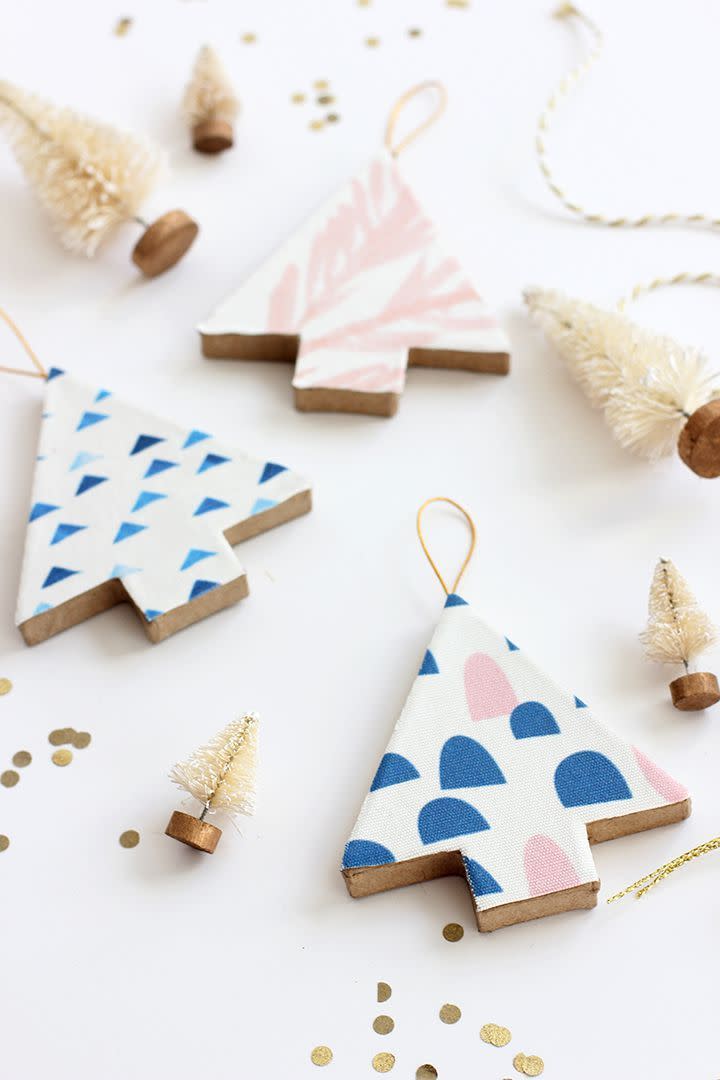
Fabric Covered Christmas Tree Ornaments
DIY gifts don't have to look fuddy-duddy, you know! We love the modern look of these whimsical ornaments, which can be customized with just about whatever pattern you want.
Get the tutorial at Alice & Lois.
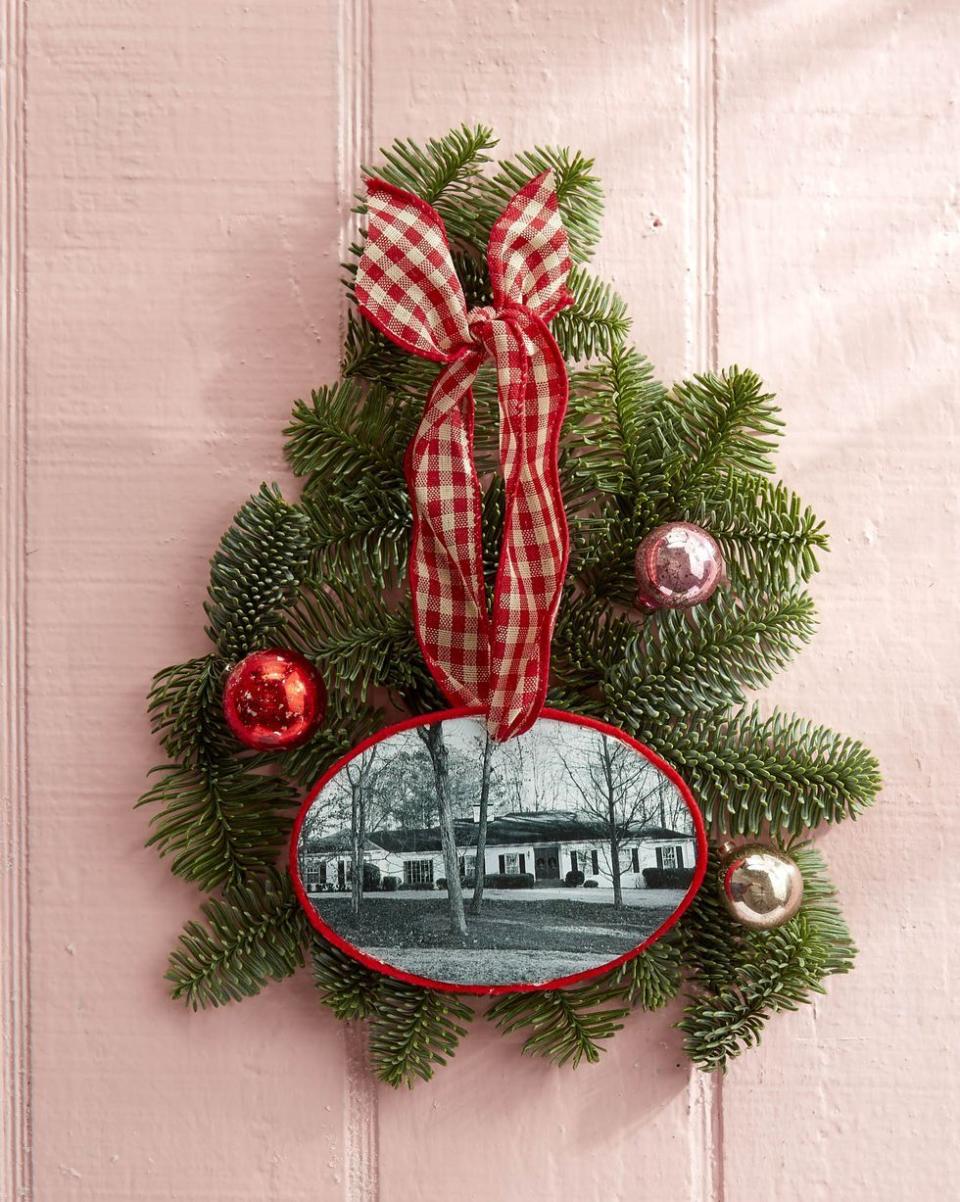
Homespun Ornament
He's worked tirelessly to get through that Christmas honey-do list, so why not reward your significant other with this ornament starring your special home for the holidays—and every day.
To make: Mod Podge a photograph of your house to an oval wood crafting blank. Once dry, attach a length of felt or twine to the edge with hot glue. Use an awl or small drill bit to create a hole in the top; thread a ribbon through the hole to hang.
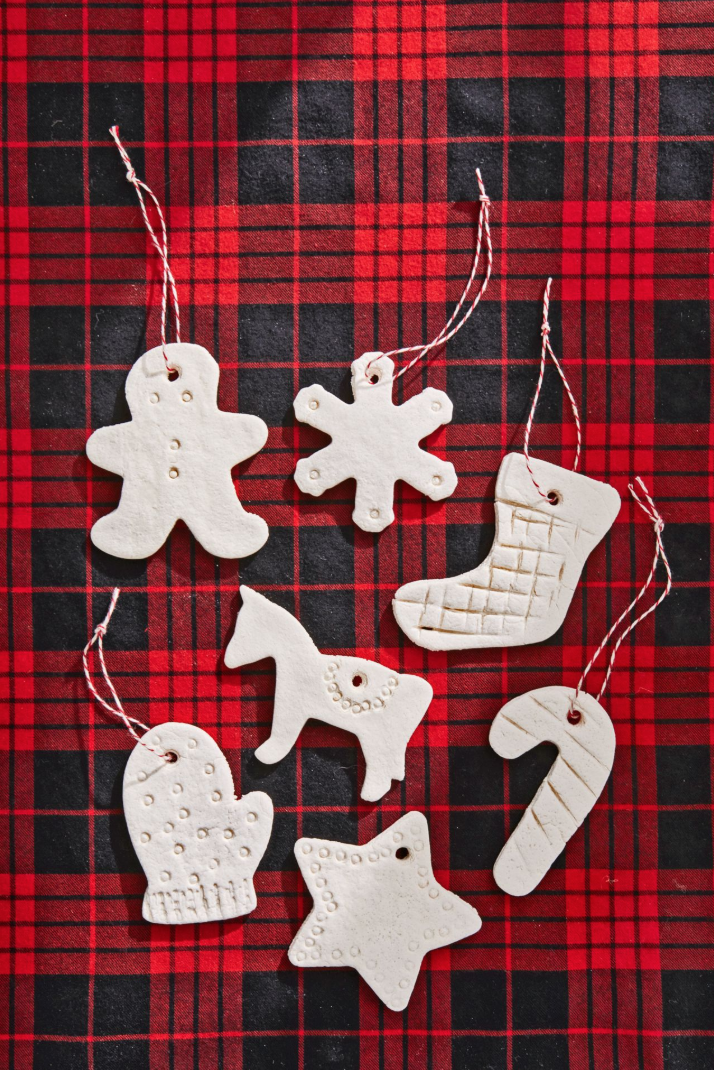
DIY Salt Dough Ornaments
Salt dough ornaments are a classic gift—and for good reason. They're simple, subtle, and so thoughtful!
Make the ornaments: Combine 4 cups all-purpose flour, 1 cup salt, and 1 1/2 cups of warm water in a mixing bowl. Knead until the dough is firm and smooth. Roll out dough and cut desired shapes (use a straw to poke a hole for hanging). Bake at 300°F until dry, approximately 1 hour; cool completely.
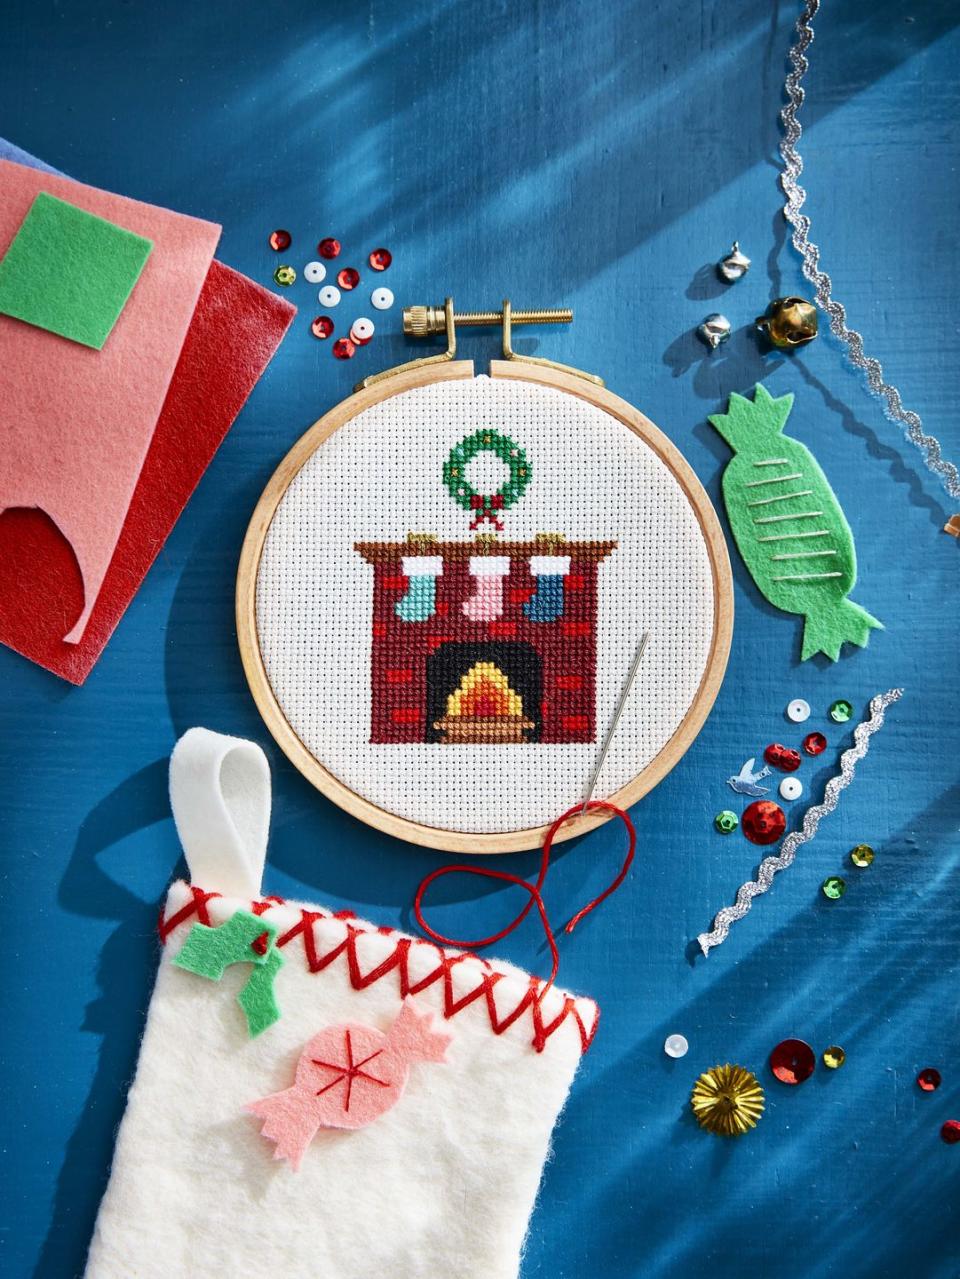
DIY Cross Stitch Gift
If you're crafty, now's the time to show it off! Stitch this adorable Christmas motif, and let your recipient share your handiwork with the world year after year after year.
Homemade Gingerbread Ice Cream Pints
Think homemade ice cream is too finicky to tote to the next holiday party? We disagree. Simply pack up scoops in white paper pints adorned with red and white ribbon for a look that's as chic as it is transportable.

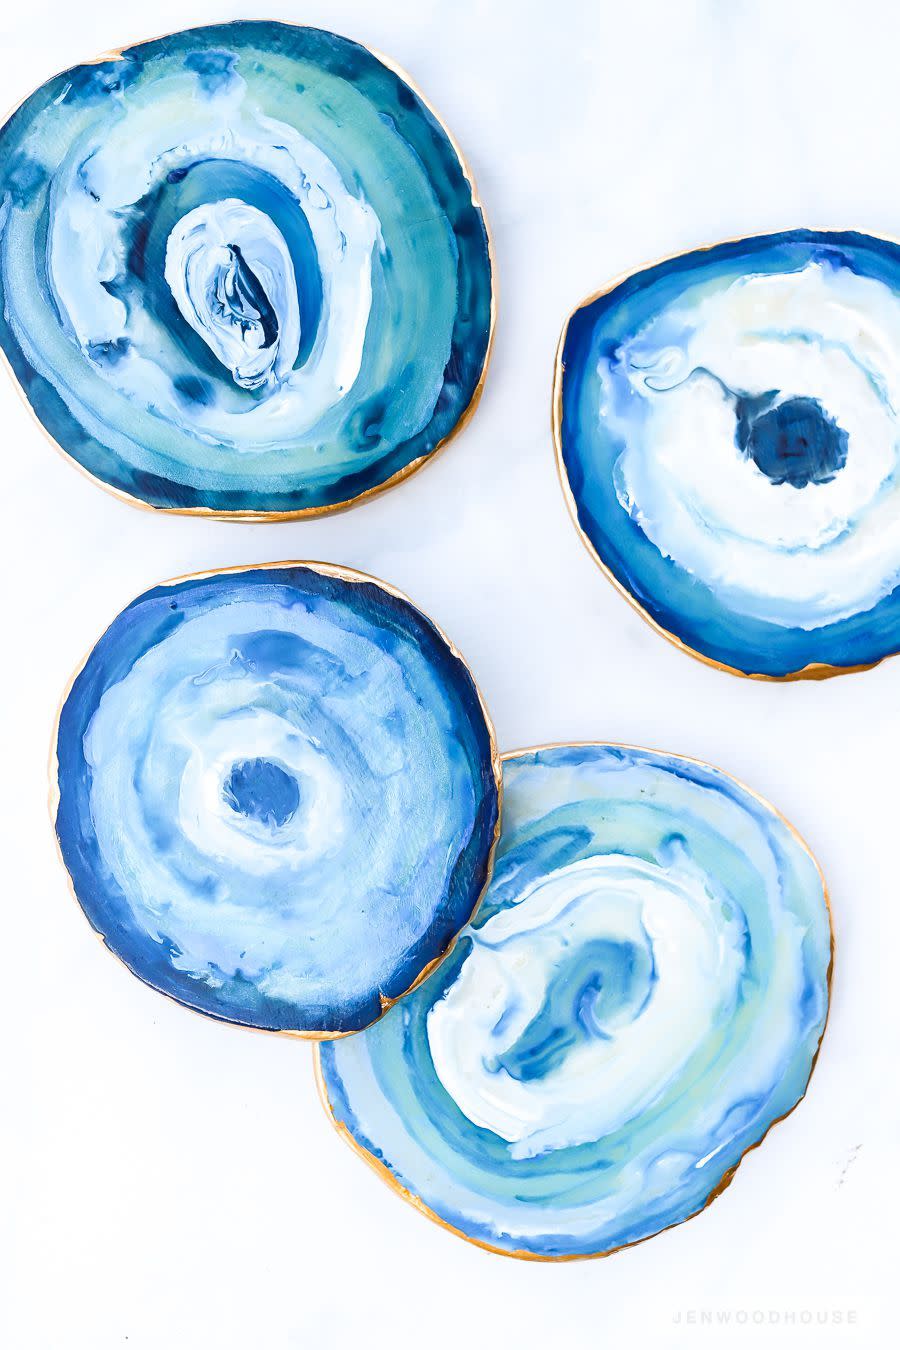
DIY Agate Coasters
These coasters couldn't be more gorgeous. It's hard to believe they're made of polymer clay and a bit of acrylic paint—making them a beautiful and inexpensive DIY gift.
Get the tutorial at The House of Wood.
DIY French Fries Ornament
Would you like your Christmas tree with fries this year? Better question: Who wouldn't? This hilarious ornament will have your fast food-loving friend in stitches.
Get the tutorial at Studio DIY.

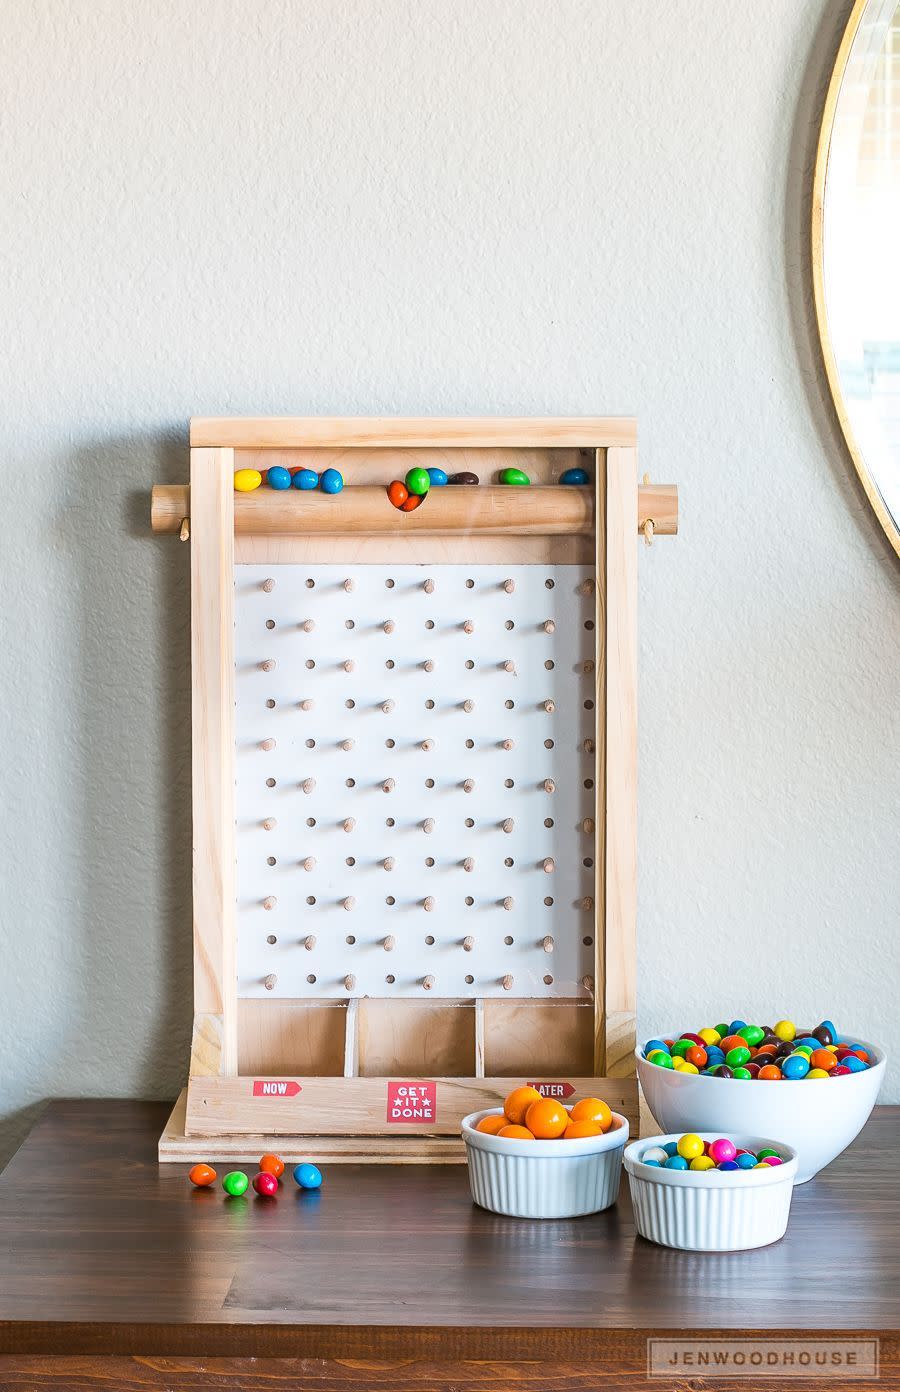
DIY Candy Dispenser
Know someone with a serious sweet tooth? Let them get their fix with this sophisticated candy dispenser. (We suggest including a selection of the recipient's favorite candies to keep things feeling truly personal.)
Get the tutorial at The House of Wood.
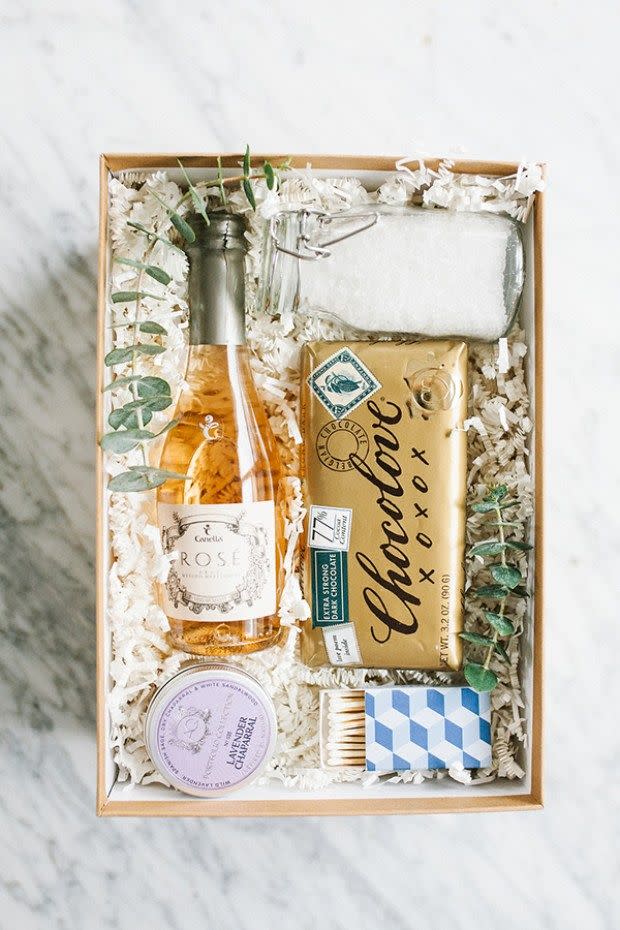
DIY Bubble Bath Gift Box
Odds are, your bestie could always use a good night of pampering. Give her everything she needs to unwind with this sweet gift box, complete with bath salts, rosé, a bar of chocolate, and more.
Get the tutorial at Sugar and Charm.
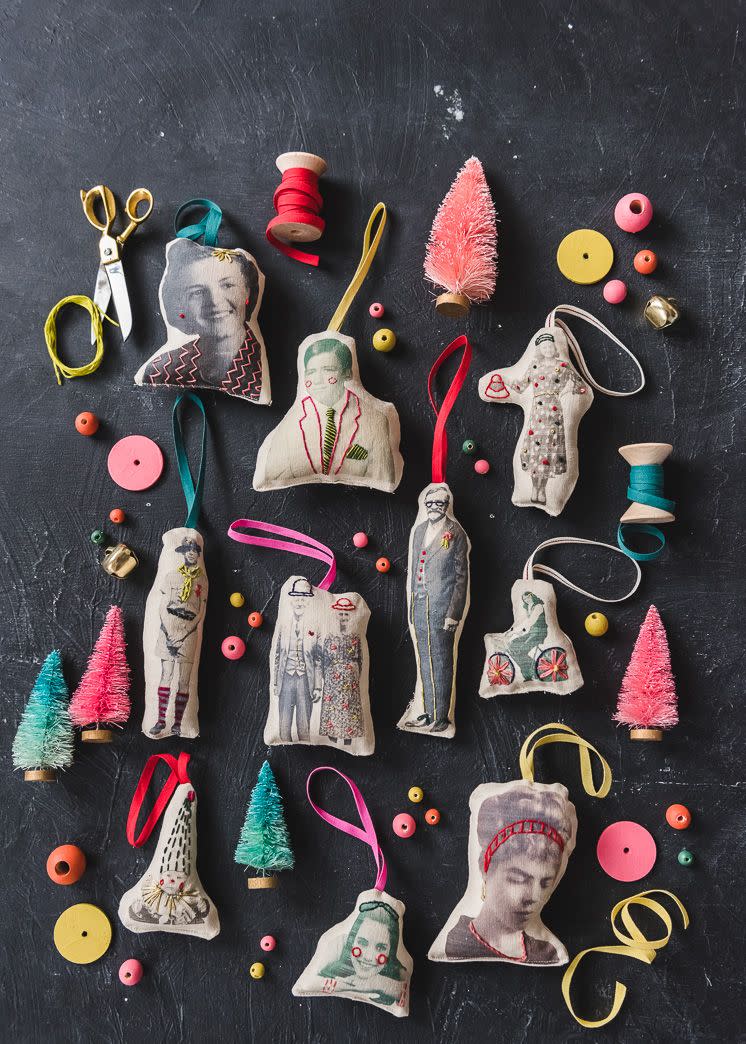
DIY Family Heirloom Ornaments
Who says an ornament has to have been around a long time before it can be considered an heirloom? These ornaments, crafted from vintage family photos, are an immediate classic.
Get the tutorial at The House That Lars Built.
DIY Christmas Lights Leggings
Gift these leggings to a loved one on Christmas Eve, then don them together on Christmas morning. They're the ultimate festive getup!
Get the tutorial at Studio DIY.

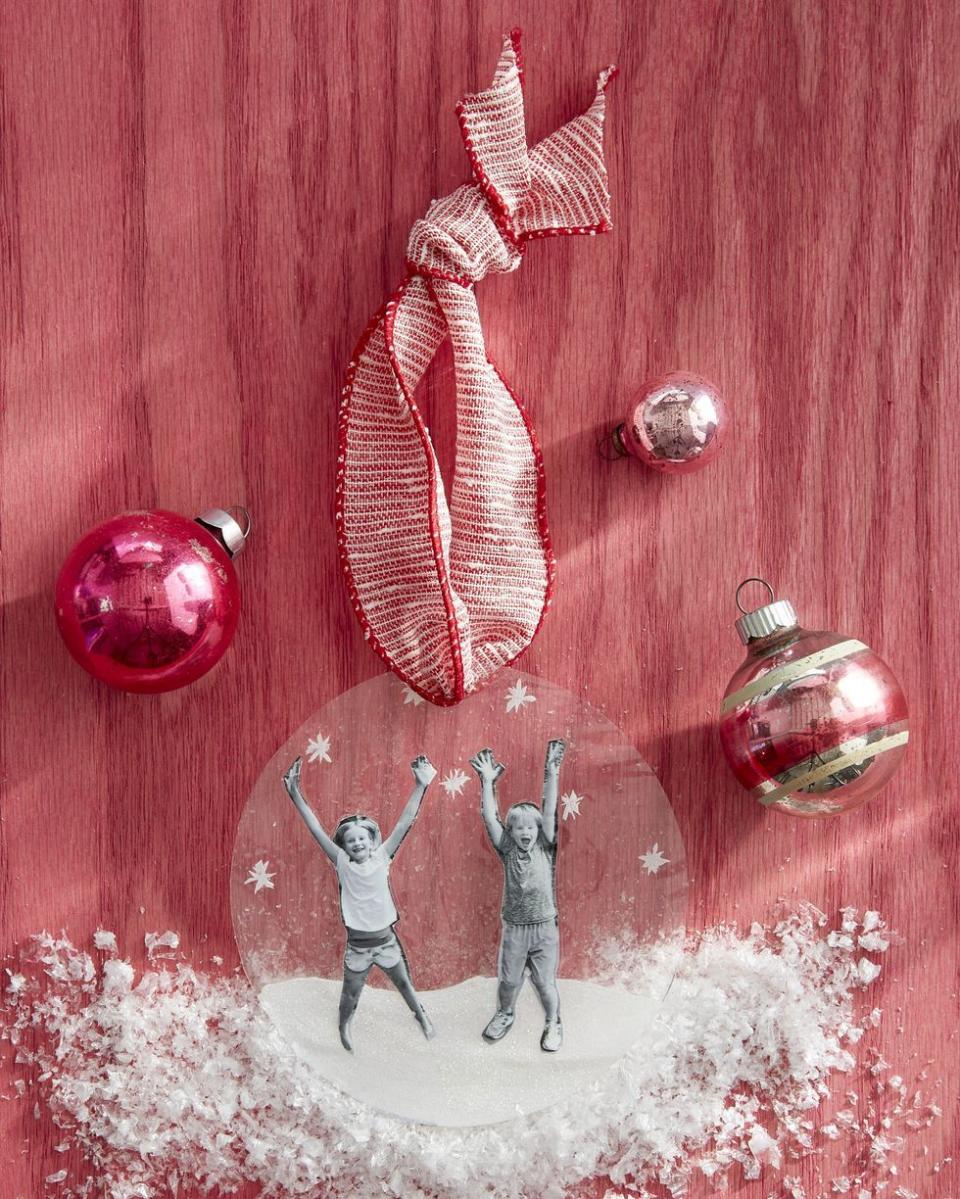
Glistening Snow Ornament
A perfect gift for the grands, this ornament places the kids inside a wintry wonderland of sparkling snow.
To make: Cut out photographs. Cut out snow and snowflakes from glittery craft paper. Set imagery on one sheet of laminating paper. Top with a second sheet and run through the laminating machine. Cut out ornament to desire shape. Punch a hole in the top; thread a ribbon through the hole to hang.
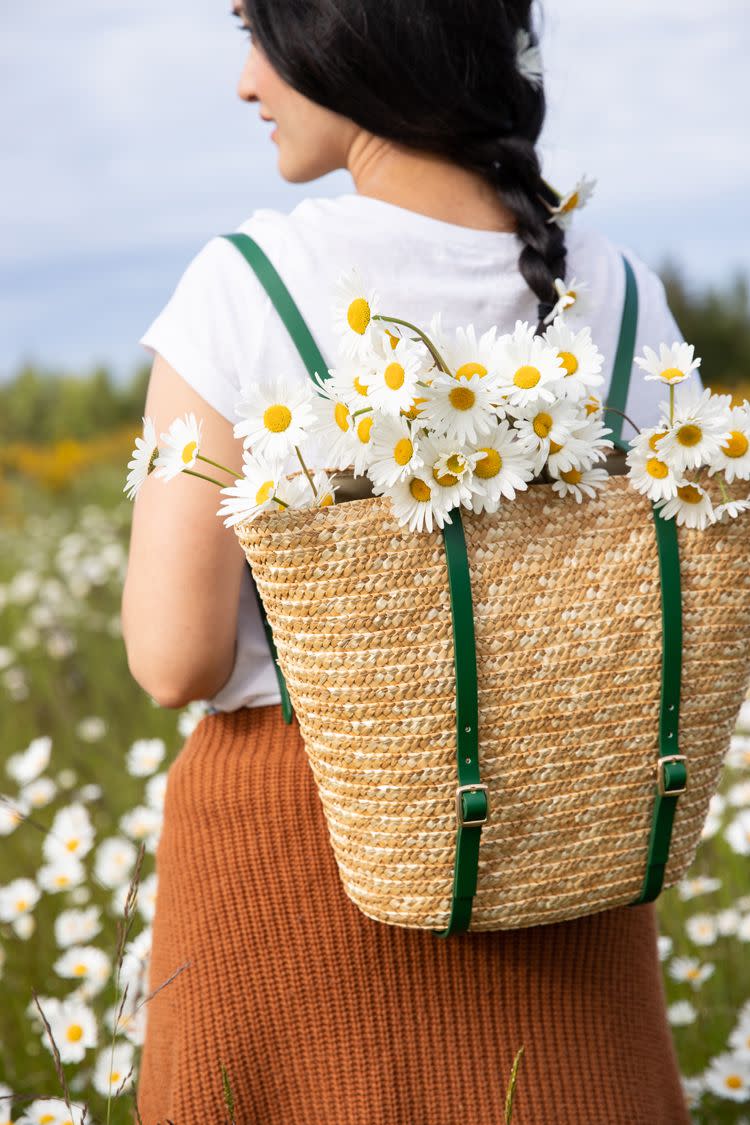
DIY Basket Backpack
Come springtime, the gardener on your list will love filling this stylish, no-sew pack with pretty flowers.
Get the tutorial at Delia Creates.
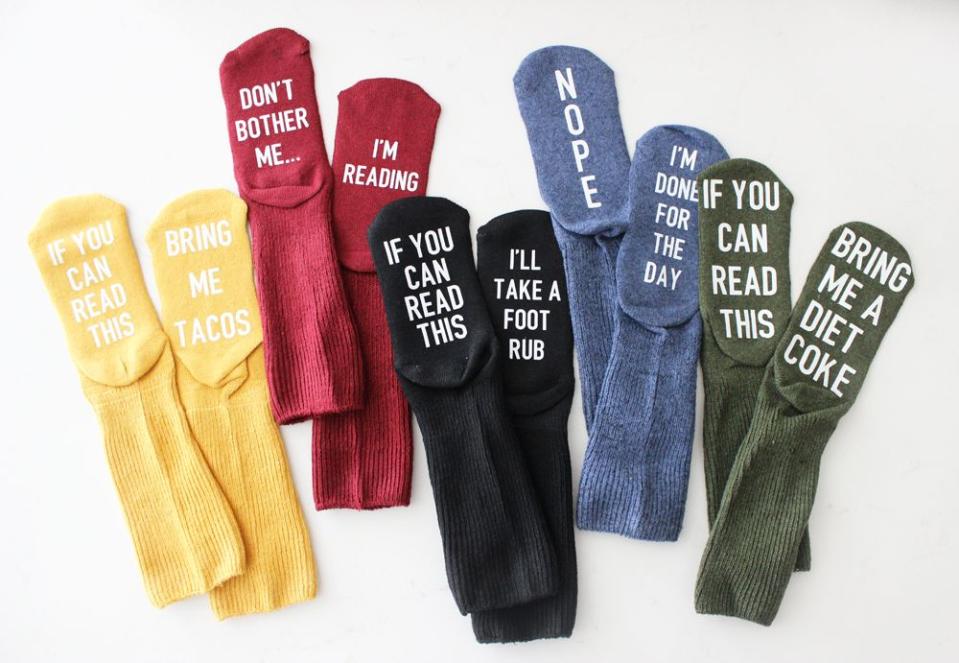
DIY Funny Socks
Thanks to this genius iron-on idea, socks are suddenly the most amusing Christmas gift you could get.
Get the tutorial at Pretty Providence.
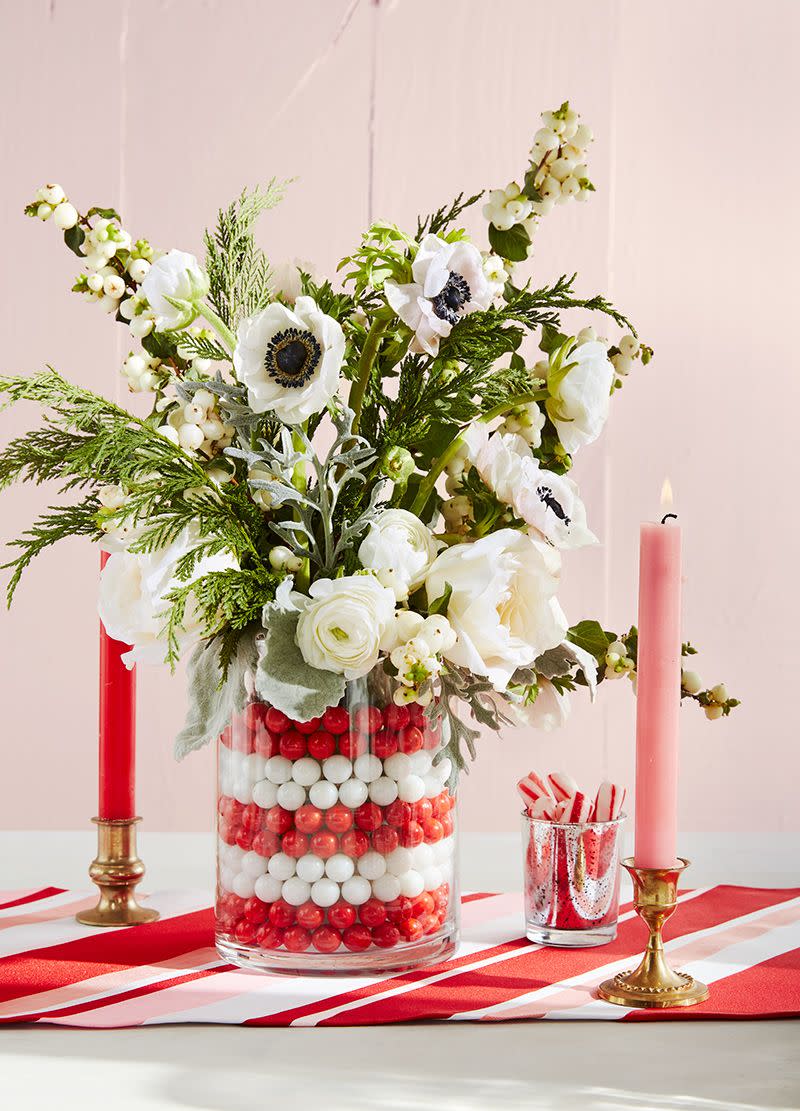
Marble Vase
Talk about a great hostess gift! Place a small pillar vessel inside a larger vase, and fill the gaps between the two with red and white marbles. Contrast the colorful stack with anemones, garden roses, and evergreen sprigs.
DIY Fleece Blanket
Give the gift of warmth this Christmas with a cozy fleece blanket you can make yourself.
Get the tutorial at It's Always Autumn.
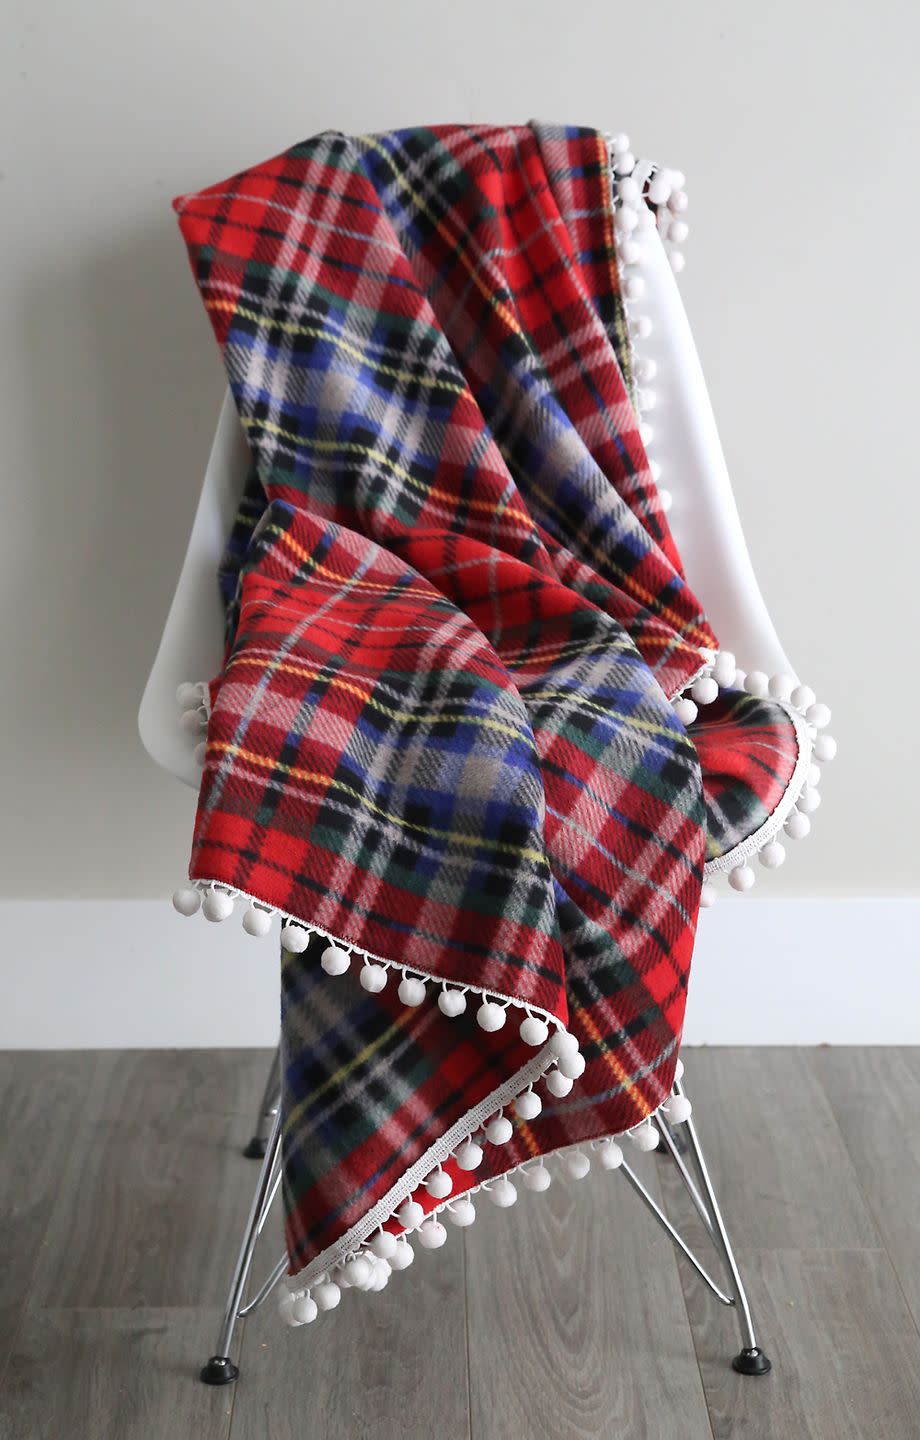
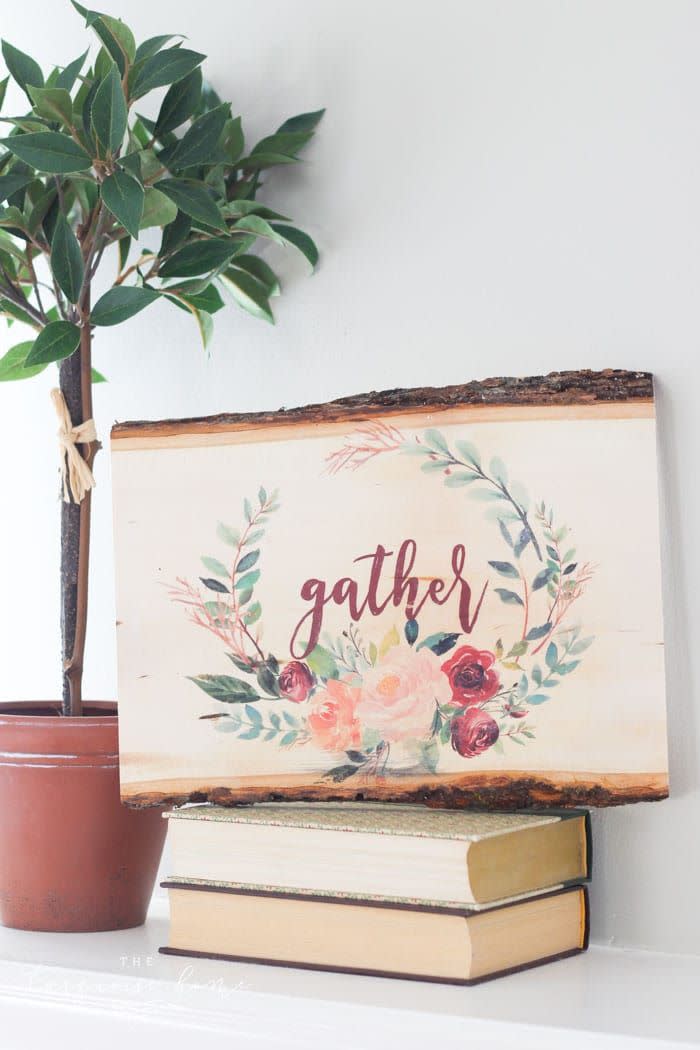
Photo Transfer Art
Add some art to her home with this blogger's simple photo transfer tutorial.
Get the tutorial at The Turquoise Home.
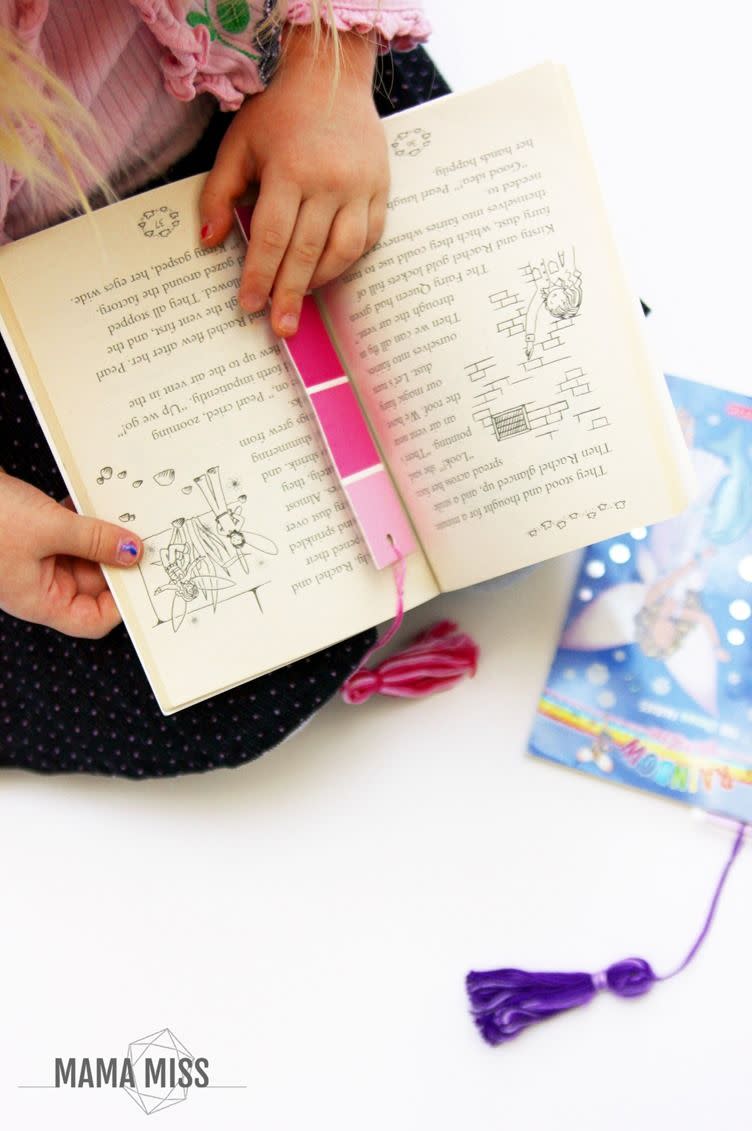
Paint Chip Bookmark
Leftover paint swatches turn into cute and colorful bookmarks. Bonus points for personalizing in their favorite color!
Get the tutorial at Mama Miss.
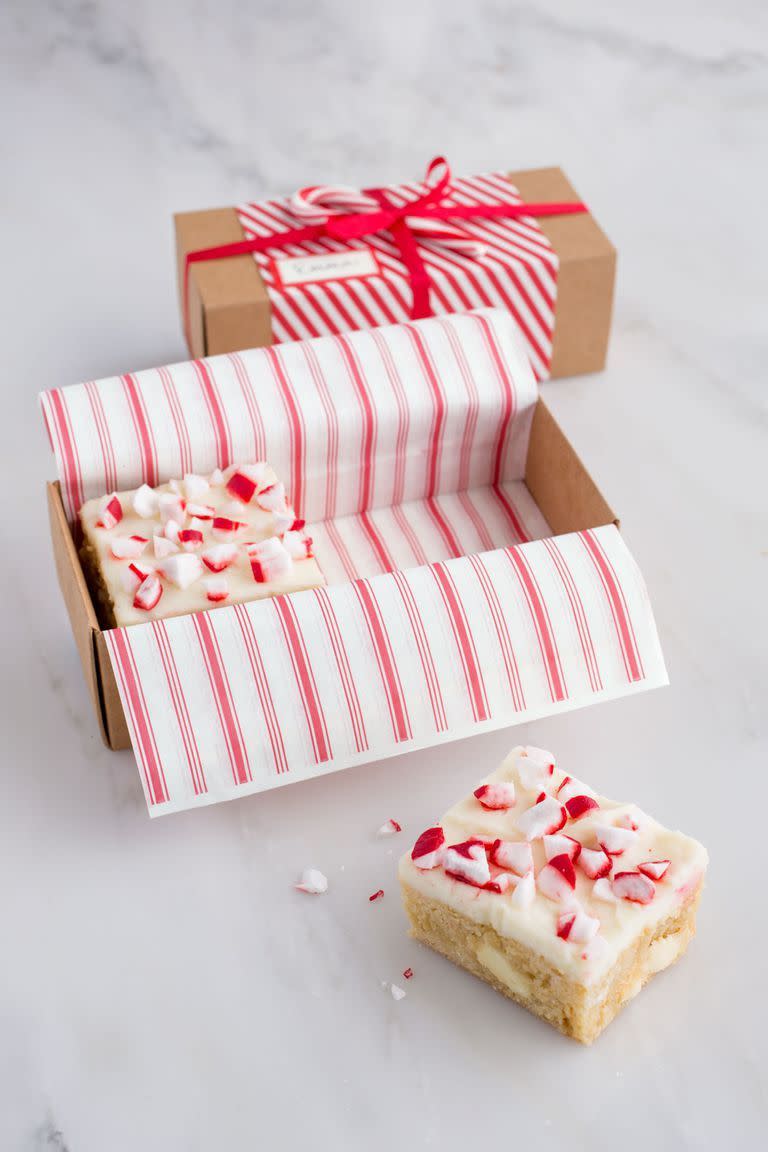
Peppermint Blondies
Staying with relatives this Christmas? Any hostess will be grateful for a box of peppermint blondies as a treat for opening her home.
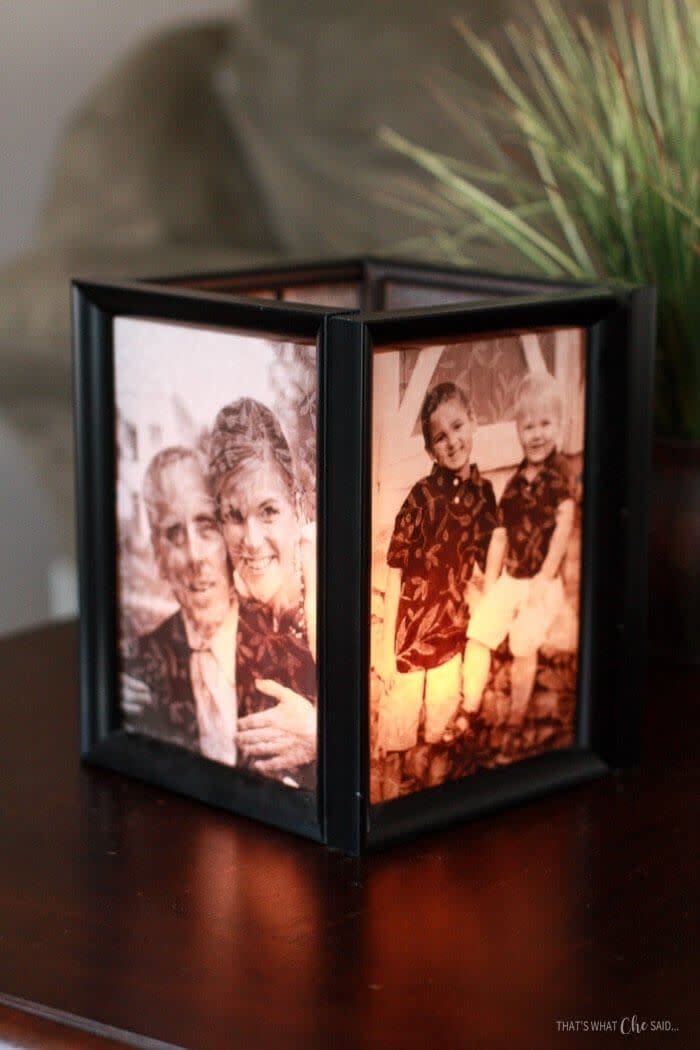
Personalized Luminaries
Light up someone's Christmas with this personalized luminary.
Get the tutorial at That's What Che Said.
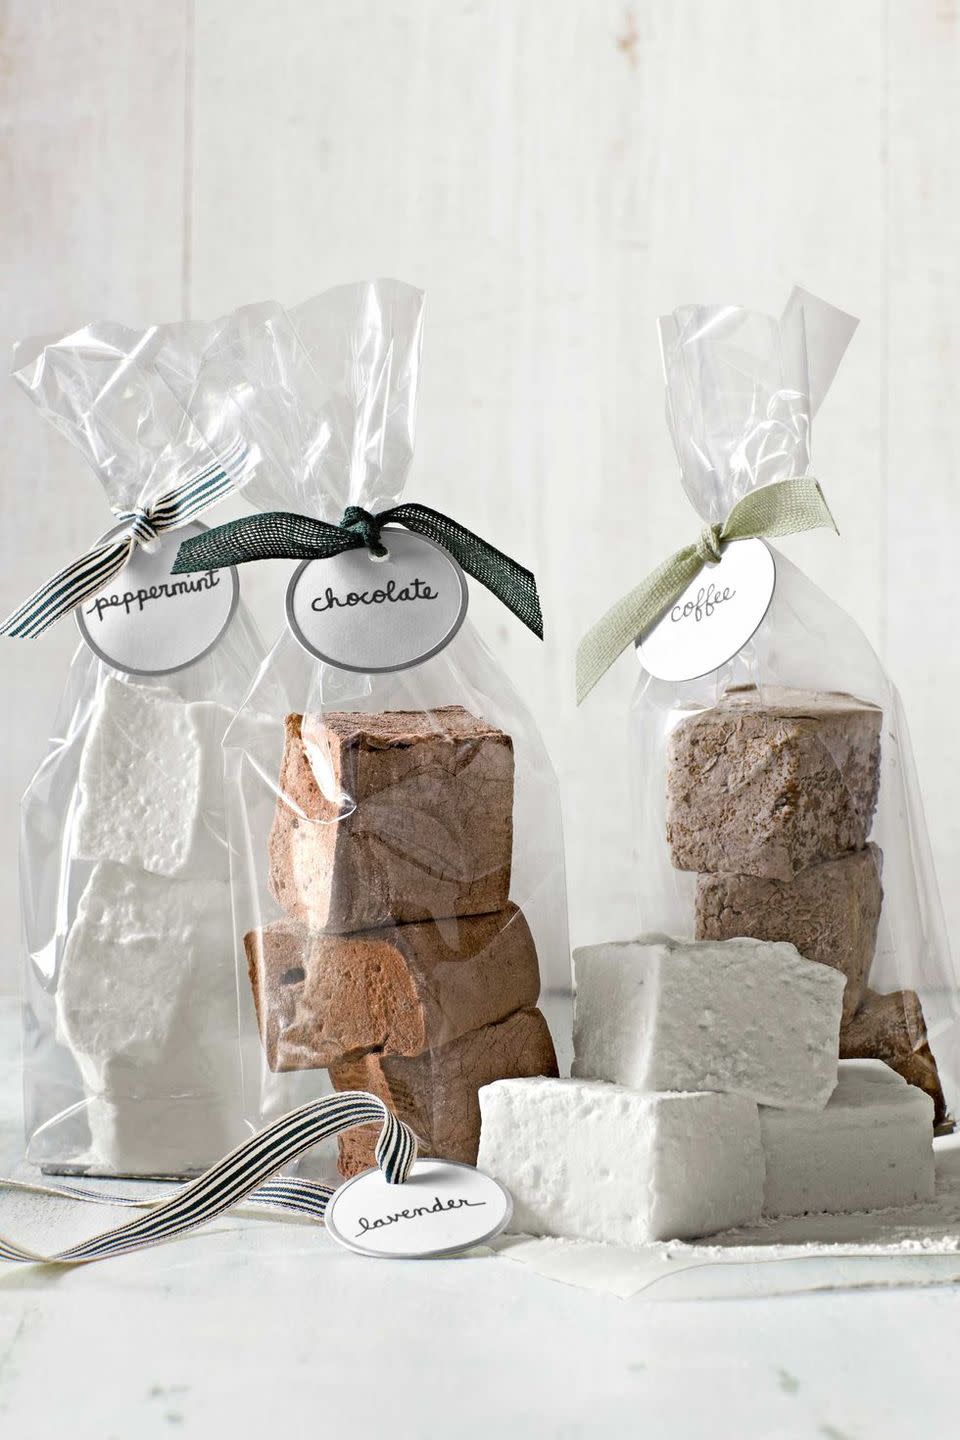
Gourmet Marshmallows
Make Christmas presents for a crowd by baking a batch of these gourmet marshmallows, then packaging them in a glassine bag.
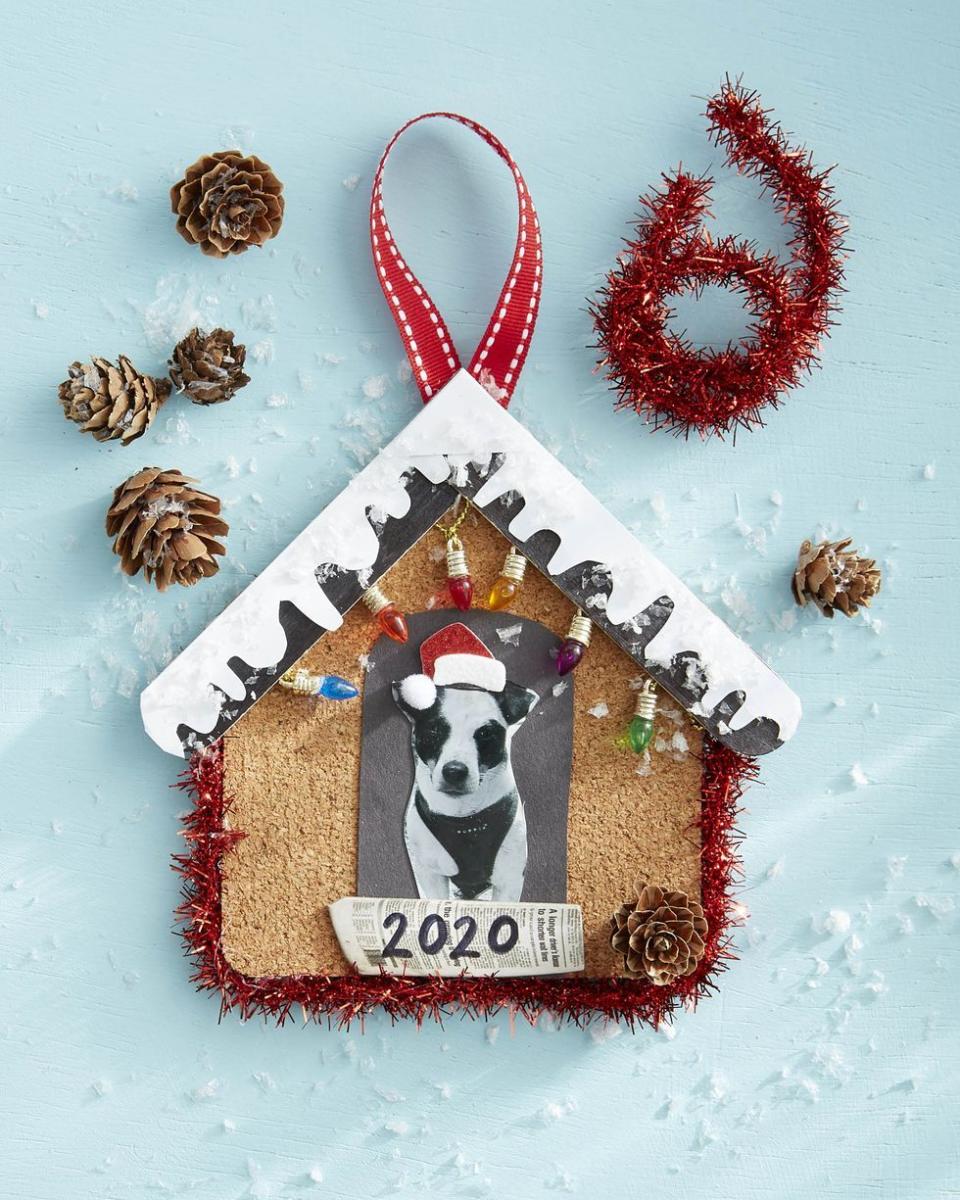
In the Doghouse Photo Ornament
There isn't much that kids love more than their pooch, so why not make them a special ornament this year that celebrates the object of their affection?
To make: Cut a piece of cork to the shape of a small doghouse. Cut out a black piece of craft paper to resemble the doghouse door; glue a picture of the dog to the door. Glue to the cork. Trim two tongue depressors to the size needed to create a roof, overlapping trimmed ends at the point. Paint tongue depressor black. Cut snow from white craft paper and glue to roof. Glue mini craft lights to the back of the roof. Glue roof to the top of the cork house.
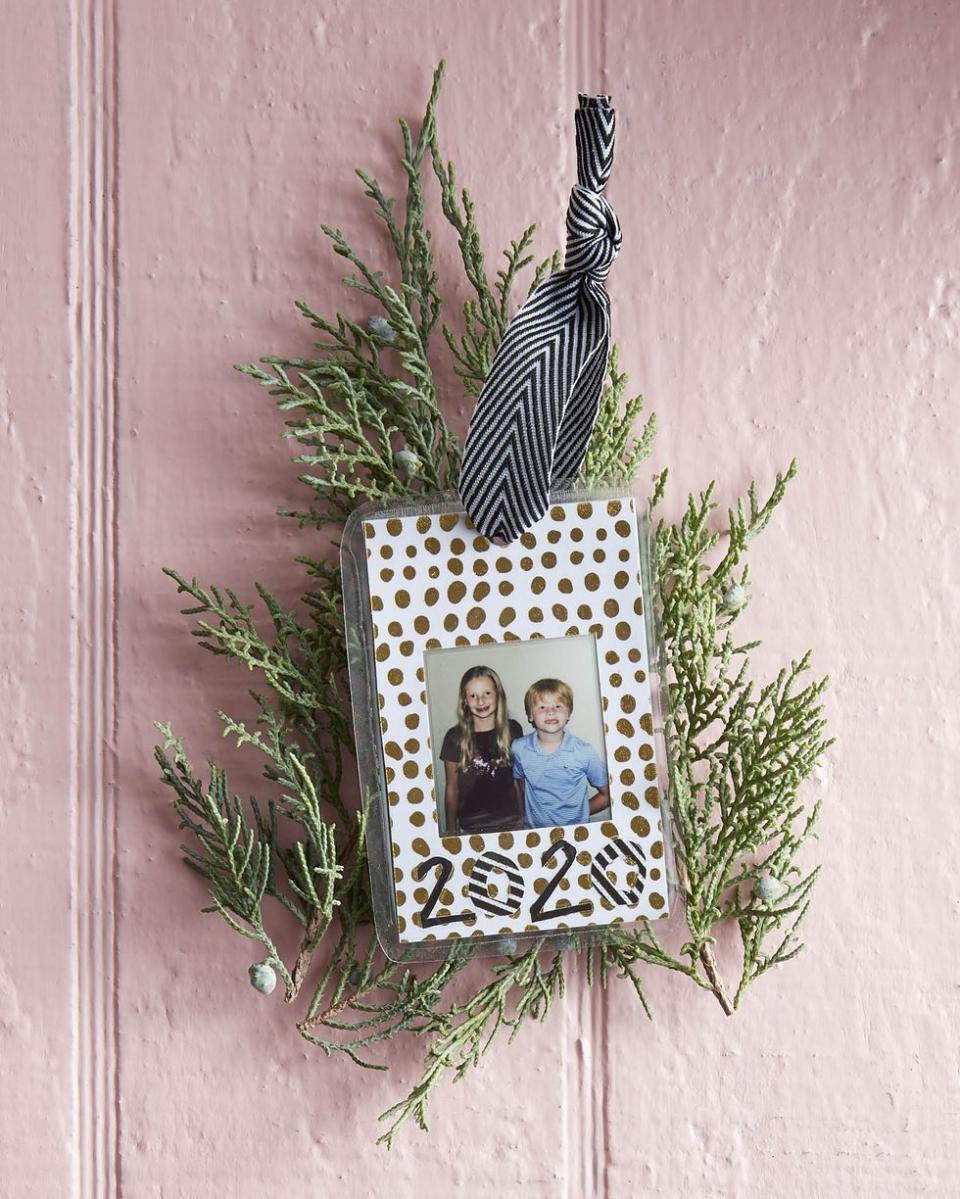
Laminated Portrait Ornament
Long-lasting thanks to lamination, this ornament freezes a moment in time. Drop it in the mail to show far-flung relatives how big the littles are getting.
To make: Cut two pieces of decorative craft paper to desired size. Cut a hole (it can be any shape) in one piece of the craft paper that is just smaller than the photo. Tape the photo over the opening. Tape the second piece of paper to the back with double-stick tape (this hides the messy back). Use sticker numbers or cut out numbers from craft paper and glue them to the paper below the picture. Run the ornament through a laminator; round edges. Punch a hole in the top; thread a ribbon through the hole to hang.
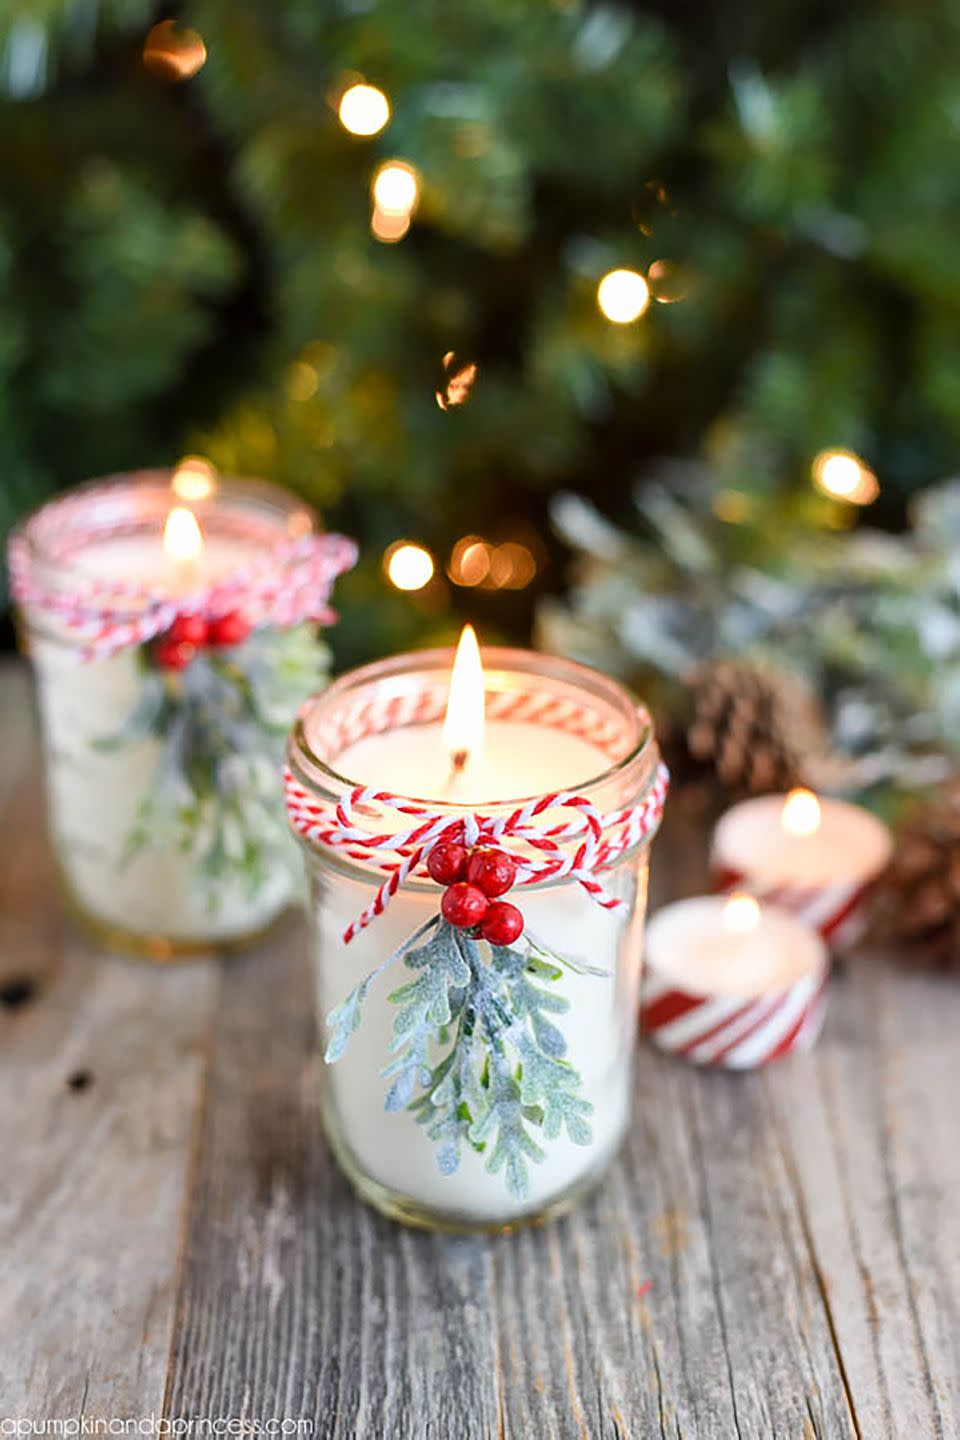
Mason Jar Candle Gift DIY
Everyone loves candles, and mason jars make ideal vessels.
Get the tutorial at A Pumpkin and a Princess.
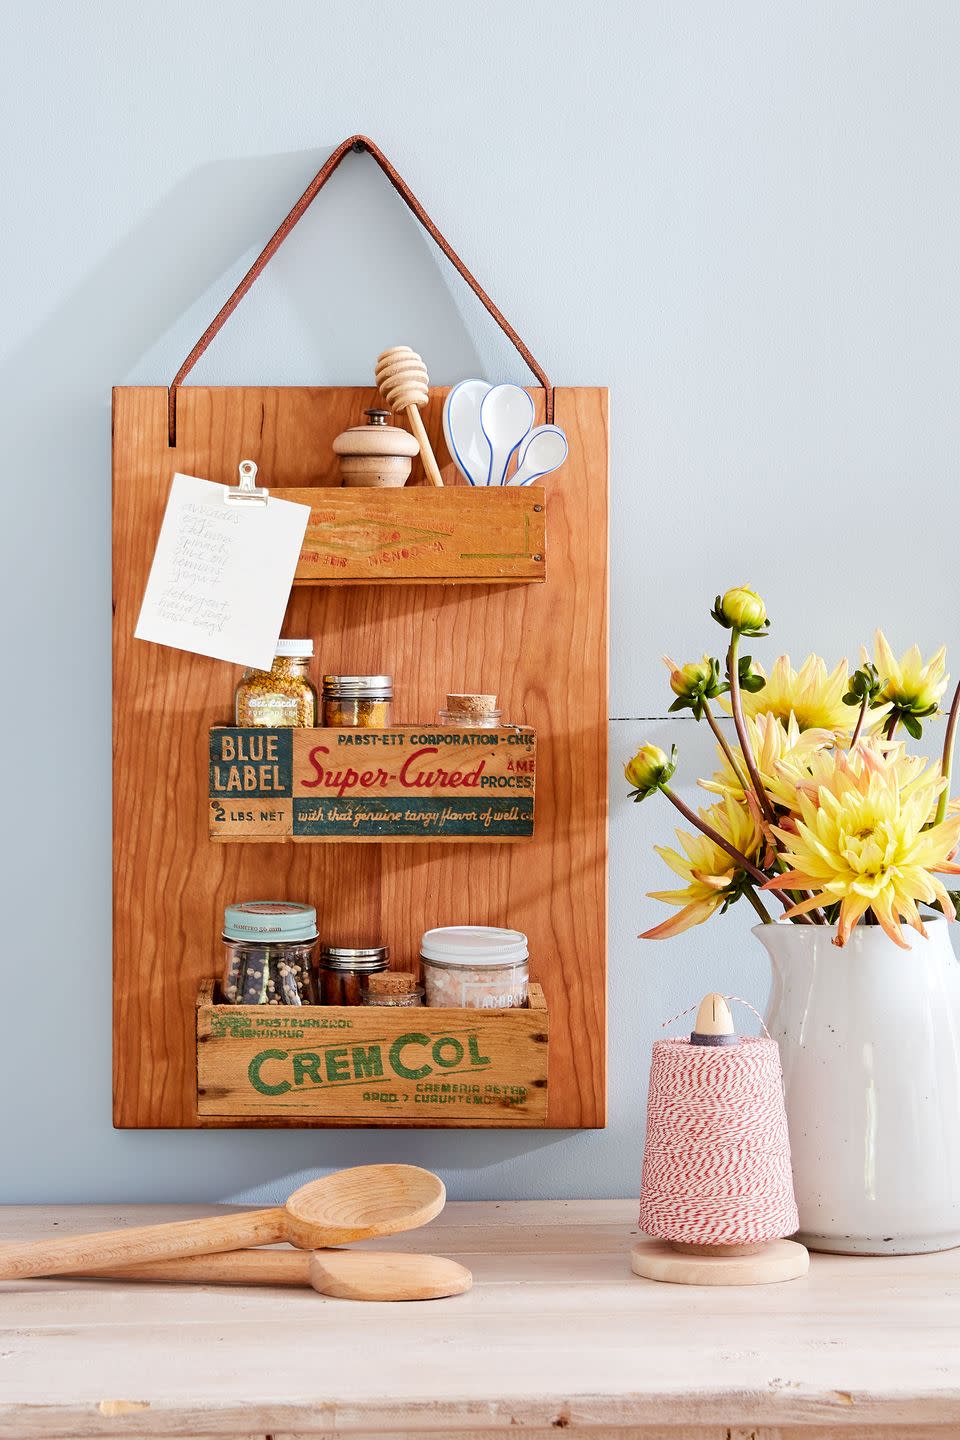
Cutting Board Spice Rack
Repurpose an old cutting board by using screws to attach small wooden cheese boxes to a rectangular cutting board. Then add a leather strap for hanging.
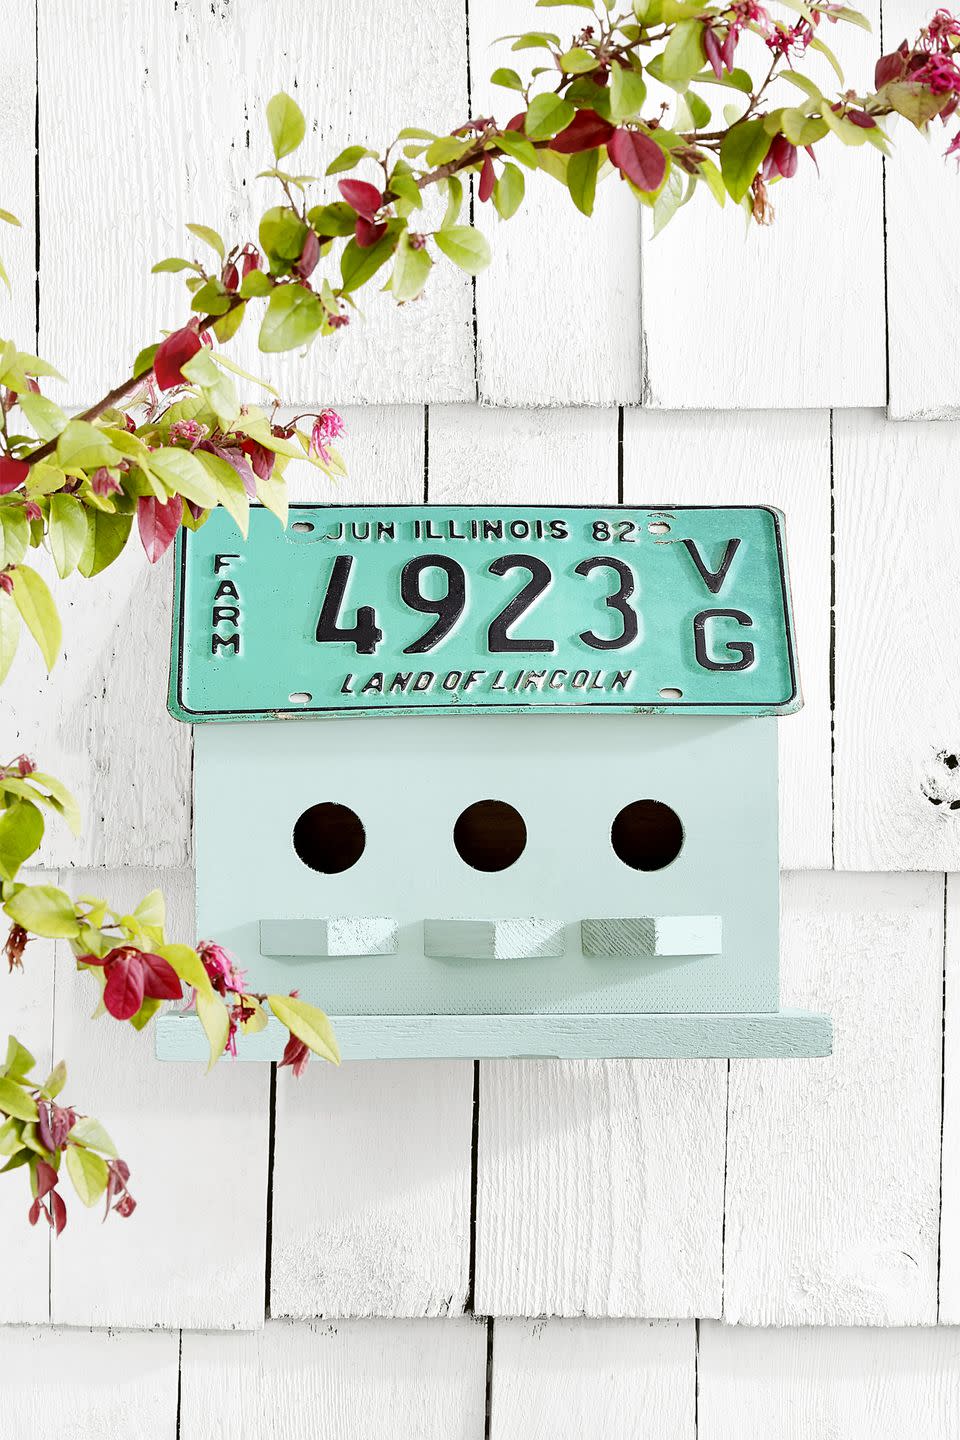
Vintage License Plate Birdhouse
Old license plates also make a one-of-a-kind roof for your favorite birdhouse. Simply use hot glue or a screw to attach them to the little home.
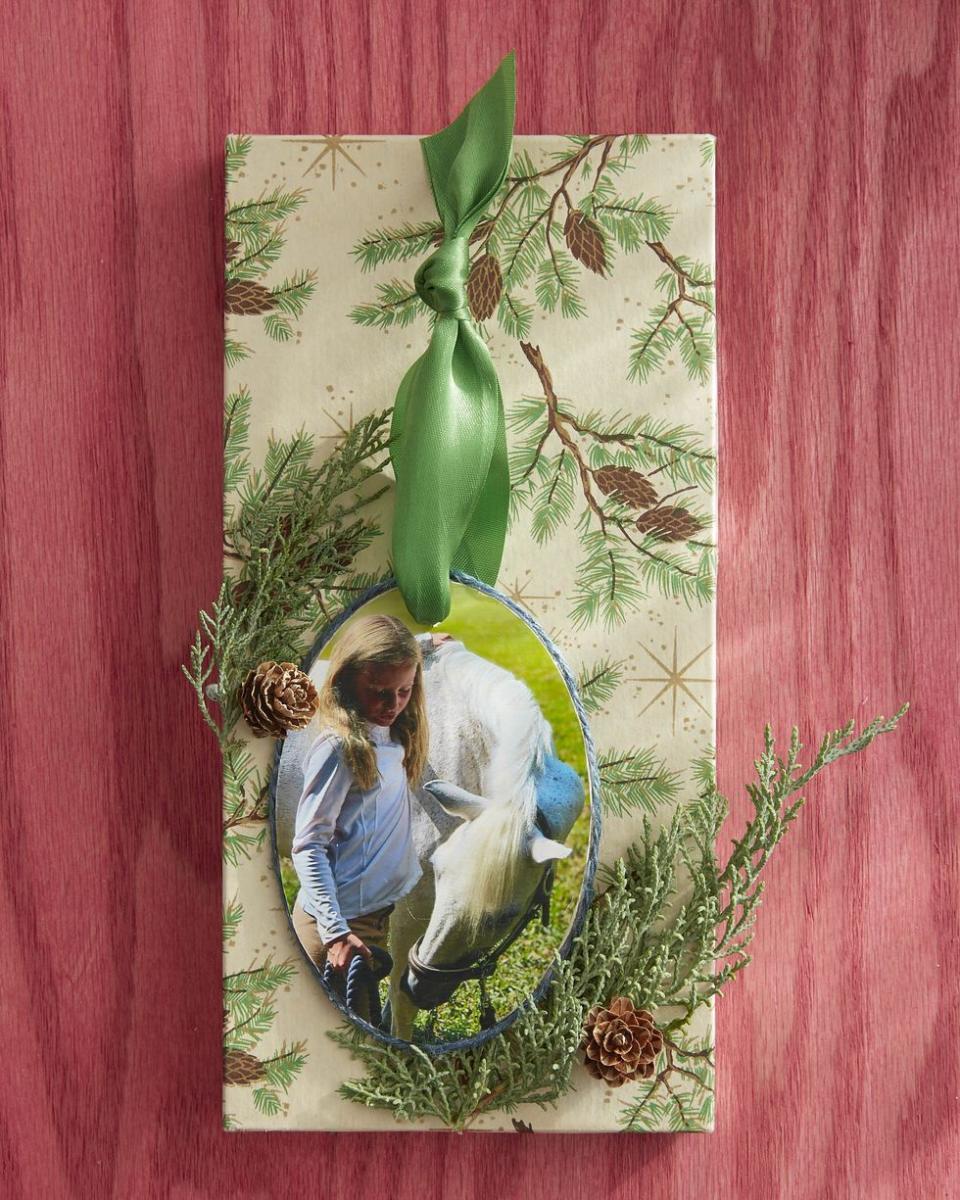
Celebrate Their Passions Ornament
From horses to football, baseball to doll collecting, no matter what they love they'll adore getting a nifty ornament from you saluting it.
To make: Mod Podge a photograph to an oval wood crafting blank. Once dry, attach a length of felt or twine to the edge with hot glue. Use an awl or small drill bit to create a hole in the top; thread a ribbon through the hole to hang.
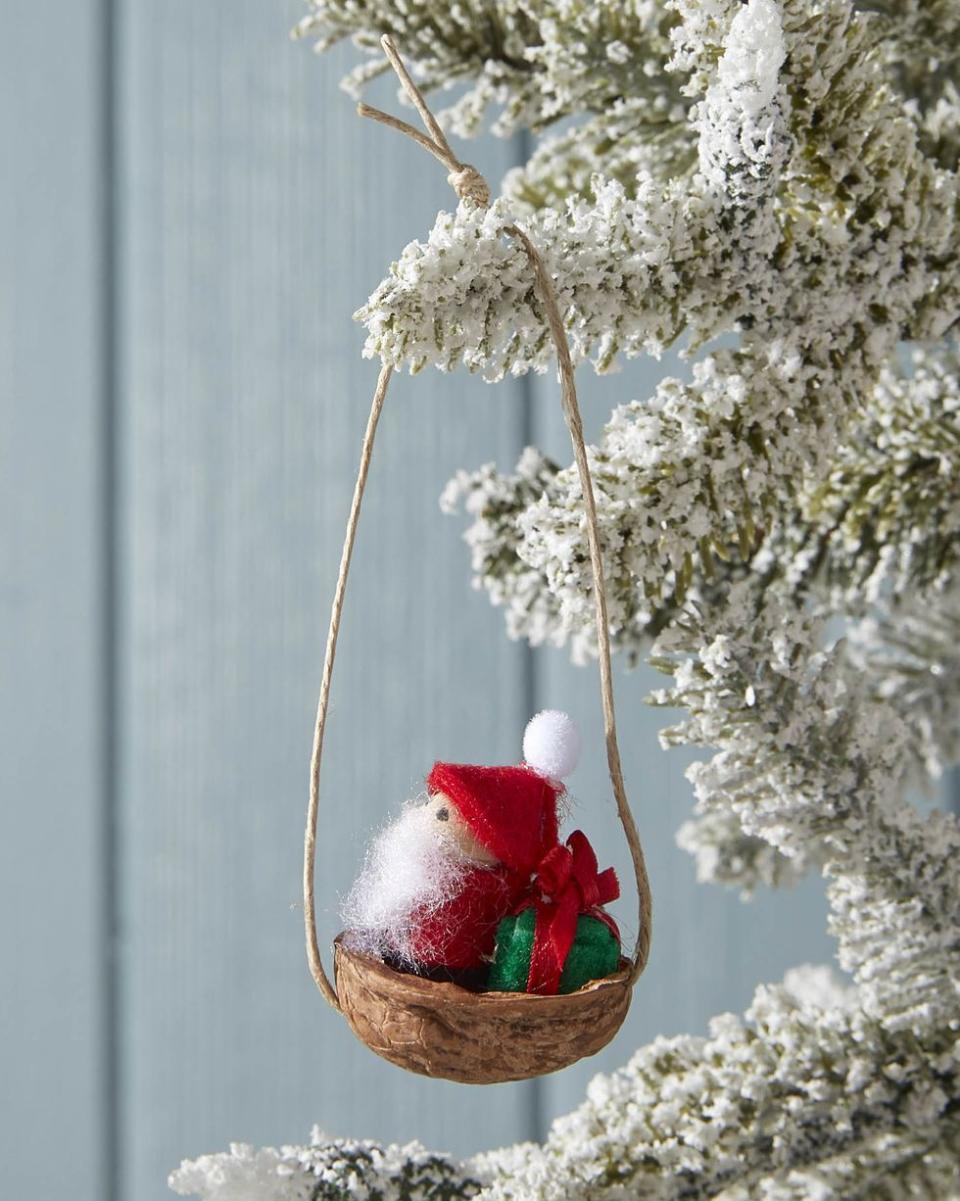
Mini Santa Sleigh Ornament
No matter who you give this ornament to, they're sure to go nuts for the adorbs walnut shell sleigh.
To make: Draw eyes on the face of a small wooden peg doll with a fine-tip black marker. Wrap the body of the doll in red felt; holding it in place with hot glue. Create a small hat from red felt, gluing it to the doll's head with hot glue. Attach a mini pom pom to the hat. Cover a mini wooden cube in green felt, holding it in place with hold glue. Tie a ribbon around the present. Drill small holes on either end of half of a walnut shell. Thread a piece of thin twine through each hole, securing it on the inside of the shell with hot glue. Knot the twine at the top for hanging. Use hot glue to secure Santa and the present in the shell.
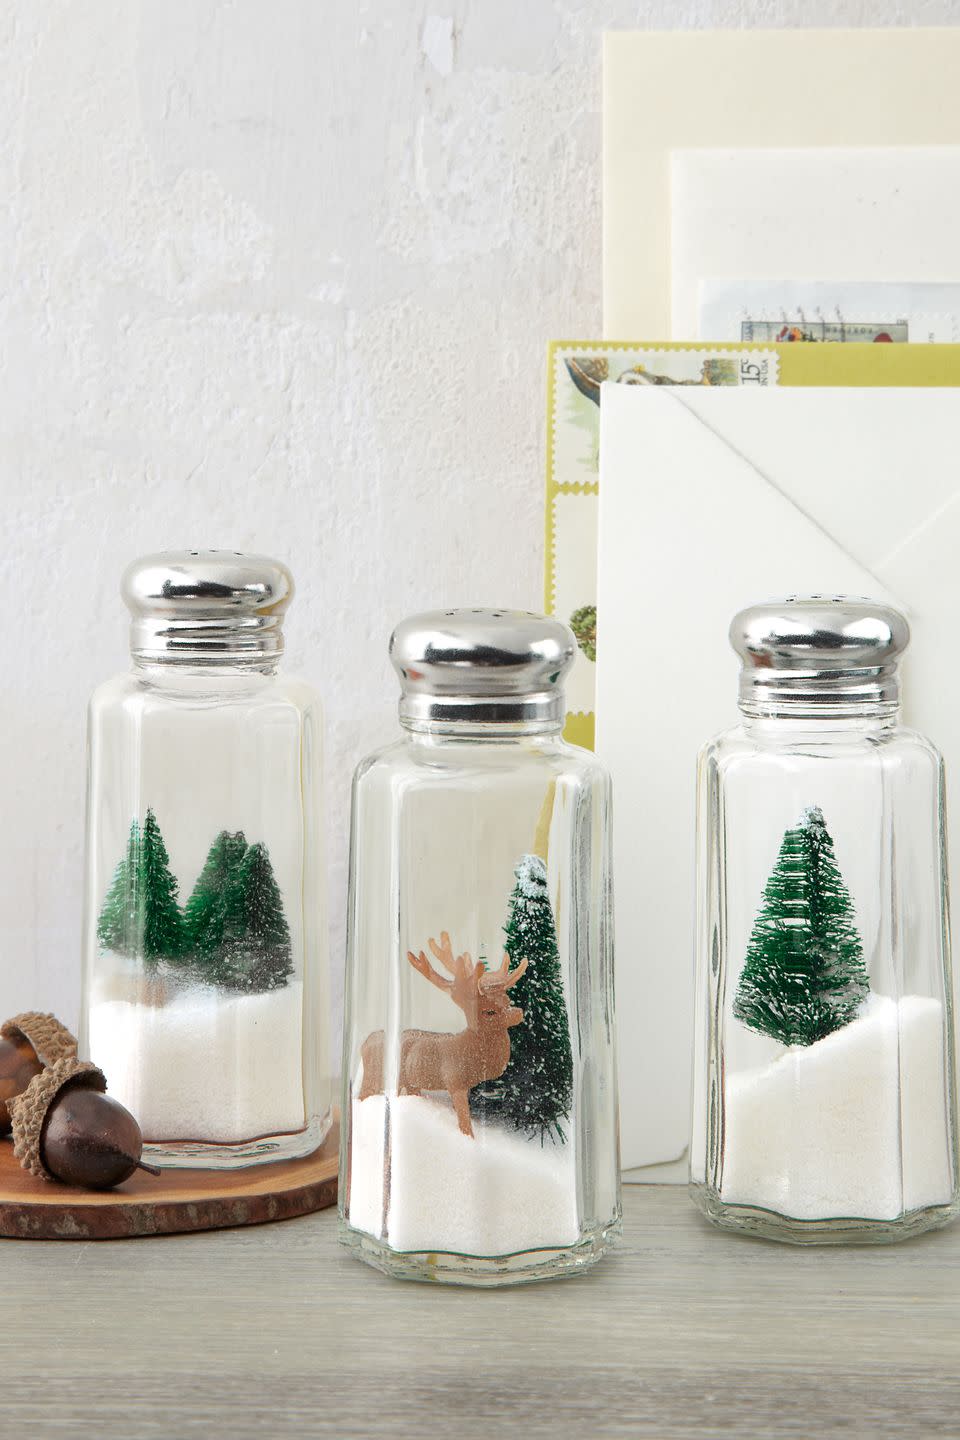
Holiday Shakers
Here's one Yuletide idea that's definitely worth its salt: Turn under-a-dollar shakers into mini winter wonderlands by nesting toy evergreens and deer atop iodized "drifts."
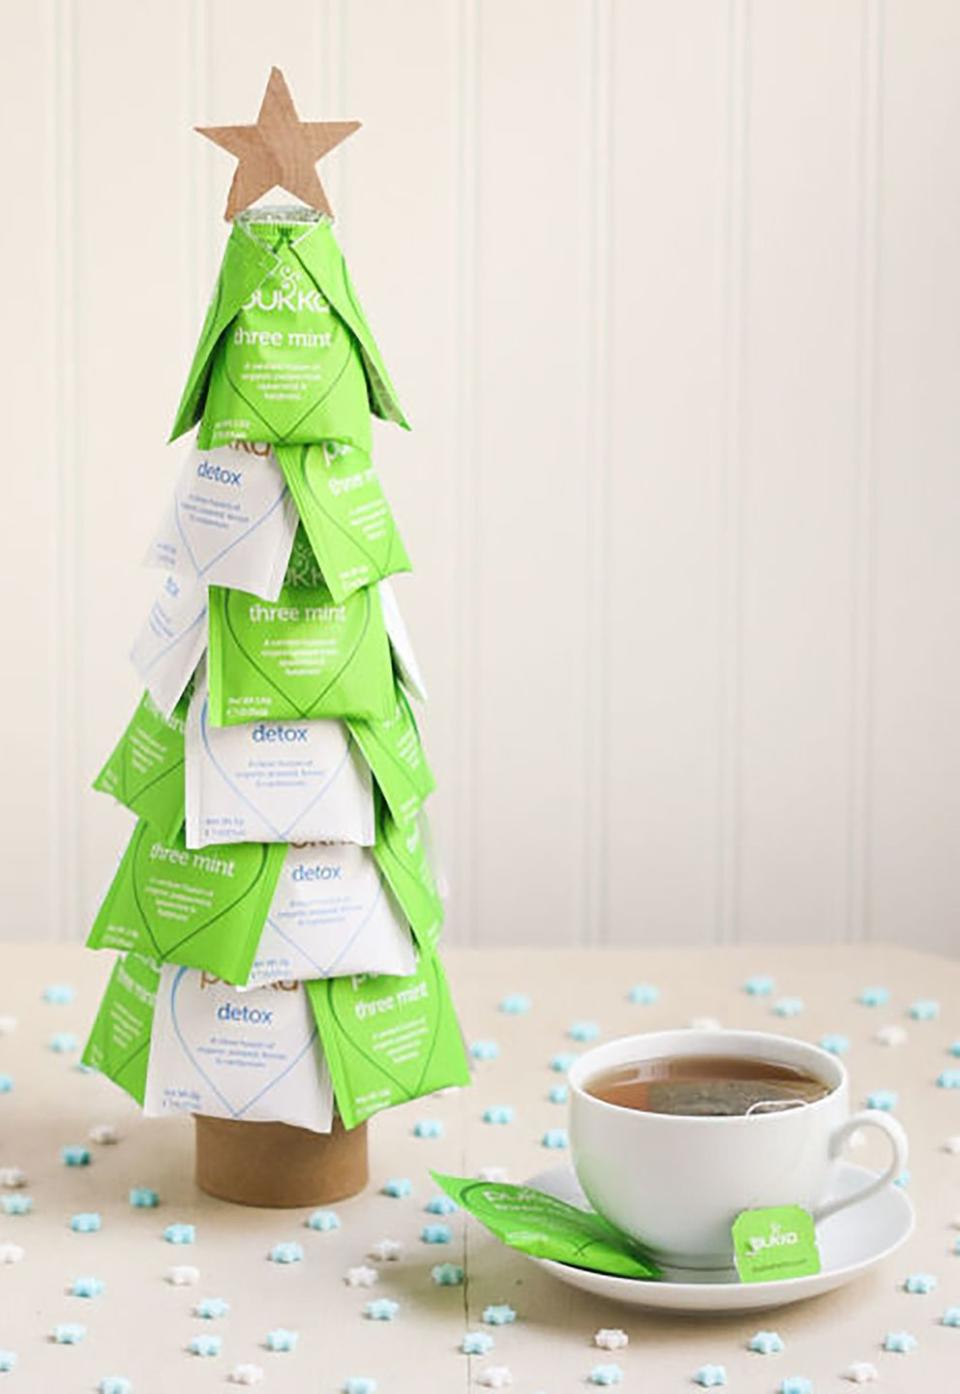
Christmas Tea Tree
Arm yourself with a glue gun, some tea bags, and a styrofoam cone, and you've got yourself the perfect gift for the tea-lover in your life.
Get the tutorial at Thirsty for Tea.
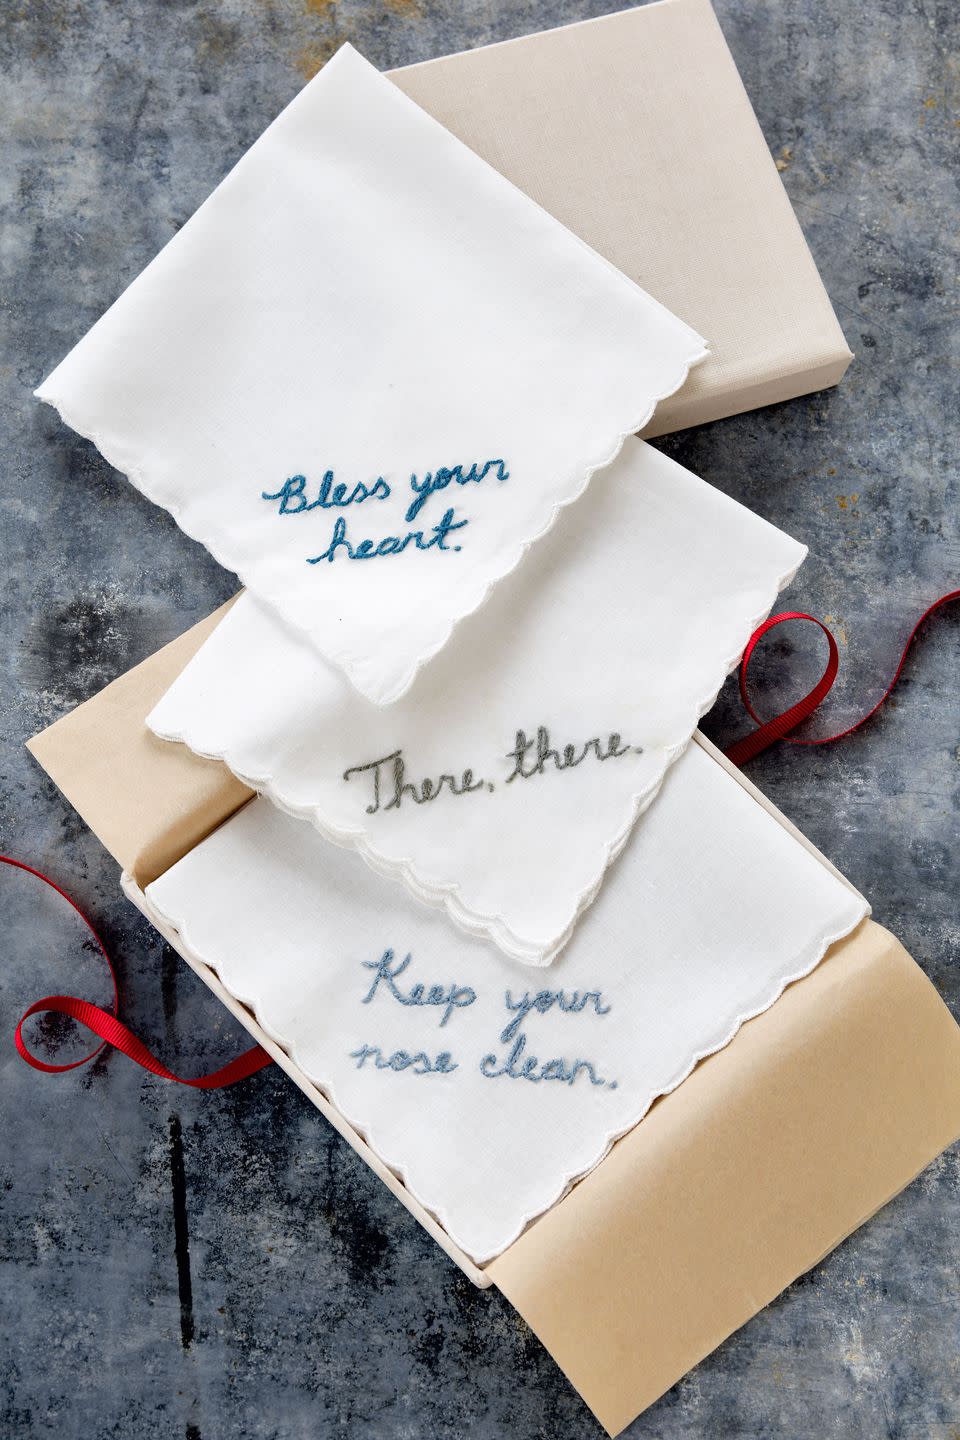
Witty Embroidered Handkerchiefs
Lend bespoke charm to basic cotton hankies. For each, handwrite the phrase of your choice in the bottom-right corner with a water-soluble marker. Then embroider over the letters using a standard stem stitch (check out a quick tutorial to learn how). Remove any stray marks with a dab of water.
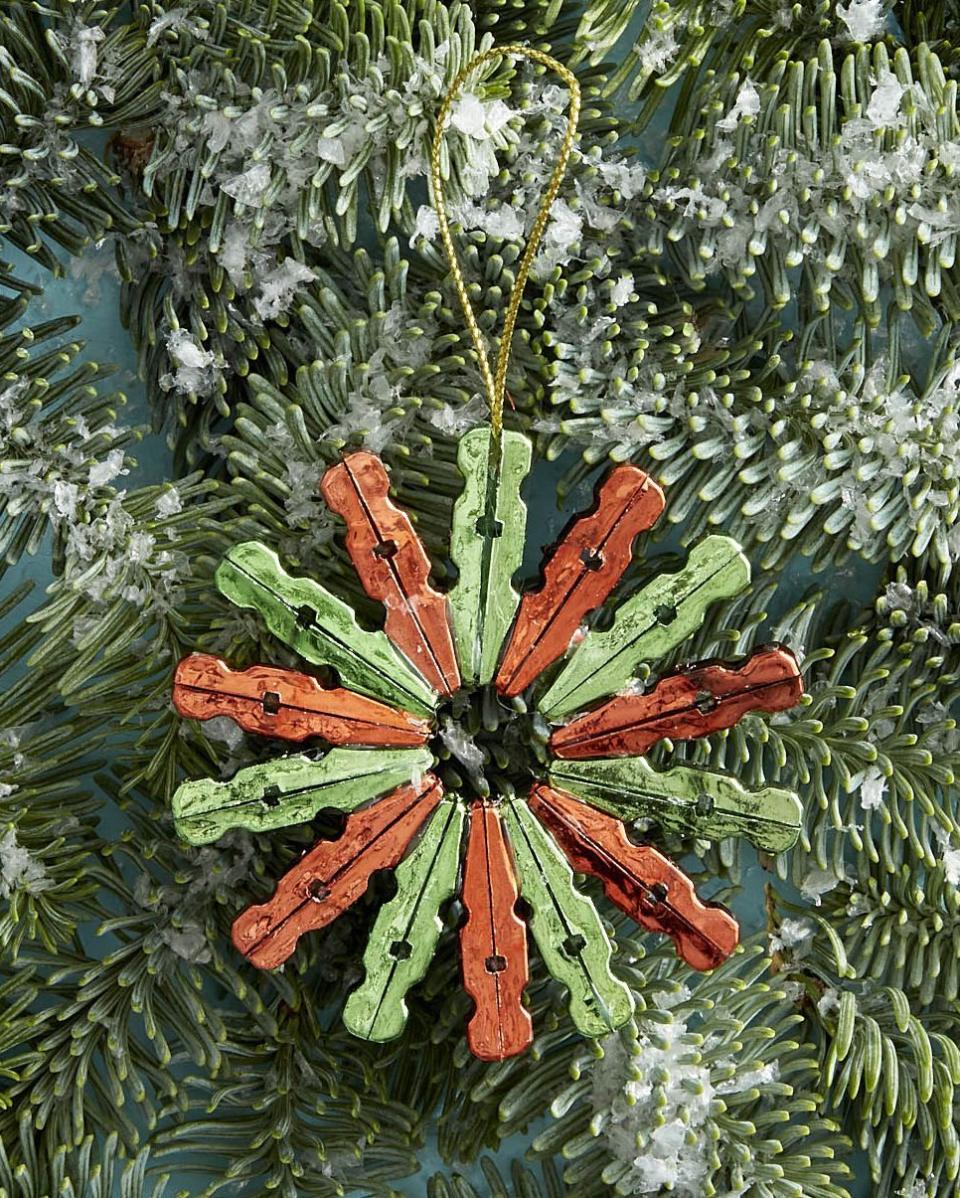
Clothespin Ornament
If they're even a little bit country they'll love this homespun Christmas ornament, crafted from mini clothespins. They make especially sweet teacher gifts, since they're easy enough kids can lend a hand with them.
To make: Remove the springs from 14 mini clothespins. Turn the pieces from each clothespin around and glue them back to back. Glue the pins together to create a circular shape. Glue a piece of gold twine to one pin for hanging.
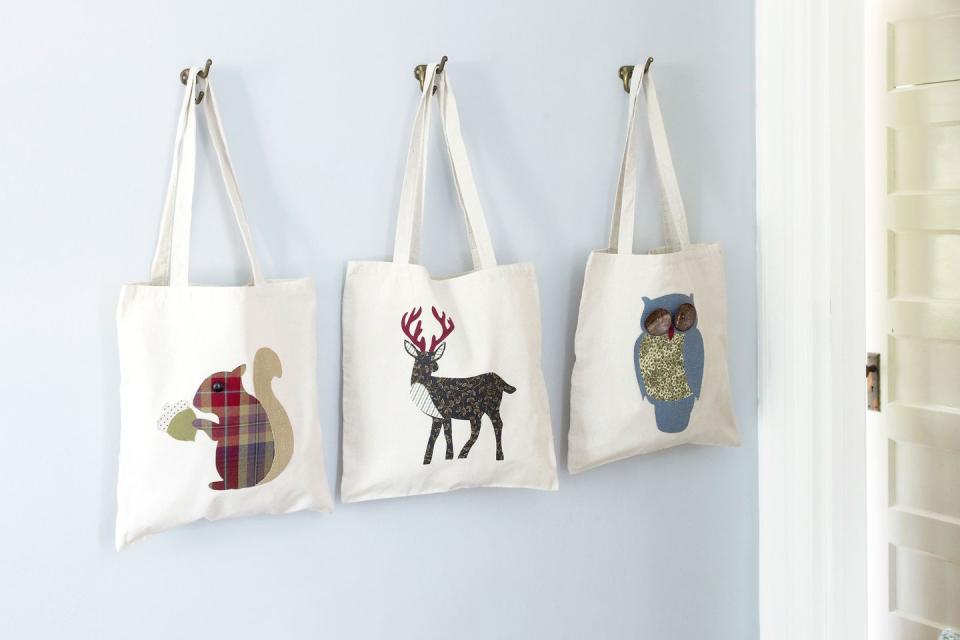
Animal Tote Craft
Here's how to turn a cheap canvas bag into a cute woodland-themed carryall:
Step 1: Print the animal template of your choice (Squirrel or Deer) and cut out. Using our photo as a guide, pick a mix of fabrics and place your template's pieces on the fabrics; trace and cut out.
Step 2: Next, trace the template's pieces onto iron-on adhesive and cut inside the lines so the adhesive shapes are slightly smaller than the fabric ones. Following the package instructions, iron adhesive to the back of fabric.
Step 3: Remove the adhesive's backing. Working pattern side up, center the animal's fabric body on the bag and iron in place. Follow with the other pieces of the animal, again using our photo for guidance. Finish by sewing on button eyes for the owl and squirrel.
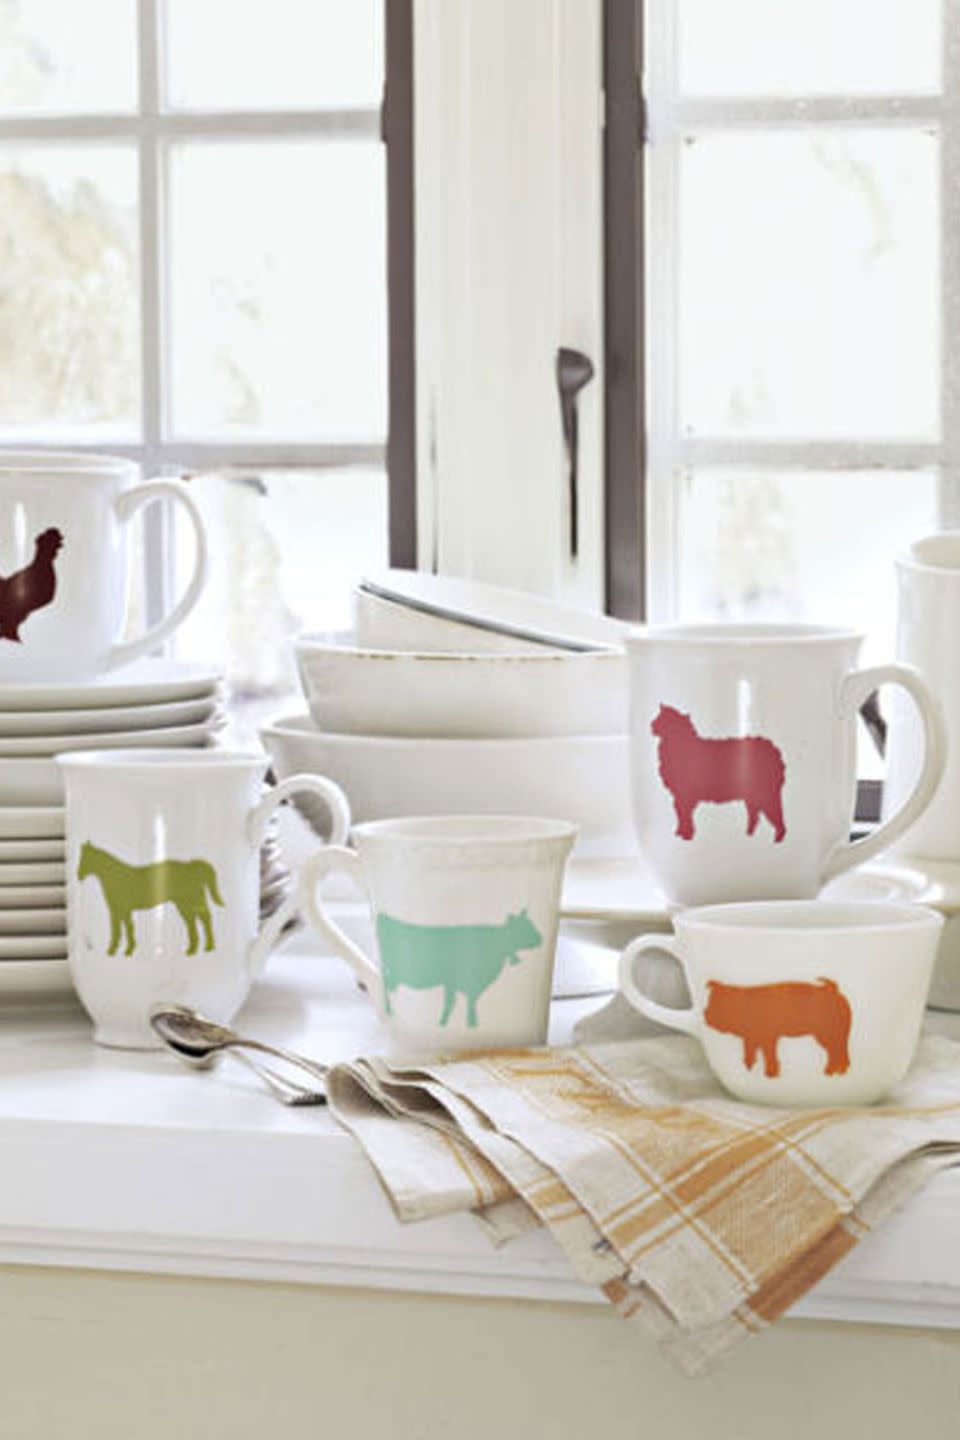
Stenciled Animal Mugs
Look no further than the nearest pasture for inspiration to dress up plain dishware. To duplicate these mugs, print and cut out animal shapes. Place each shape atop a small piece of contact paper and outline it in pencil. Cut out with a craft knife; then discard the paper inside the outline. Peel away the backing and affix the stencil to a clean, dry mug, making sure to center the image. Following the package directions, use a soft brush to fill in the outline with dishwasher-safe PermEnamel paint; let set for a few minutes. Carefully remove the contact paper, clean up any edges with a damp cotton swab, and allow the paint to cure for 10 days.
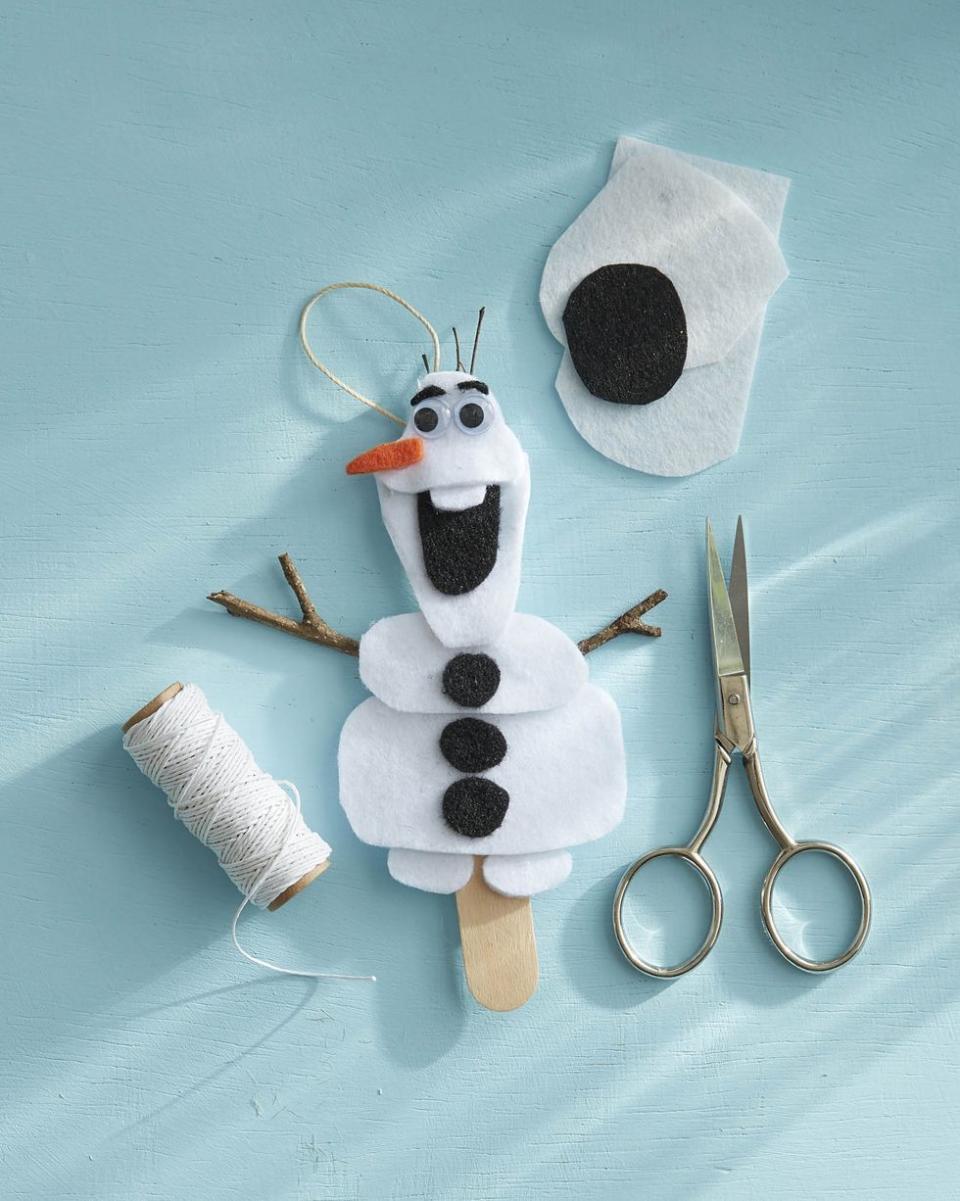
Felt Olaf Ornament
Your young ones will love this fuzzy ornament that represents the loveable, iconic snowman from the hit movie Frozen.
To make: Cut body shapes from white felt; attach to a tongue depressor with hot glue. Cut buttons, mouth and eyebrows from black felt; attach to body with hot glue. Glue mini googly eyes below the eyebrows. Cut a carrot nose from orange felt; attach below the eyes with hot glue. Glue mini twig arms and a piece of twine for hanging to the tongue depressor.
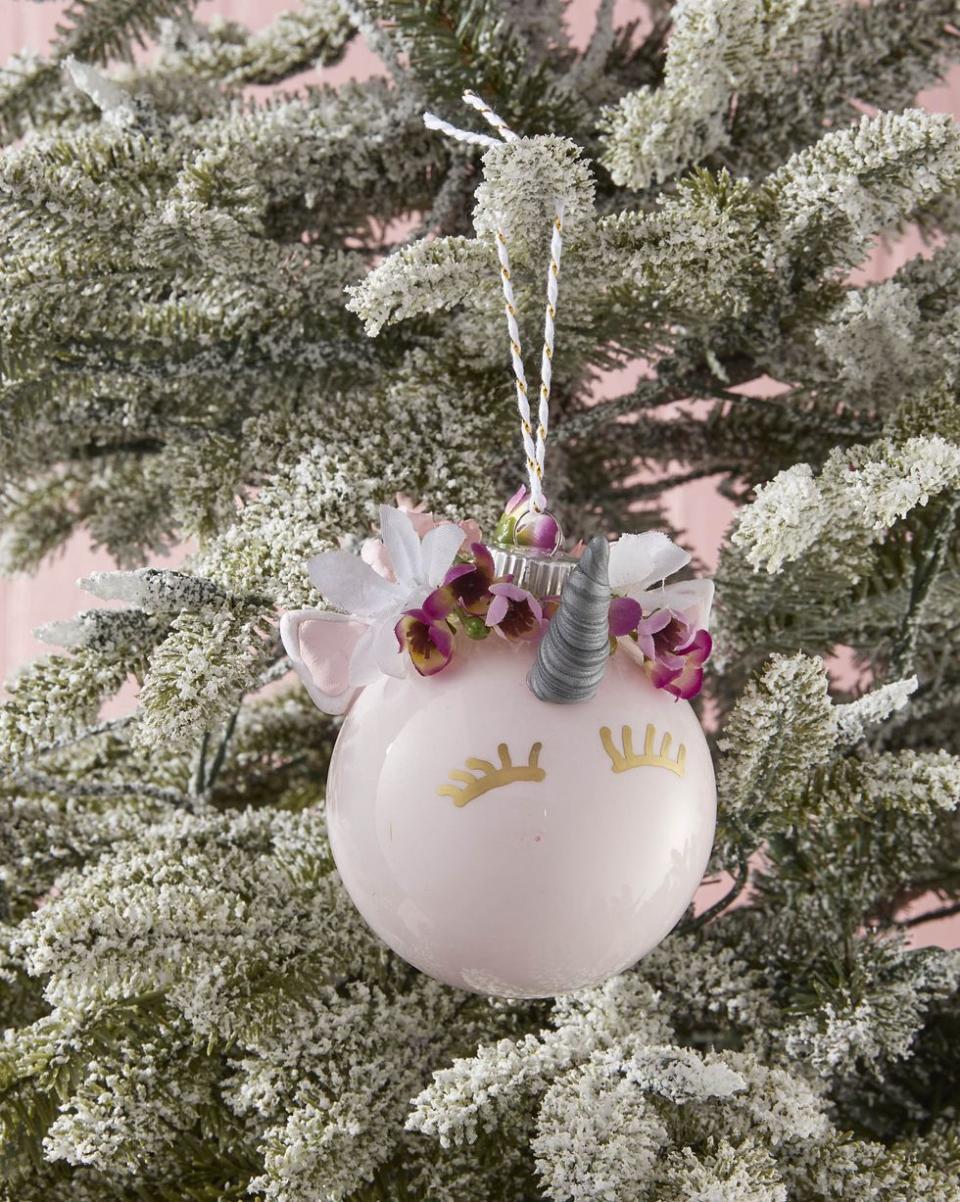
Unicorn Ornament
There aren't many little girls who wouldn't love to receive this unicorn ornament with a super-precious horn and ears made from sculpting clay.
To make: Remove the cap from a glass or plastic ball ornament. Lightly water down a small amount of light pink acrylic paint. Carefully pour the paint in the opening of the ornament. Rotate the ornament until the inside is fully covered with paint; pour out excess. Allow to dry then reattach cap. Press desired color sculpting clay into a silicone unicorn mold to create ears and horn; allow to dry completely. Attach a mini unicorn horn, ears, and fake flowers with hot glue. Draw eyelashes just below the horn with a gold paint pen.
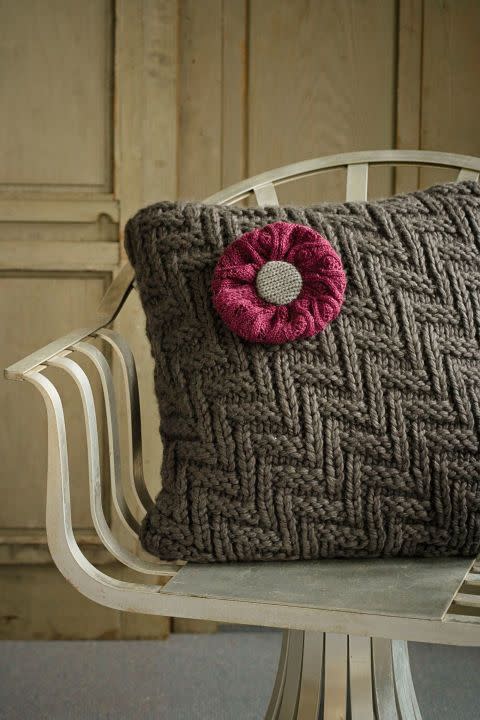
Pillow
To make this sham, you'll need an 18-inch square pillow insert and a large sweater, cut into two 19-inch squares. Sew the right sides of the wool together along the edges, leaving the bottom open. Turn right side out and insert the pillow form, then stitch the bottom closed. For the flower, cover a two-inch circle of card stock with a piece of a thin sweater; hot-glue to the circle's back. Next, fold a 3- by 20-inch strip of another sweater in half lengthwise. Glue the edges together, then sew a running stitch down the strip lengthwise along the glued seam. Once you've stitched the entire length, pull the thread to gather the fabric and knot. Hot-glue the gathered edge in a circle to the back of the card stock, then hot-glue a pin-back in the center and affix to the pillow.
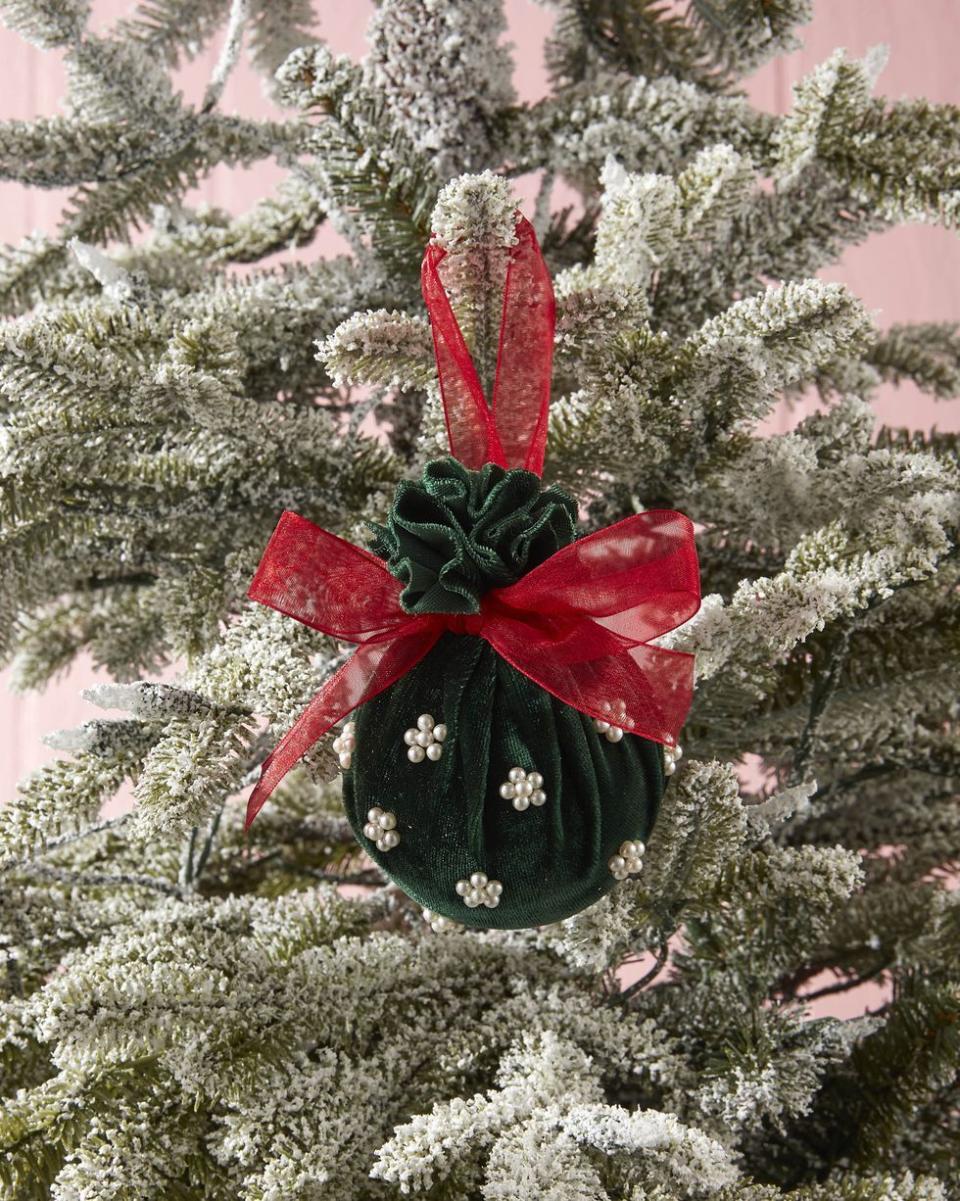
Velvet-Wrapped Ornament
The perfect sophisticated touch for that friend who favors cultivated over cute, this velvet ornament is sure to be a Christmas hit.
To make: Cut a square of velvet fabric. Wrap around a ball ornament, cinching it at the top. Tie a piece of ribbon around the cinch to hold closed and create a hanger. Tie a bow from the same ribbon and attach with hot glue. Attach small pearl craft bead with hot glue.
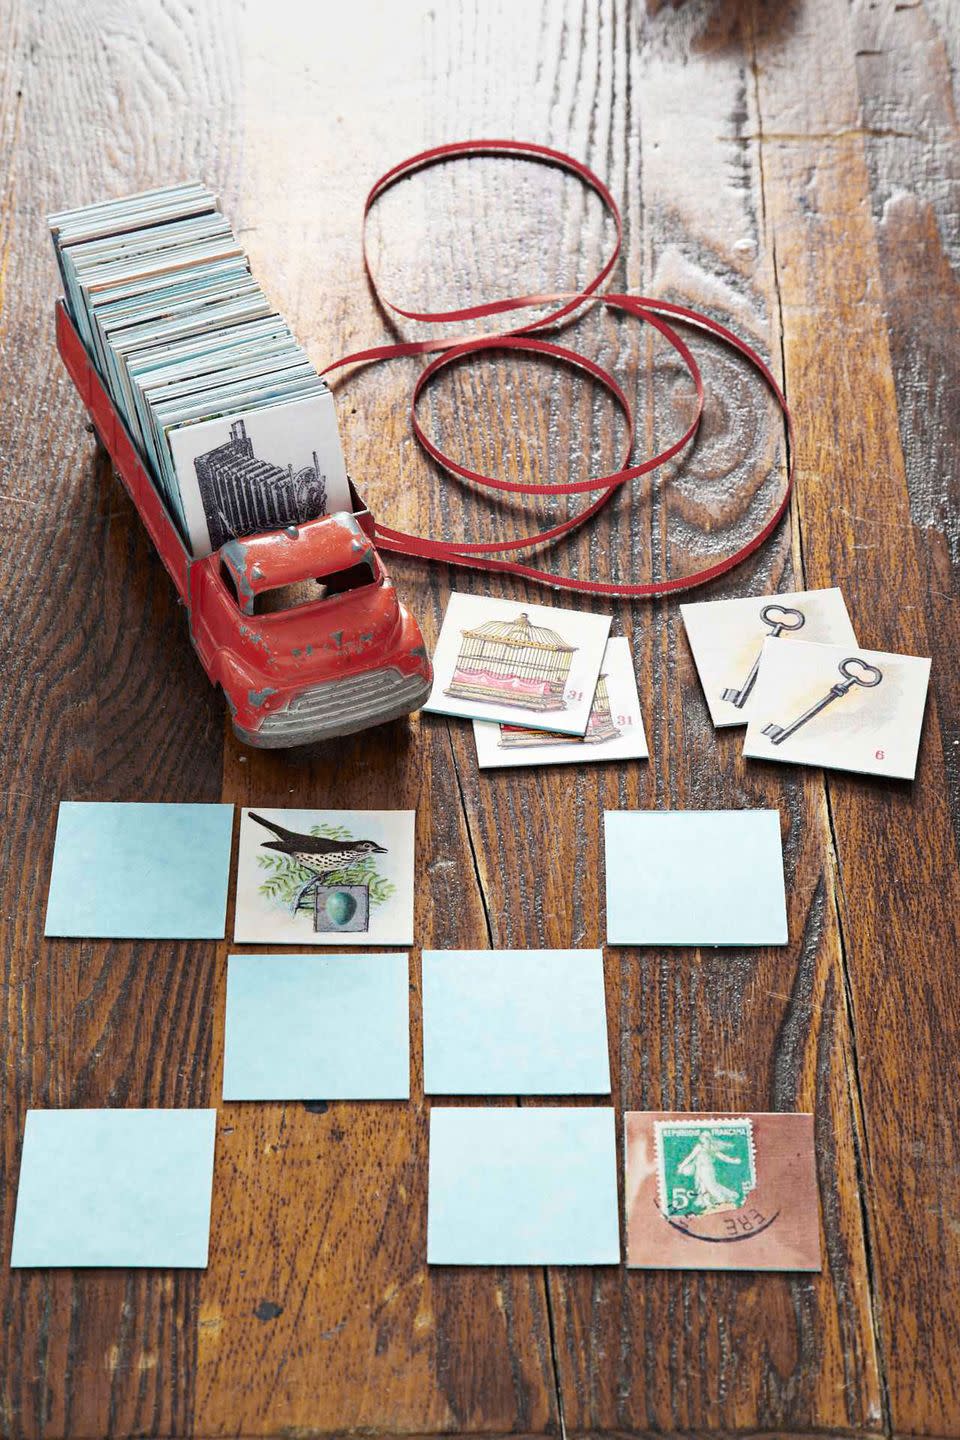
Memory Card Game
For this clever project, CL contributing editor Cathe Holden's already done most of the hard work—assembling a slew of vintage images (courtesy of The Graphics Fairy) into four easy-to-print PDFs: 1, 2, 3, 4. Print out two copies of each PDF onto 8 1/2" x 11" card stock. With a foam brush, apply Mod Podge to the back of each card-stock printout before adhering it to colored mat board.
Let dry for two hours, then top with an additional coat of Mod Podge (test your printer ink to ensure it doesn't smudge before applying glue). Allow another hour drying time. To keep game pieces from sticking together when stacked, lightly wipe both sides of the board with baby powder and a cloth. Finally, cut out the game pieces with an -X-Acto knife, then stash them in a cute catchall, like this toy truck.
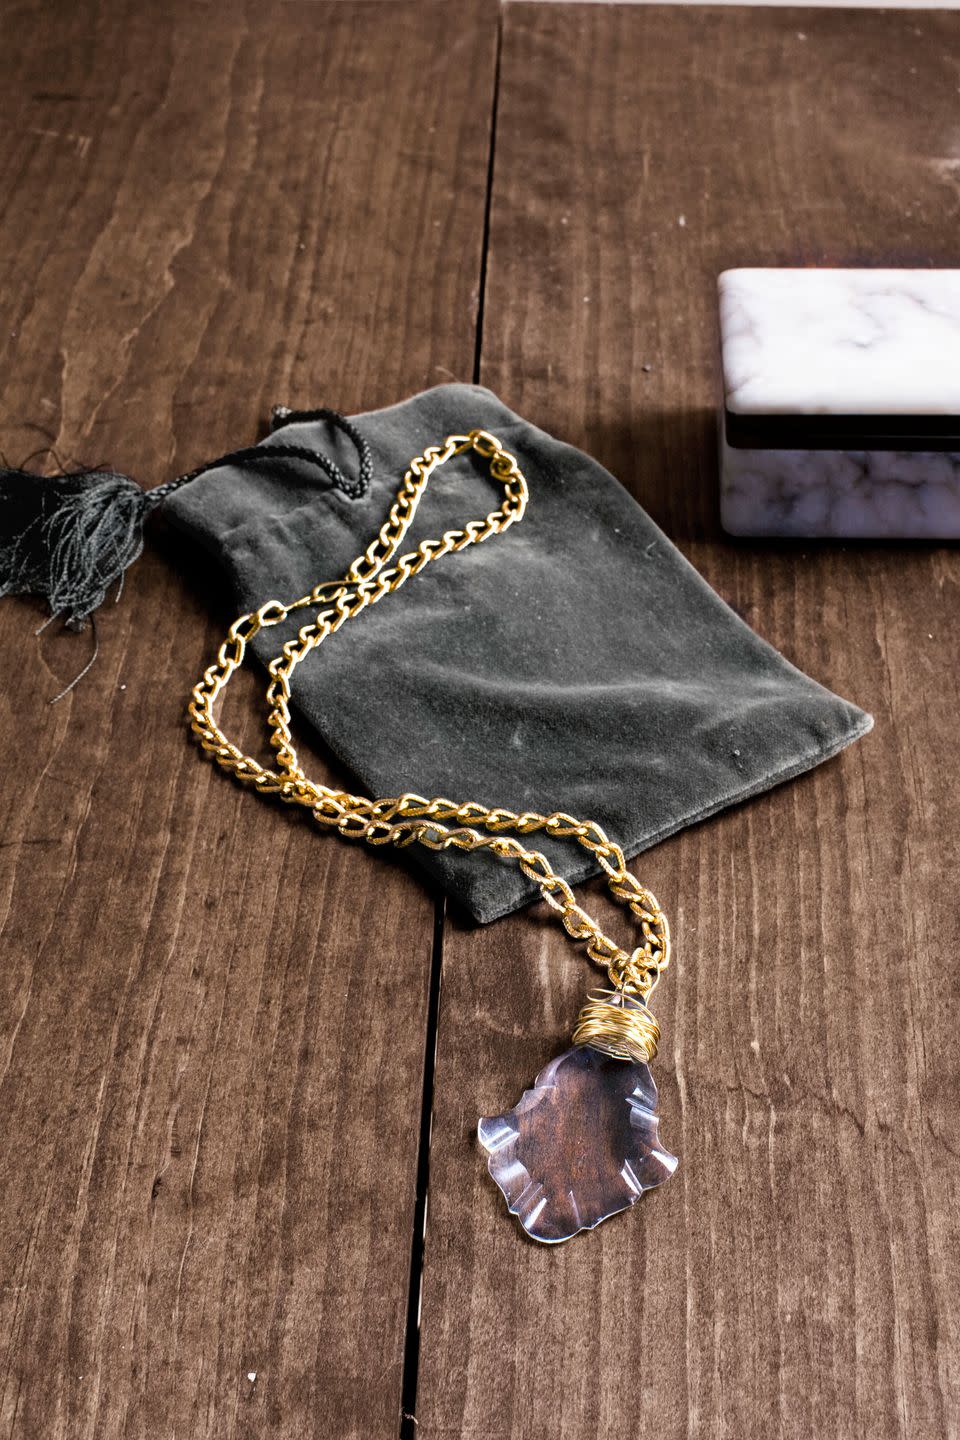
Chandelier Prism Neckace
A dime a dozen at flea markets and antiques shops, cast-off prisms make for stunning pendants. First, use pliers to remove any existing wiring. Then tightly wrap 22-gauge gold craft wire around the top of the prism, as shown below. Form a wire loop for your necklace chain; then, using pliers, cut the wire two inches past the loop before securing its end inside the wrapped wire. String a length of gold-plated chain through the wire loop. Attach a gold S hook to each end of the chain. For a fanciful finish, present the necklace inside a velvet pouch.
Handmade Candles
Teacups offer elegant vessels for hand-poured candles. Repurpose china from old place settings, mixing and matching pieces. Or single out a favorite new find, such as this one from Etsy.

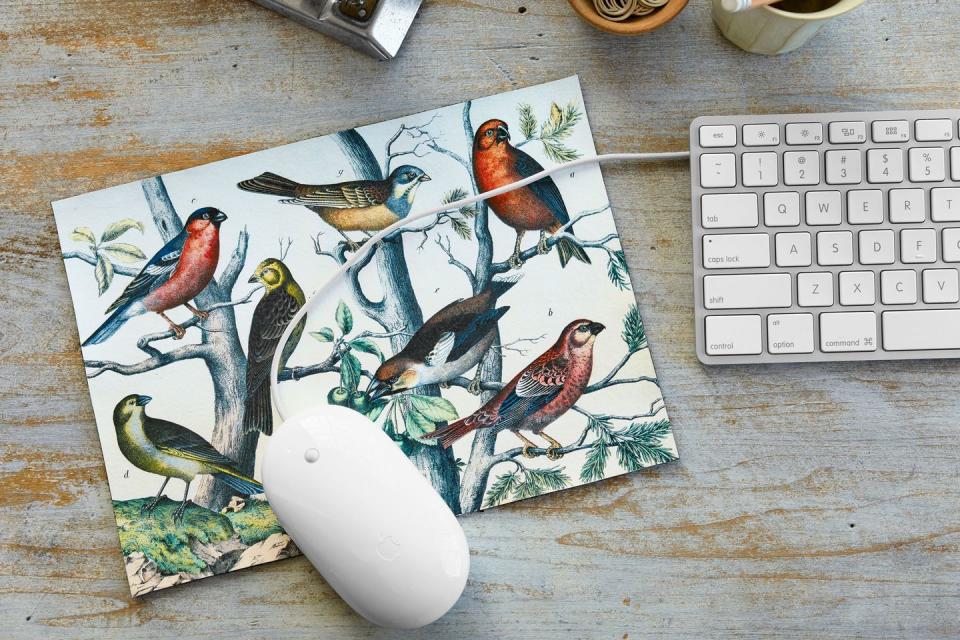
Illustrated Birds Mousepad
Build a better mouse pad: Put a bird—or seven—on it! Download the free illustration above. Resize the image to 10"W x 7 1/4"H and print onto fabric-transfer paper. Cut out the image from the transfer paper, remove the backing, and place, right side facing up, on the smooth side of a piece of top-grain leather. Iron the image onto the leather, following the transfer-paper package instructions, and trim away the excess leather bordering the flock.
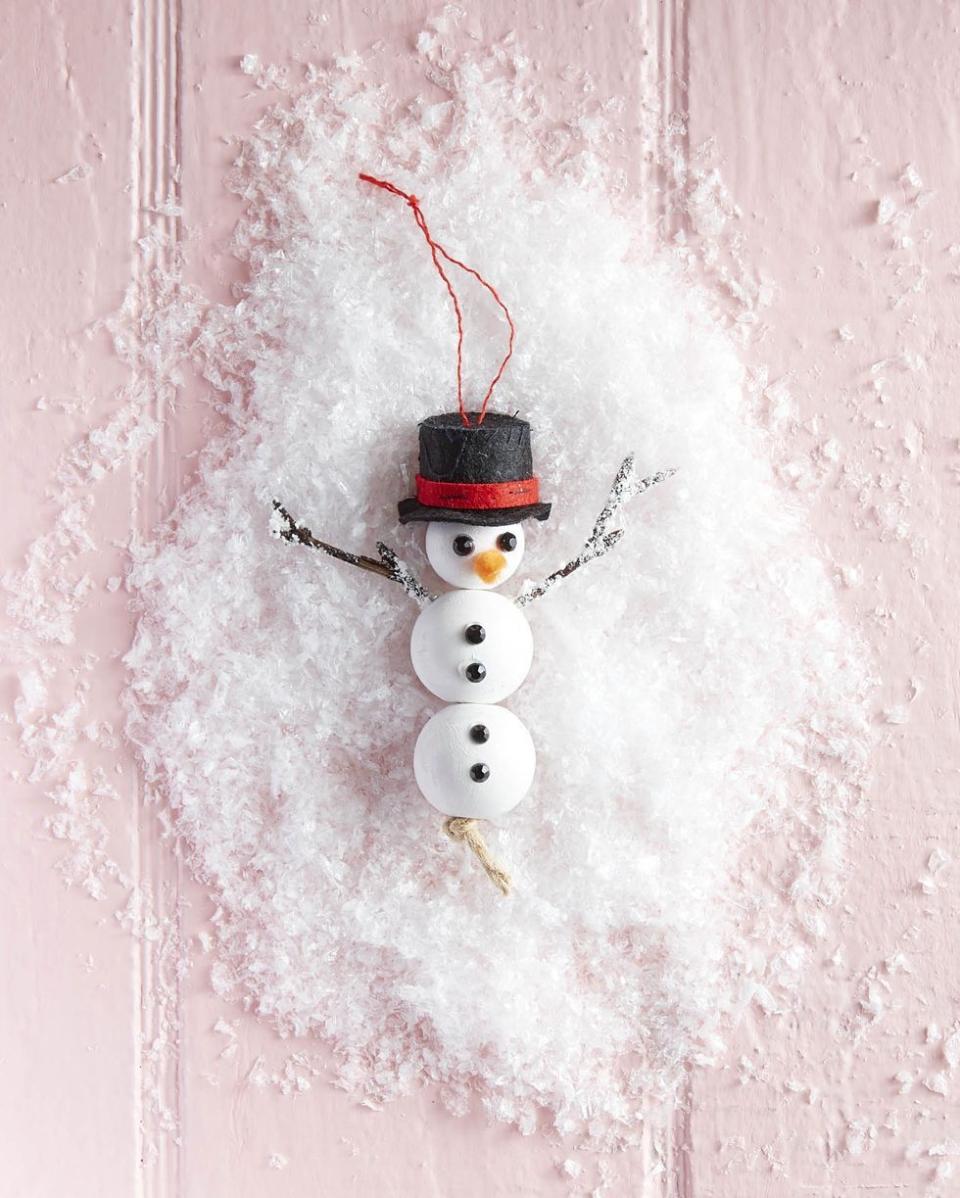
Wooden Bead Snowman Ornament
This jolly happy soul, which can be crafted in no time, shows you care enough to DIY the season's sweetest snowman ornament for them.
To make: Paint three wooden craft beads with white acrylic paint. When dry thread a piece twine through the holes of the beads and knot to hold together. Attach two black gem mini crystal rhinestones for the eyes and four for the buttons with hot glue. Snip a short lengths of orange felt and attach just below the eyes with hot glue. Attach stick arms to the side of the middle bead with hot glue. Flock arms, if desired. Wrap a thin length of red felt to a mini black top hat with hot glue. Glue a string to the top of the hat for hanging. Glue hat to snowman’s head.
SHOP BLACK GEM MINI CRYSTAL RHINESTONES
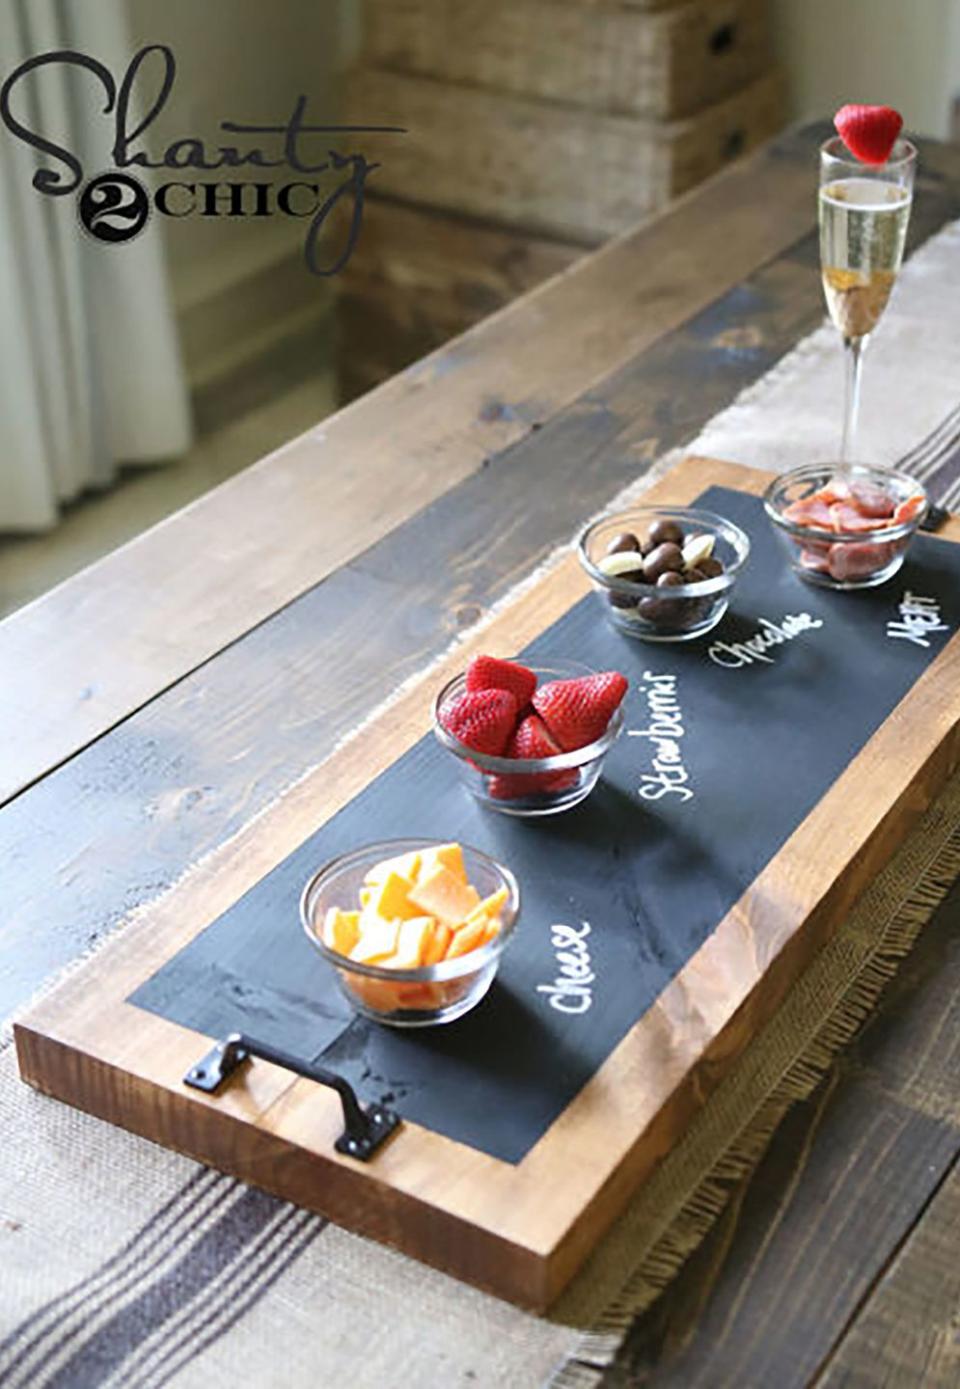
Chalkboard Serving Tray
Let the ladies of Shanty2Chic walk you through a tutorial for this easy-to-make chalkboard serving tray,the perfect gift for a friend who is always entertaining.
Get the tutorial at Shanty2Chic.
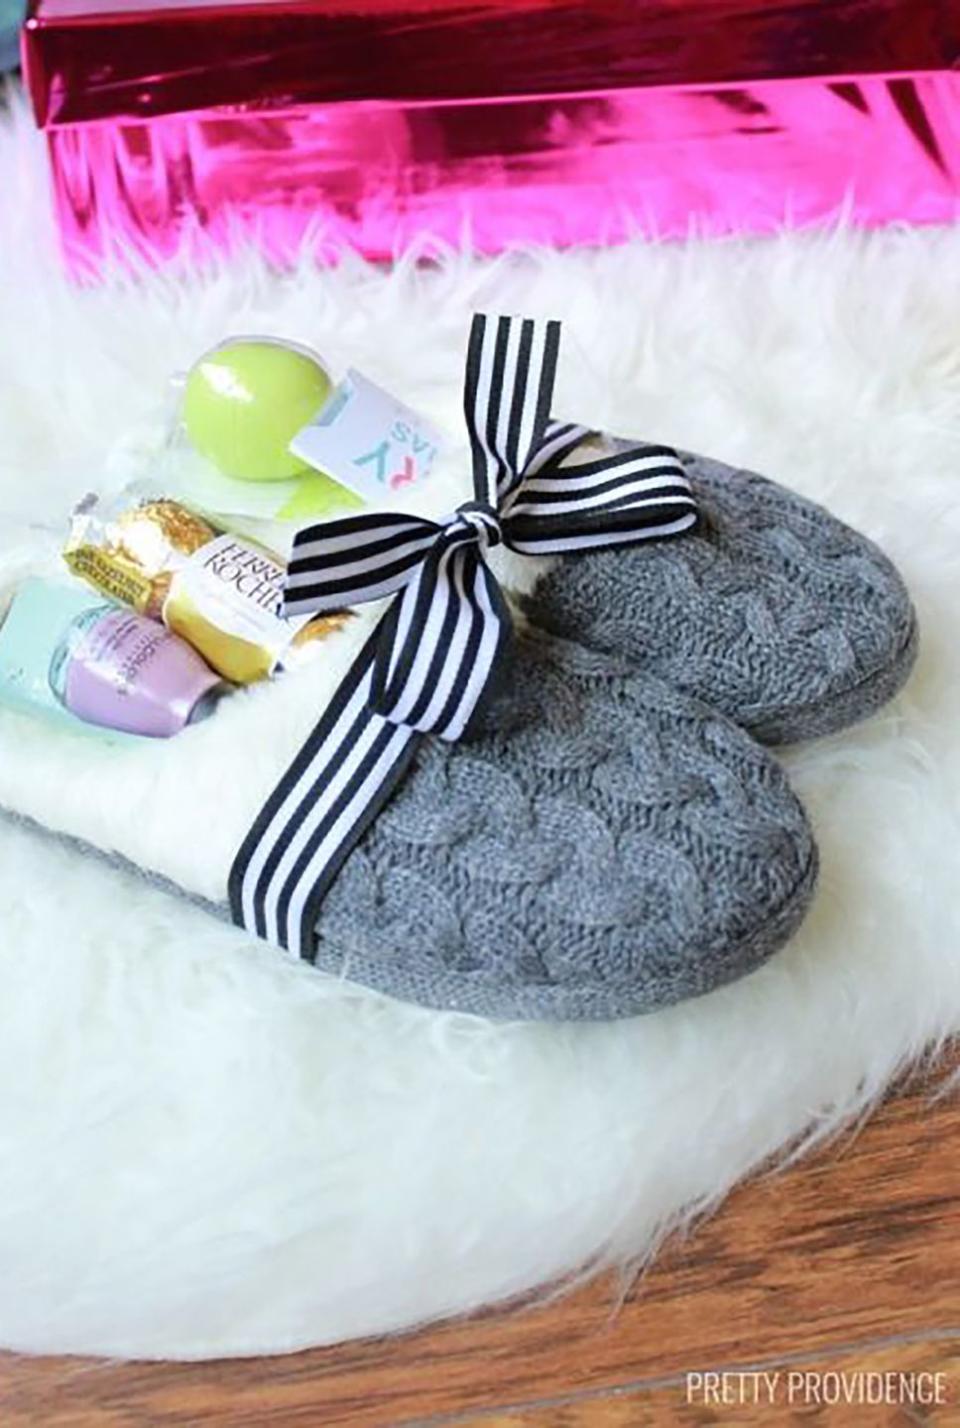
Slippers and Such
Fill a pair of cozy slippers with goodies, such as nail polish, candy, or lip balm.
Get the tutorial at Pretty Providence.
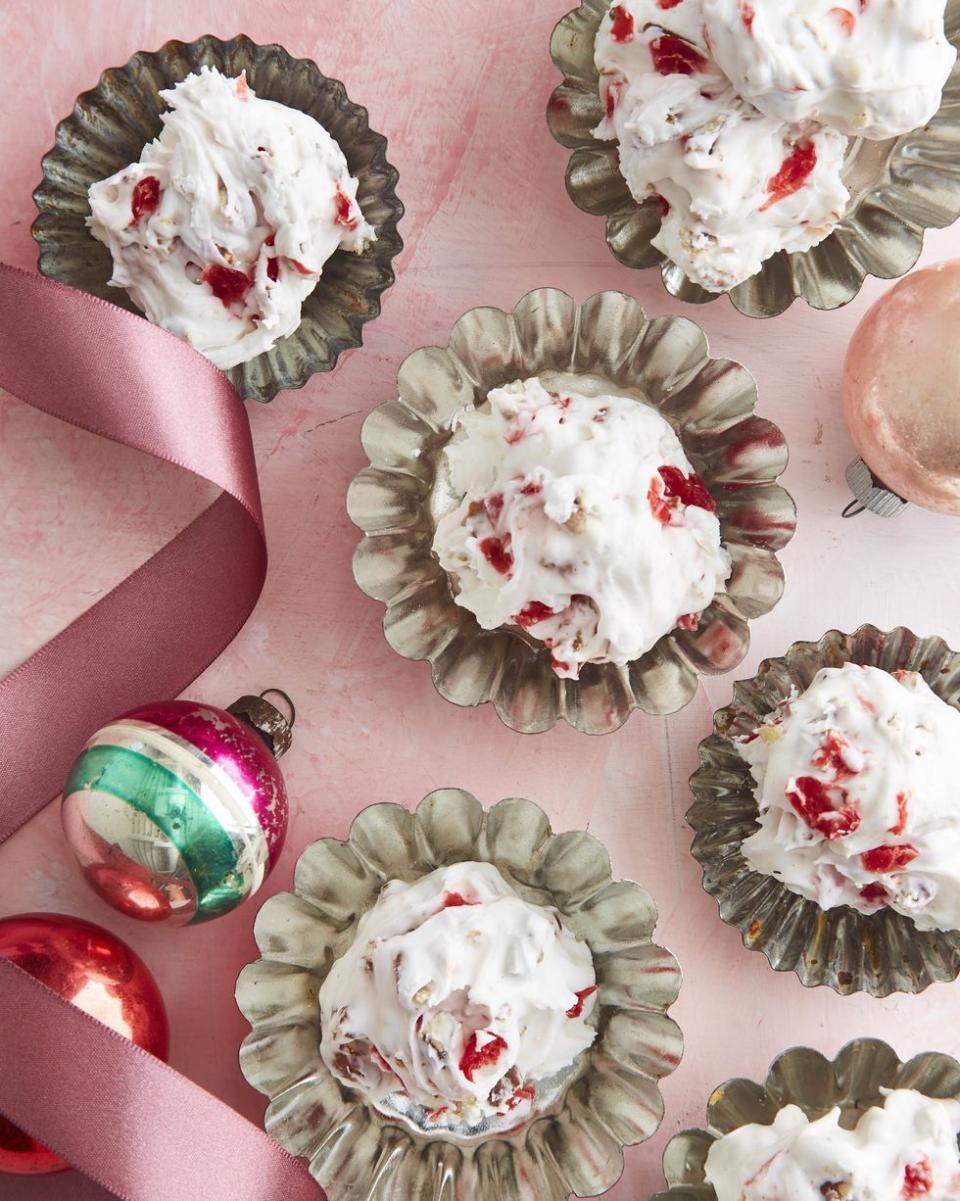
Cherry and Pecan Divinity
You don't have to be from the below the Mason Dixon Line to whip up the classic Southern dessert with this recipe, which uses cherries and pecans for a food gift they'll love to unwrap.
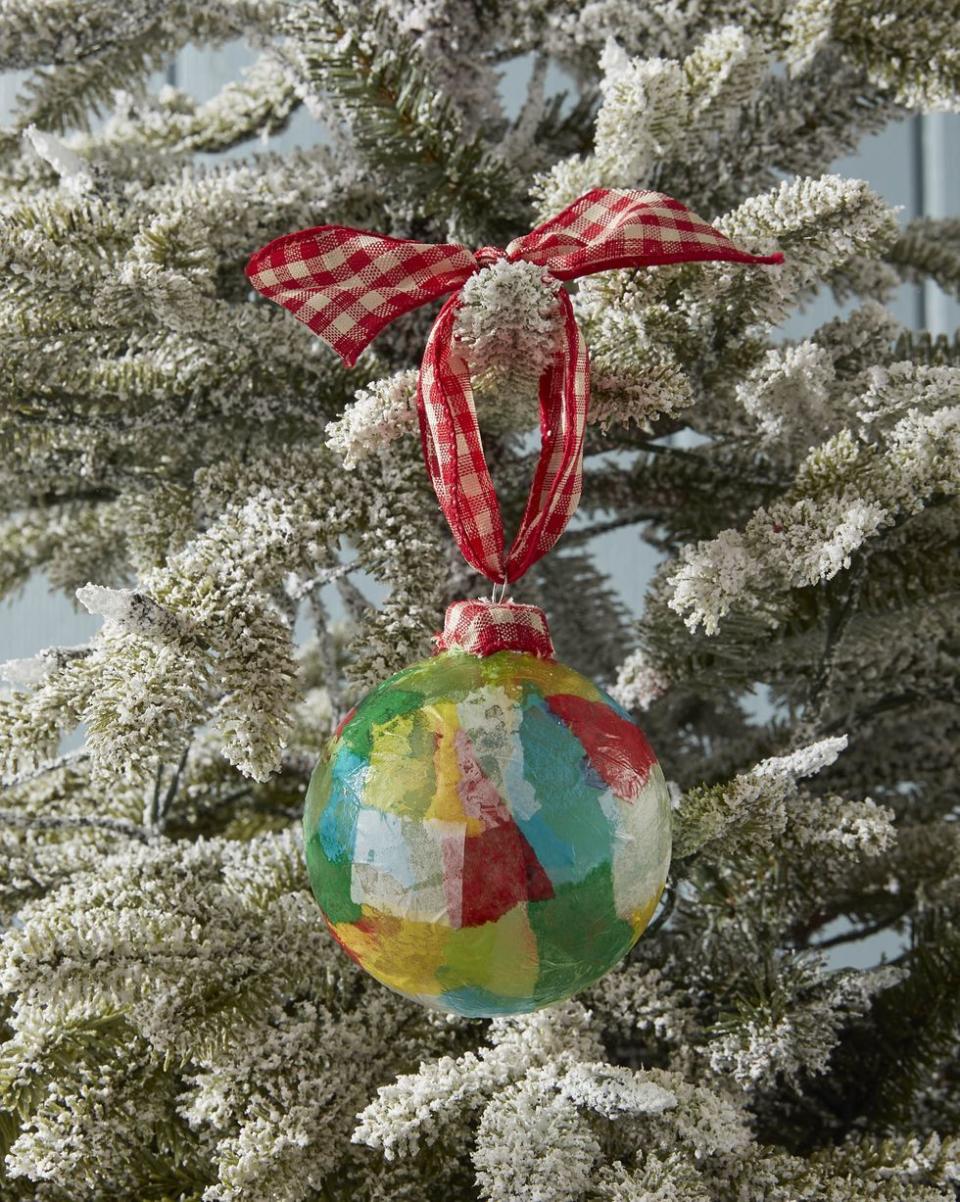
Decoupaged Tissue Paper Ornament
Decoupage, the art of decorating things by gluing colored paper cutouts onto it, makes this ornament as much fun to create as it is to receive.
To make: Tear colorful tissue paper into small pieces. Attach to a clear glass or plastic ball ornament with glossy Mod Podge. Attach a small piece of ribbon or fabric over the ornament cap. Hang to dry.
You Might Also Like