How to DIY a Guitar Shelf In 3 Steps
How to DIY a Guitar Shelf In 3 Steps
Dylan Silver is a woman of many talents. She's a writer, director, comedian, actress — and now she's a DIY-er, too! Her DIY, celeb-inspired room makeovers (on a budget!) are a hit on "You Wish You Lived Here," which airs every Sunday on HGTV's Snapchat.
"I moved into my first apartment and felt like I couldn't have the home of my dreams because of my budget," Dylan tells Rachael. "DIY-ing taught me that not only can I have the place of my dreams, but empowered me to realize that I can do it on my own."
Naturally, she brought three DIY gift ideas to our show, and we're detailing each one!
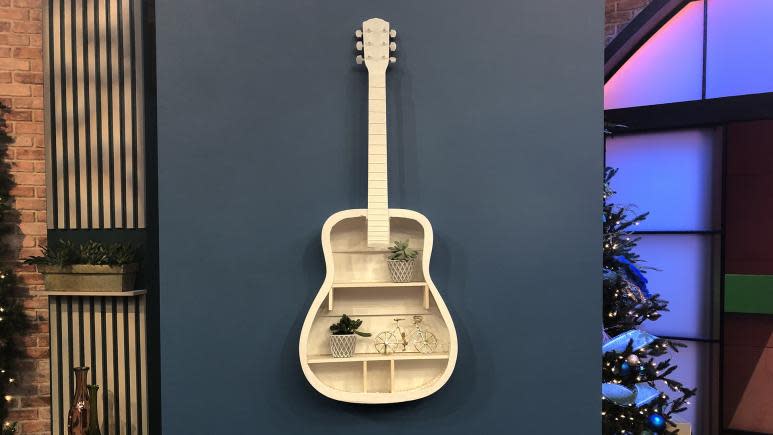
First up is this unique guitar shelf, which is perfect for the musician or music lover in your life. Be sure to check out the other DIYs she demonstrated on the show: DIY Photo Coasters and DIY Word Art.
1. Remove The Top of The Guitar
"Guitars — sometimes you can't necessarily use them as an instrument anymore," Dylan says, "but when they're at the end of the road you can refurbish it as a shelf!"
The first step is to remove the top of the old guitar. "You don’t need power tools for this," Dylan says, "I used a hand saw and sanded it down."
2. Insert Balsa Wood Shelves
To make the shelves themselves, you can buy Balsa wood from a craft or hardware store. And to put the shelves into the guitar, all you'll need is super glue.
3. Spray Paint
Then, cover the entire thing with a couple light coats of spray paint. You can choose a simple white to match a plain wall, or go with a metallic silver or gold for a fun pop of color. Dylan suggests holding the spray paint about five inches away and using consistent movements.
Be sure to spray paint your shelf outdoors or in a well-ventilated space!
The finished product can be personalized even further with whatever accents the recipient chooses to add to the shelf.
Take a look at Dylan's example:

Rachael Ray Show
And see Dylan and Rach demonstrate this DIY in the video above!