How to make your own watercolour paint from plants
Making your own watercolours with plants is a fascinating way to work with the world around you and invite the beautiful craziness of nature into your artwork. There are several ways to obtain colours from plants, but below is my tried and tested method – a simple 'lake pigment' recipe.
Materials
- 2 litres of distilled water
- An acid (Potash Alum will be perfect – KAl(SO?)?·12H?O)
- An alkali (Natron is easily available, it is sodium carbonate decahydrate Na2CO3·10H2O)
- A big saucepan (glass, inox or any chemistry cookware)
- Miniscale of some sort, we have to weigh 5g/10g
- 2 tall transparent (glass/plastic) jars (mason jar/spaghetti storage glass vial/vase)
- Cheese cloth and sturdy coffee filters
- Disposable paper plates or a dehydrator
- Mortar/pestle
- Slab and muller for grinding
- Liquid arabic gum, cloves oil or other antifungal, liquid honey (the clearer the better)
- Small containers, half pans
After you've made your lake, you can turn it into a watercolour paint. I'll also cover the different techniques for storage and conservation.
You can use the colours from plants in a lot of ways. For example, by making an infusion, like a tea, and reducing it till the colour is so concentrated you will be able to paint with it. This is very bright but very unstable over time.
You can also use that concentrated colour and pour it onto a neutral colour medium or filler, like a clay or chalk, and let it dry till you get a powder you can use as pigment. There's also a third solution and this is the one we’ll cover here: In brief, we'll extract the pigment via an acid/alkali reaction. The pigment will be adsorbed into a crystal (salt) and once ground, you’ll get a dry pigment to work with (make sure you have some watercolour paper ready). The process is always the same: infusion, concentration, precipitation.
01. Pick your flowers

(Image: ? SoMK Klesen)
Try to follow the seasons when choosing your flowers. Trying to extract rose pigment in January in the northern hemisphere would not be the best idea for instance. Dried flowers, barks and leaves can be stored and used, but to experience the freshest colours, fresh material is the best. For this recipe, let’s pretend it’s spring and the dandelions are raising their golden heads everywhere.. (or that it is nearly autumn and that we have bright yellow flowers in the garden. Marigolds maybe, StJohn’s wort or sunflowers). This recipe will work with many different flowers.
02. Infuse your flowers

(Image: ? SoMK Klesen)
Fill a saucepan with flowers and discard all the green bits. Let the petals simmer in the saucepan with two litres of distilled water and your acid, 5g of Potash Alum. Wait till you have a nice yellow infusion and then filter it with the cheese cloth.
03. Reduce and react

(Image: ? SoMK Klesen)
Simmer the clear infusion down to 1 litre or close to it. Do not boil. Dandelions don't really mind boiling but most flowers/leaves will. Keep it slow and steady. When you think it is ok, turn off the heat, and progressively add 10g of Alkali (Natron) while stirring constantly.
Beware: This is the acid/alkali reaction you probably studied in school. Acid+alkali creates salt+water+C02, meaning, there will be bubbles! Sometimes, a tad too many! So, be ready to clean afterwards or work with your saucepan in the sink to avoid overflowing on the stove.
04. Transfer the lake

(Image: ? SoMK Klesen)
Transfer the bubbly liquid into your glass jar. You will have a murky liquid with bubbles on top and you will begin to see the pigment, adsorbed by the salt created, depositing to the bottom of the jar. This is your laque forming!
05. Filtering the lake

(Image: ? SoMK Klesen)
I usually leave the mixture overnight. And in the morning I have a very clear liquid on top and the laque at the bottom. When you've got this, carefully get rid of the most clear liquid you can. Put a coffee filter on the second glass jar and slowly pour the lukewarm sludge into it to filter the excess water. The colour that stays in the filter is your lake pigment. Sometimes you can double the filter and use two of them if the sludge is very delicate, but that is a matter of experimentation, you’ll decide!
06. Dehydrate the lake

(Image: ? SoMK Klesen)
Once done (it can take a few hours), open the filter, lay it flat on a paper plate and leave it to dry, or use a dehydrator for a few hours on low setting, to dehydrate your lake. You will have to carefully brush with your fingers all the tiny bits off the filter and into a paper plate to check whether extra bits of paper are stuck in there.
07. Grind the lake

(Image: ? SoMK Klesen)
When the laque is ok, transfer it into a pestle and grind it till you get a smooth powder. Here is your pigment! You can store it in a waterproof jar, and if possible in a cupboard away from the light.
08. Make the paint

(Image: ? SoMK Klesen)
I will give you my quantities for one tablespoon of pigment, but you can adapt to your own taste. So, put one tablespoon of pigment on the mulling slab, one teaspoon of liquid arabic gum, a few drops of honey (the clearer the better – this is an antifungal and rewetting agent, no need to use honey that will change the colour), 1 or 2 drops of clove oil (strong antifungal) and mull.
If it is a tad too liquid to your taste, you can either add arabic gum powder, more pigment or even a mini amount of a filler of some sort (sepiolith, some sort of clay or chalk, though bear in mind they will slightly change the colour… up to you!)
09. Store your paint

(Image: ? SoMK Klesen)
You can add many other additives but the more you will add, the farther away you’ll move from the true colour. It’s a matter of balance and personal taste.
Pour your mulled paint into half pans or other mini containers. Keep them closed and if possible in the fridge when you don’t use them. They will last several months.
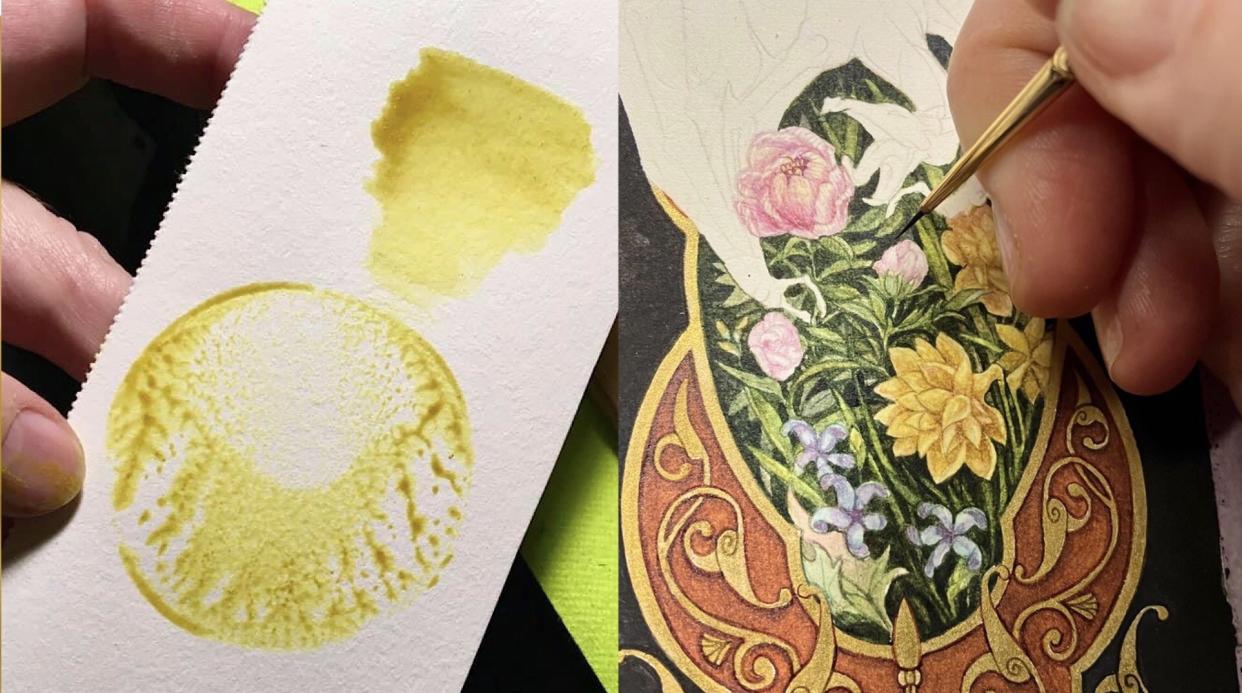
10. Experiment with your paint

(Image: ? SoMK Klesen)
You can wait for your paint to dry and reactivate it with lukewarm water, or keep it smooth in an airtight jar. In any case, transfer a small quantity, just add water and paint. In this case, I have a gorgeous Yellow Dandelion paint. (If you need inspiration for what to do with your paints, see these watercolour tutorials).
For more information and experiments making paint, visit my website or my Instagram.
