What Is a Pony Wall? A Guide to Everything You Need to Know
Pony walls, often called half walls, are popular design features across various architectural styles. Put simply, a pony wall is a short wall. Whether used structurally or purely as a room divider, a pony wall can be a clever solution for architectural needs where full walls won't do.
Below, we've explained what a pony wall is, laid out some practical uses for pony walls, and provided step-by-step instructions for building a DIY pony wall.
What Is a Pony Wall?
A pony wall is a partial wall that stops short of the ceiling, typically around halfway or less, depending on the height of the ceiling and the intended purpose of the pony wall.
Pony walls are framed and finished much the same as a standard-height wall. However, additional reinforcement is often necessary to make the wall rigid and prevent wobble.
Where and Why Pony Walls Are Installed
Pony walls are installed in a variety of spots throughout homes. Here are some common places you may find a pony wall:
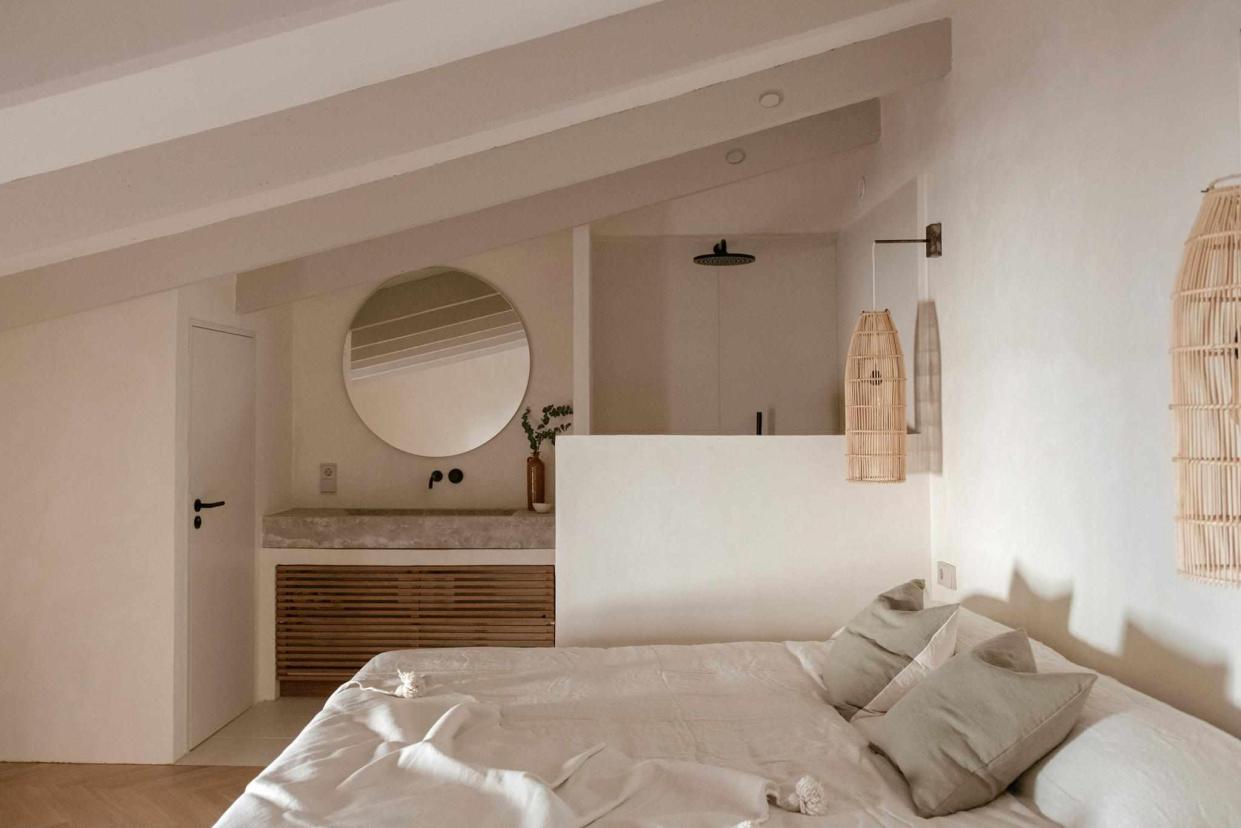
In bathrooms, pony walls are often used as a means of privacy surrounding a toilet or shower.
In kitchens, pony walls are often installed behind a row of cabinets that extend perpendicularly from a wall.
In an open-concept floor plan, pony walls are used to divide and define a floor plan without blocking the line of sight.
In split-level homes, pony walls are used to line a subtle transition between levels.
Along stairways, pony walls are used to create a safe barrier on upper floors.
Pony Walls: Load-Bearing vs. Non-Load-Bearing
It's safe to assume that most true pony walls aren't load-bearing unless there is one or more columns present. Load-bearing short walls are more accurately called knee walls and cripple walls. However, both of these terms are often used interchangeably with "pony wall."
Knee Walls: Knee walls can be found in an attic supporting the rafters. While these aren't always structurally necessary and sometimes exist simply as a design element or to hide ductwork and other infrastructure, knee walls stretch from the floor to the rafters and fully enclose the space.
Cripple Walls: Cripple walls can be found in a crawlspace, stretching from the foundation to the floor system. These walls support a tremendous amount of weight, as the entirety of the home is essentially resting on them.
Interior Pony Walls
Interior pony walls are used as room dividers, countertop supports, railings support, and more, and are rarely ever load-bearing. However, even non-load-bearing pony walls must be strong enough to support themselves and anything else daily life throws at them.
Interior pony walls are most often designed with one end terminating at a wall and the other in the middle of a room, though some pony walls do go wall to wall.
While the one end of the pony wall that is attached to the wall is plenty strong, the free end is prone to wobbling, as it is tied to nothing more than the floor system. One common way that contractors account for the dreaded pony wall "wobble" is to extend the final stud through the floor and bolt it to the side of the joist below.
Before You Begin
Before you start buying materials to build your DIY pony wall, make a thorough plan. If you're simply adding a pony wall as a room divider and don't plan on it being load-bearing, it's a fairly simple process.
If your home's floor joists are running perpendicular to the proposed pony wall, you don't have a problem. If they're running parallel, you'll have to add blocking between two joists for the pony wall to attach to.
Warning
If your reason for building a pony wall is to replace a full-height wall, you must first confirm that the wall isn't load-bearing. If the wall you're removing is load-bearing, plan to add supplemental support with one or more columns.
How to DIY a Pony Wall
The steps below explain how to build a simply partition pony wall running perpendicular to the floor joists.
Measure and Mark the Subfloor
After roughly establishing the placement of the pony wall, mark the rough positioning on the subfloor by measuring from the surrounding walls to ensure the pony wall is straight and square.
Obtain Final Measurements
With the floor marked, measure the final length of the pony wall from the wall to the mark on the floor.
Cut the Lumber
Cut the top and bottom horizontal plate to the total length of the pony wall minus 1-3/4 inches. Next, cut studs to length to determine the height. Don't forget to account for the added height of things like countertops, railings, and moldings, should you be installing them.
Frame Up the Pony Wall
Pre-build the pony wall by connecting the plates together with the studs positioned every 16 inches, plus one flush at each end.
Install the Pony Wall
Screw the pony wall into the framing of the wall and the floor joists.
Attach the Final Stud To the Floor Joist
Cut one final stud to go on the end of the wall. The length will be determined by the height of the pony wall, plus the thickness of the subfloor and the height of the joists.
Once cut, cut a hole in the subfloor at the end of the joists and slide the stud through. Screw the stud to the end of the pony wall and bolt it to the side of the joist below to prevent wobble.
Tip
A clever way to easily strengthen the free end of a pony wall and prevent wobble is to add another short perpendicular pony wall at the end, creating an "L" shape. This is often done around a balcony surrounding a stairway to create a strong barrier to prevent falls.
Finish With Drywall
Install drywall and paint just as you would a standard wall.
Read Next: 21 Half Wall Ideas That Will Add Style to Any Room
Read the original article on The Spruce.
