How to Save Seeds

Many veteran gardeners make a habit of saving seeds. While it is simple enough for most beginners to do, it’s also an activity being undertaken by scientists who recognize that collecting seeds is crucial to preserve existing species of flora. They see developing new cultivars as crucial to feeding the world’s population in the face of a changing planet.
But for most of us, saving seeds aside is simply a way of stashing some of this summer’s bounty for next year’s garden.
Why Save Seeds?
There are a number of reasons you might want to harvest seeds from your own garden, whether they’re fruit, vegetable, or flower seeds. You can:
Save money by not having to purchase seeds
Preserve heirloom or rare varieties of plants
Ensure repeat cultivation of a variety you found especially delicious, easy to grow, or beautiful
Share your saved seeds with neighbors or family members, who will cherish the tomatoes they grew from seeds you produced
Enjoy the satisfaction that comes from seeing the cycle of life through, from beginning to end, to beginning again.
RELATED: 20 Totally Free Ways to Start a Garden This Year
Plan Ahead for Seed Saving

Photo: istockphoto.com
If you are hoping to save your seeds, it’s important to plan ahead. If you’re already pulling up your spent summer plants and preparing your beds for the winter to come, you may already have missed your chance.
Plant Extra
Depending on the number of seeds you plan to collect, you might need to start an extra plant or two specifically for the purpose of saving its seeds. For example, plant enough tomato plants to satisfy your family’s need for Caprese salad all summer long, and then plant an extra tomato plant so you can harvest seeds from the fruits.
Choose the Right Seeds
For the best results in your garden, don’t waste time saving seeds from hybrid plants. The plant that grows from the seeds of a hybrid plant almost certainly will not duplicate the mother plant exactly. You aren’t guaranteed to get the characteristics that attracted you to the original plant.
Examples of hybrid plants:
Mesilla pepper
Stargazer lily
Avoid uncertainty and save seeds only from heirloom, self-pollinated, or open-pollinated plants, which will keep their distinct characteristics as long as they’re mated with a plant of the same breed.
Examples of openly pollinated plants:
Straight Eight cucumber
Rose of Heaven petunia
As you choose your varieties at planting time, bear in mind the plants from which you’d like to harvest seeds and choose hybrid or non-hybrid types accordingly.
Choose the Nicest Specimens
When seed-saving time rolls around, be choosy as to which plants you collect seeds from. If you save the seeds of plants that didn’t perform well, you’re likely to see a similar result next season. Spend some time in the garden carefully assessing your plants; identify the plants whose characteristics you’d want to replicate.
Look for plants that are vigorous growers and abundant producers, whether fruit or flowers. Consider plants that were early producers, too, and those that have shown resistance to diseases and pests. Also think about flavor, color, drought-tolerance, and hardiness as you decide which plants from which you plan to save seeds.
Understand Species and Growing Patterns
When collecting seeds in the garden, it helps to know which species can cross-pollinate, or reproduce with one another if grown closely together. Isolating them from one another can help the seeds saved later be true to the original crop. This can be a more time-consuming and advanced seed-saving process, explained in detail by Seed Savers Exchange.
It also helps to know whether a plant is a perennial, biennial, or annual. Most crops grown in the vegetable garden are annual plants, which means they grow, flower, and set seeds all in the same season. Seeds from annual flowers and crops are the easiest to harvest and replant.
Biennial plants take two seasons to reach maturity, and therefore set seed. The cold nights of winter lead to seed formation in biennials, and some can overwinter in the garden under the right conditions. Examples of biennial crops are beets, onions, turnips, carrots, and kale.
Perennial plants can live longer than 2 years, and harvesting and planting seeds from perennials may or may not be worth the effort for a seed saver. Assuming they are growing in the zone to which they are hardy, perennial vegetables will show up in the garden year after year. Asparagus and artichokes are examples of perennial vegetables.
RELATED: 15 Best Perennial Herbs to Grow
How to Save Flower Seeds

Photo: istockphoto.com
Why buy flats and flats of annual flowers again next spring when you can plant them from the seeds you already have? Here’s how to save flower seeds.
Cut flower heads once their seed pods have dried out, or shortly before.
Place the flower heads on wax paper to dry for about a week.
Remove the seeds from the flower and separate them from the pods or husks and other plant material.
How to Save Fruit and Vegetable Seeds

Photo: istockphoto.com
Most fruit and vegetable seeds can be saved by following these directions for collection. Note that some fruits and vegetables have specific seed-collection requirements, detailed below.
Select fruit that is fully ripe, but not rotten.
Separate seeds from the surrounding plant tissue and from each other. For large seeds, you can use a colander to help separate unwanted plant material from the seeds.
Place the seeds on wax paper in a cool, dry place to dry for a week.
Here’s how to save seeds for some commonly grown fruits and vegetables:
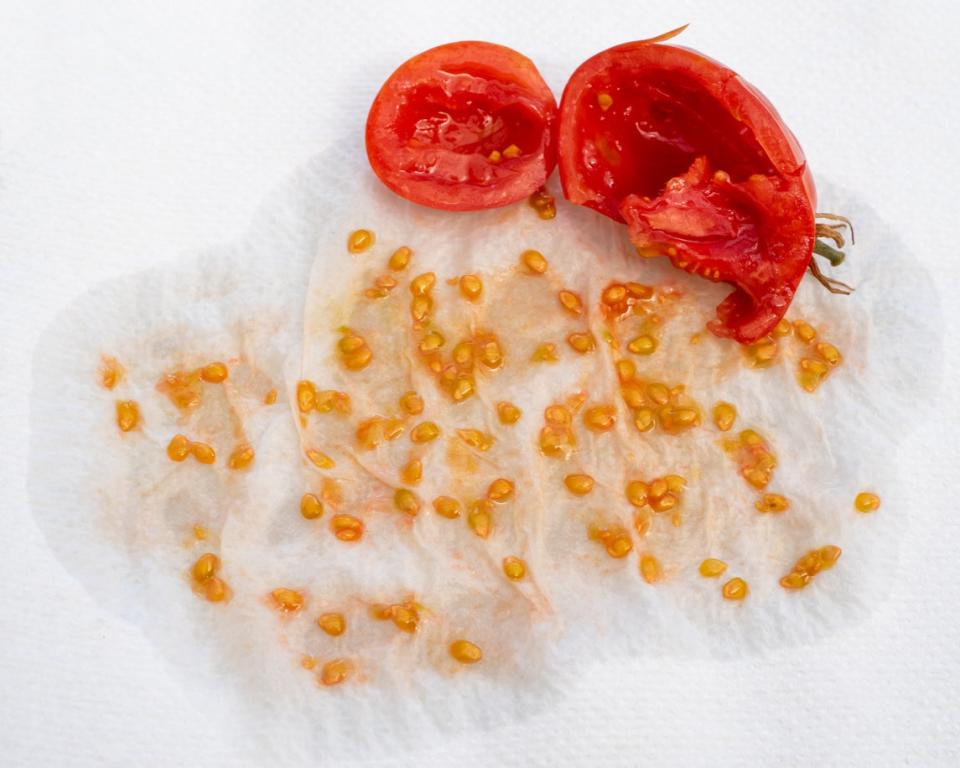
Saving tomato seeds: Cut the tomato in half and squeeze the seeds and pulp into a jar of water. Stir the mixture twice a day. The seeds will sink to the bottom of the jar in about 5 days. Strain the liquid away, rinse the seeds, and then place them on wax paper to dry for a week. Use the same method to save cucumber and pumpkin seeds.
Saving pepper seeds: Allow some peppers to remain on the plant until they are fully ripe and start to wrinkle. Then, remove the seeds from the peppers and spread them on paper towels for about a week until they are completely dry.
Saving bean and pea seeds: Allow pods to ripen fully on the plant, and then allow them to remain on the plant a bit longer, until the pods are leathery or crispy. Pull the pods, open them, and spread the seeds on paper towels for a week.
RELATED: Determinate vs. Indeterminate Tomatoes: What's the Difference?
Pro Tips for Drying Seeds

Photo: istockphoto.com
Dry seeds in a cool, dry place, away from direct sunlight. Seeds that are fairly dry can be placed on paper towels or newspaper to complete the drying process. Seeds that are wet, however, should be placed on wax paper so they don’t get stuck.
Large seeds such as pumpkin, bean, and squash can be dried in a dehydrator set at no higher than 100 degrees Fahrenheit for 5 to 6 hours. It’s not recommended to dry smaller seeds such as those from tomatoes in a dehydrator.
Do not dry seeds in an oven. Even the minimum heat setting is too hot.
How to Store Seeds You’ve Saved

Photo: istockphoto.com
Store dried seeds in paper seed envelopes, labeling each with the name of the seed and its year of harvest. You might think you can remember what is what, but some varieties look nearly identical. Many seed types remain viable even several years after being harvested, including beet, broccoli, cucumber, petunia, and zinnia.
Put your seed-stocked envelopes inside an airtight container. Store the container in a cool, dark, and dry location (some people use the refrigerator).
To absorb moisture, add a packet of desiccant (from a pill bottle) or fold a little powdered milk into a tissue.
Final Thoughts

Collecting and saving seeds is fun once you get the hang of it. If you end up with extras, trade seeds with friends and neighbors, give some away as gifts, or donate them to local libraries or community gardens. Seed saving is a great way to save money since you won’t have to buy new seeds next year. But we wouldn’t blame you if you decided to experiment with a new variety—or several—from a seed catalog.
Just getting started on your gardening journey? Read about our 15 essentials for beginner plant parents.