What is a snow cornice? And how do you stay safe around this deadly alpine hazard?

In April 2017, a lone hiker arrived at the summit of Mount Harvey, a 5,420-foot peak north of Vancouver. He had fallen behind his group on the ascent and when he reached the top in deep snow, all he could see were their footprints – five sets altogether – leading off the edge, and an obvious break where the snow had given way. Five hikers died that day, falling over 1,600 feet when the snow they were standing on turned out to be a cornice.
Cornices are a natural snow formation that occurs in the mountains every winter, but they become especially dangerous in the spring, when warming conditions cause them to collapse, and under low visibility conditions. If you’re still planning on taking some snowy adventures with your crampons or backcountry skis this year, read on to understand the dangers of cornices, and how to reduce your risk.
What is a cornice in the snow?
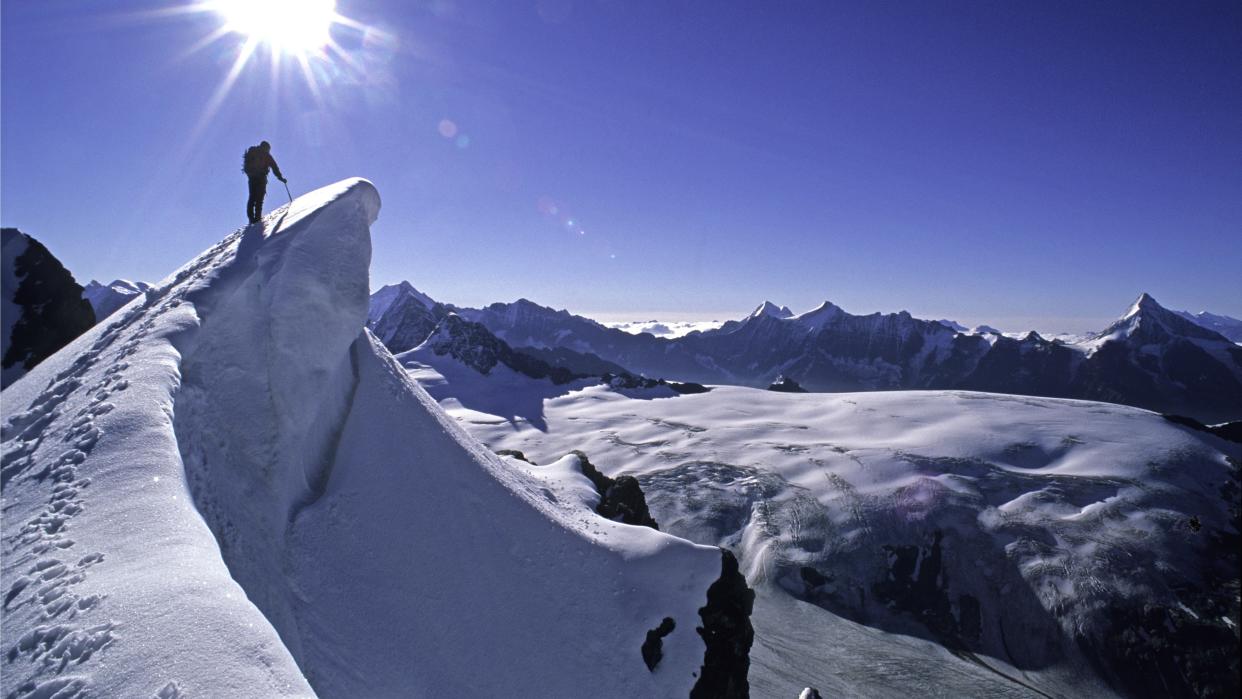
Snow cornices are overhanging masses of snow that are formed by wind. They build up over the course of the winter on the leeward (that’s downwind) side of ridgelines and mountain summits. These structures can be very beautiful to look at and can grow to be wider and longer than a city bus. Underneath them, however, can be thousands of feet of thin air. When the warming temperatures of spring bring more frequent freeze/thaw cycles, they can become unstable and break off, spelling disaster for anyone who is hiking or skiing on it, or underneath it, at the time.

How do you identify a cornice?
Cornices are very difficult to detect. If you’re looking up at a cornice from below, or from an adjacent peak, it can become clear that what looks like a rock shelf covered in snow is actually just protruding snow as you may be able to see a shadow underneath the overhang. When you’re traversing across a cornice in snowshoes or on skis, however, it can be impossible to know whether what you’re standing on is solid or could give away at any moment.
If you’re standing on a snow-covered ridge or crest, the edge might appear to be 20 feet away, but could actually be behind you, and what you’re standing on could break off and take you down the cliffside with it. Even if you know a mountain well, it’s really not easy to identify a cornice in the snow, but when you’re mountaineering or skiing on a ridge or crest, you should always assume that what you’re standing on isn’t solid.

Cornice safety tips for mountaineering and skiing
Cornices pose several hazards to anyone adventuring in alpine areas and in winter. First, they can break away underneath you and send you tumbling down the cliffside. They can also fall down on top of you if you are climbing below them, and in doing so, they can trigger an avalanche, which can affect climbers even further down the mountain.
The consequences, of course, can be deadly. Just last week, an experienced climber died after the cornice he was standing on gave way and he fell 2,000 feet into the crater of Mount St Helens and there are similar tragedies every year. Like crevasses, cornices are a very real part of mountaineering, and while they’re difficult to detect, there are measures you can take to reduce your risk.
1. Check the weather
When you're checking the mountain weather forecast before any excursion, pay attention to rising temperatures in recent days as this can increase the instability of snow, as can high winds. High winds in recent days may also have led to cornices growing rapidly. Under these conditions, know that cornice risk will be higher and consider staying away from ridges and standing well back from any apparent edge.
Furthermore, if visibility looks set to be low on the day of your expedition, you’re going to want to make sure your navigation skills are extra keen. Use a topo map and plan a route that keeps you far away from edges to ensure you’ll be safe in a whiteout.

2. Change your route
In truth, the best way to avoid the hazards of cornices is to steer clear of them. If the forecast looks like cornice danger might be high, your best option is to choose a lower route to ensure you won’t accidentally end up on a cornice unplanned. Stay off the summits and also away from routes that take you below areas you’ve identified where cornices might build up.
3. Go with a guide
If you’re you’re new to the area or lack mountaineering experience, it can be worth it to go out with a guide who knows the area well. Yes, it will cost more and of course, there’s never any guarantees about what will happen in the backcountry, but they’re very likely to know the areas where cornices tend to build up and will be keen to steer you away from danger.

4. Undergo avalanche safety training
Even if you’re not standing on a cornice when it breaks off, you could find yourself caught up in an avalanche if you’re below it. Avalanche safety training will teach you how to identify avalanche-prone areas and avoid them, as well as how to use gear like an avalanche beacon and probe. Always check the avalanche forecast before going out and if the risk is moderate or higher, change your plans and live to hike or ski another day.
