How to add 2FA to your iPhone’s Apple account

Two-factor authentication (2FA) is an important part of security in the current digital world. The basic concept is simple to understand: pick a device that you know and trust, and whenever someone tries to log onto your account, they'll need a code that gets sent to your device.
Since that device is, in theory, always in your possession, you never need to worry about a bad actor gaining access to your accounts and the data contained therein.
This is particularly important for your Apple ID, as Apple accounts hold lots of valuable data, including passwords and payment details. As a result, they require more security than a simple password. Here's where you can employ two-factor authentication, which helps ensure that you'll know who is accessing your details at any one time.
Setting 2FA up on your iPhone is simple, although for new users it can be a bit tricky to navigate the menu for the first time. As such, we have this handy guide to help you set up 2FA for your iPhone's Apple account, in which we'll show how to add more than one trusted device to your account.
How to activate 2FA
1. Access Apple account security

(Image: ? Future)
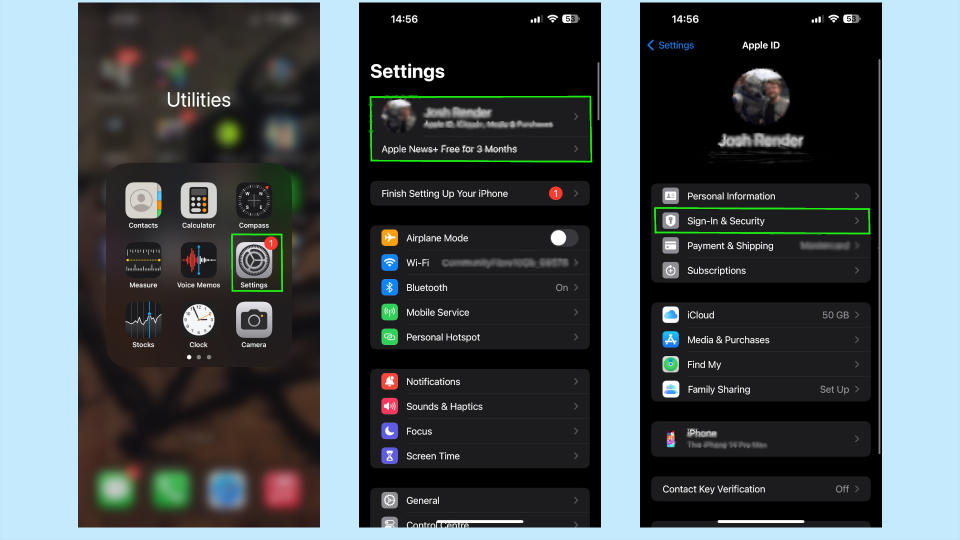
The first step is to go into your iPhone’s Settings, which is represented by a gear icon on your home screen. In Settings, select your Apple account located at the top of the Settings menu. Once in the account, select Sign-in & Security to be taken to the relevant menu.
2. Go into the security to find and enter desired number

(Image: ? Future)
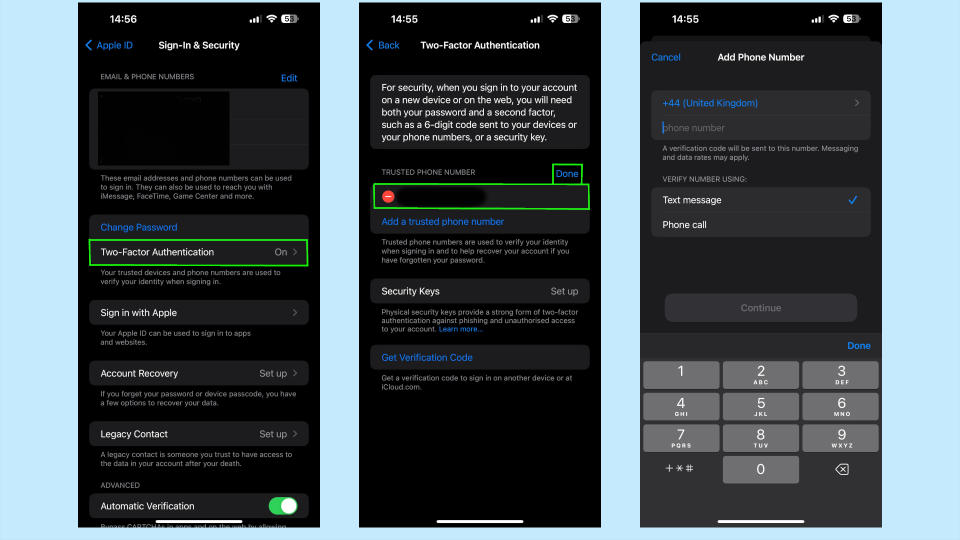
From the Sign-in & Security section, select Two-Factor authentication, which will then take you to a new screen. Once there, select the option to Add a Trusted Phone Number ,and add in the desired phone number. Please note that the area code replaces the first digit of a phone number. Once that is done, select how you would like it to be verified — either a text message or a phone call.
How to add a second verified device for Apple 2FA
1. Access Apple account security

(Image: ? Future)
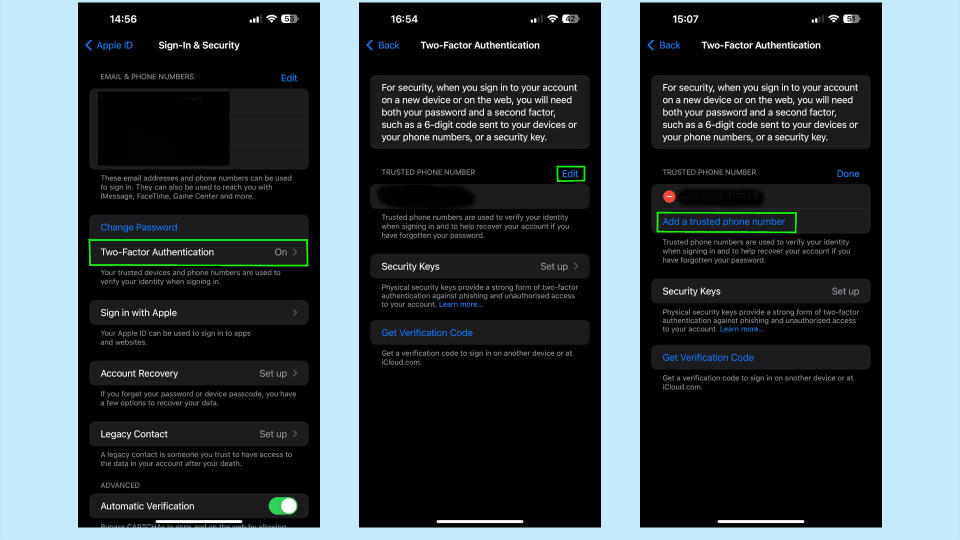
It may be that you want to add a second trusted number in case you lose your phone or can't access it and still need to verify your identity. You start in much the same way as you did when setting up 2FA. Go to Settings > Account > Sign-in & Security
2. Add a new number

(Image: ? Future)
Once in the Sign-in & Security window, you'll need to select the Two-Factor option again. However, the difference this time is that you'll click on Edit followed by add a trusted Phone Number. Once that is done, you'll follow the same process as adding the prevous phone number in the earlier steps.
It should be noted that you can only delete a number if you have more than one verified number saved.
Adding two-factor authentication is simple once you know where to go, and hopefully, this guide has made that a little easier. Please check out our other iPhone guides such as how to transfer data between iPhones, and 19 hidden iPhone features everyone should know
