How to turn on G-Sync on a gaming laptop
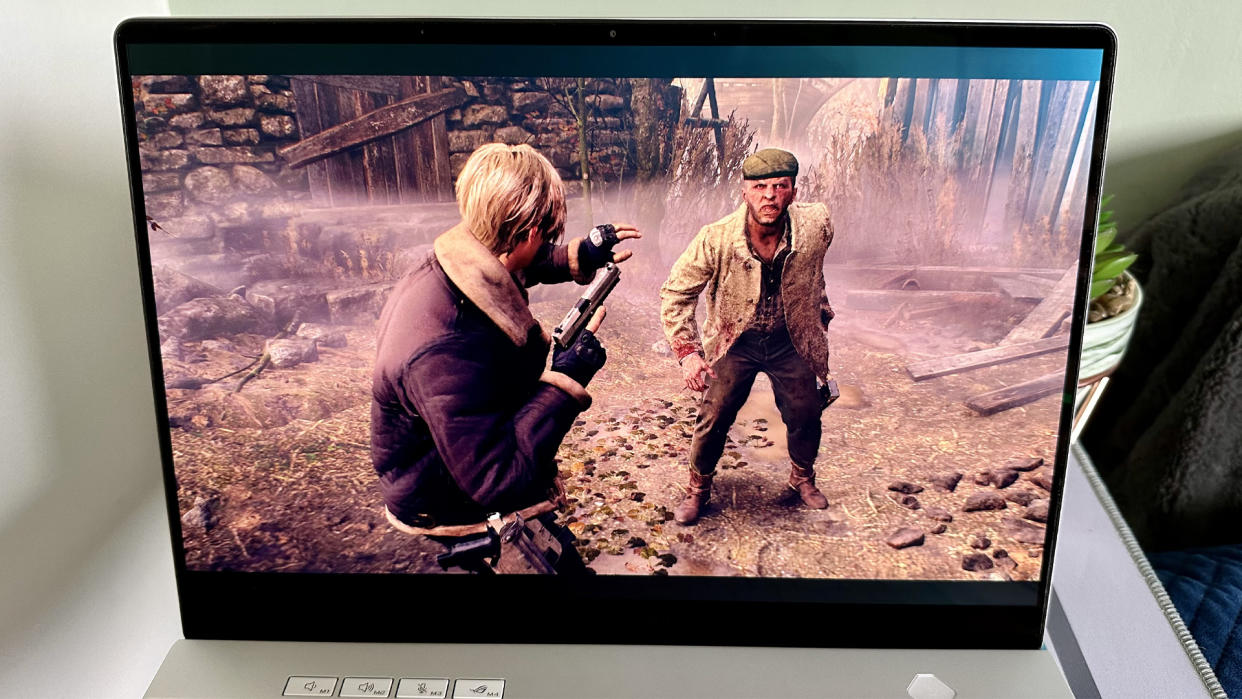
Knowing how to turn on G-Sync on a gaming laptop is important if you want to get the most out of your portable PC. While Nvidia’s display technology is only available on select gaming laptops, it’s a great feature to enable if you want to combat screen tearing and on-screen stuttering while enjoying the best Steam games.
What exactly is Nvidia G-Sync? In short, it’s a type of screen tech that synchronizes the refresh rate of your display to match the rate at which your GPU is spitting out frames of gameplay. This synchronization not only does helps eliminate tearing during play, it also reduces the sort of input lag that’s associated with VSync (“vertical synchronization”) technology.
Some of the best gaming laptops support Nvidia's G-Sync, but as I recently found out while testing the amazing Asus ROG Zephyrus G14 (2024), Team Green's frame-smoothing technology isn’t always enabled out of the box. In my case, I was forced to fiddle around with settings in the Nvidia Control Panel to remedy this issue, though thankfully it’s an easy fix once you know what you’re doing.
Below I’ll guide you through the processing of turning on G-Sync on a gaming laptop to ensure you get the smoothest experience possible when playing the best PC games.
How to turn on G-Sync on a gaming laptop
Click the Windows key and type “Nvidia Control Panel”
Select “Manage Display mode”, then “Nvidia GPU only”
Open the “Display” drop down menu, then “Set up G-SYNC”
Ensure the “Enable G-Sync” box is ticked
Enjoy playing your favorite games in smoother style
Read on to see full illustrated instructions for each step.
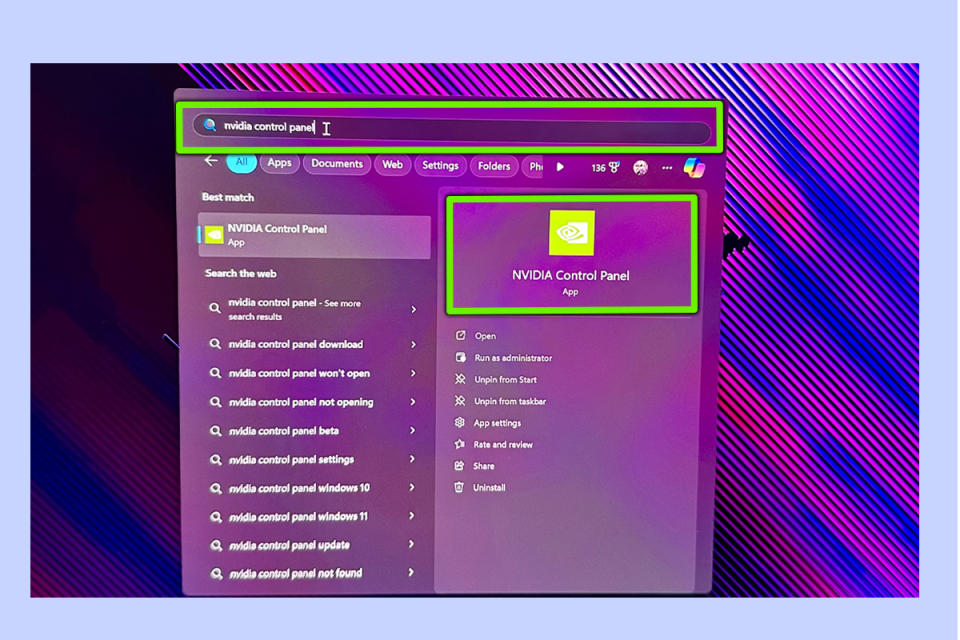
1. Click the Windows key and type “Nvidia Control Panel”
(Image: ? Future)
Press the Windows key located near the bottom left of your laptop’s keyboard, then type “Nvidia Control Panel” into the search bar to access Nvidia's GPU-tweaking settings menu.
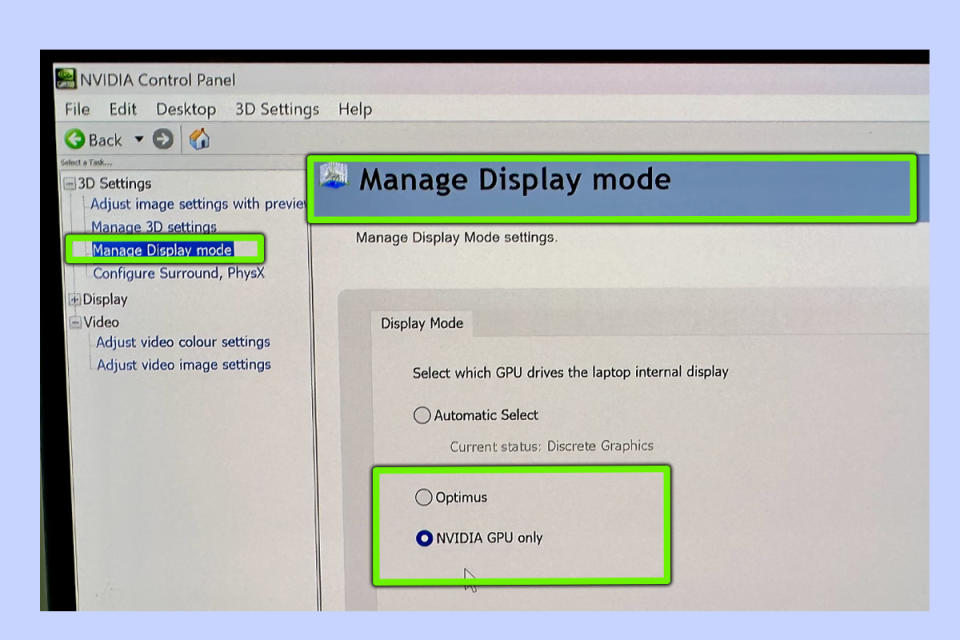
2. Select “Manage Display mode”, then “Nvidia GPU only”
(Image: ? Future)
Once you’re in the Nvidia Control Panel, select “Manage Display mode”. Depending on your laptop, it may be set to internal “Discrete Graphics” rather than your system’s Nvidia graphics solution. To get G-Sync working, you first need to select “Nvidia GPU only”.
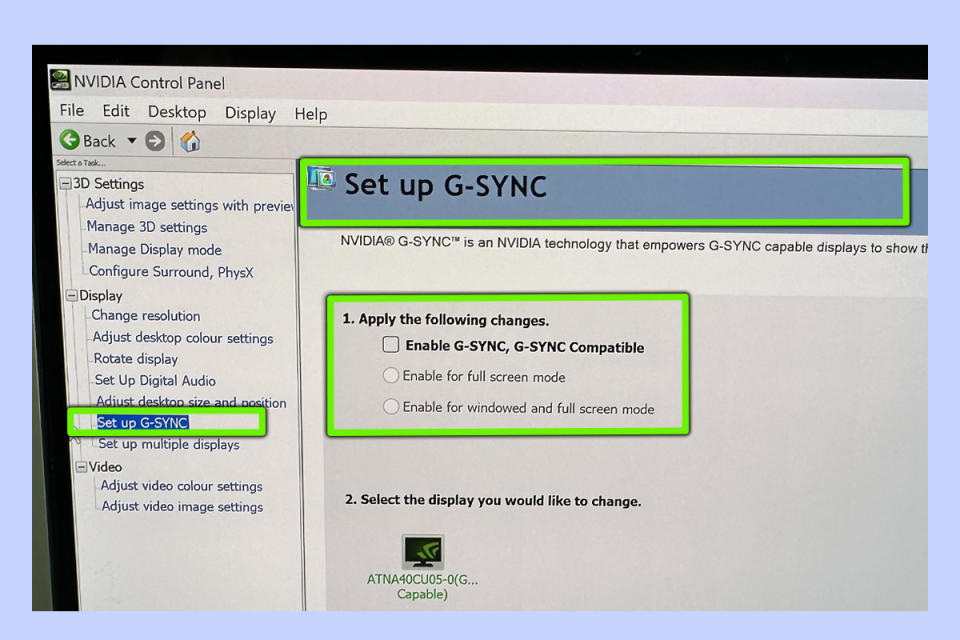
3. Open the “Display” drop down menu, then “Set up G-SYNC”
(Image: ? Future)
Once you’ve got your laptop to default to your Nvidia GPU, open the “Display” drop down menu by clicking on the little plus sign. You should now see an option to “Set up G-SYNC”, which you need to open to ensure the display tech is enabled.
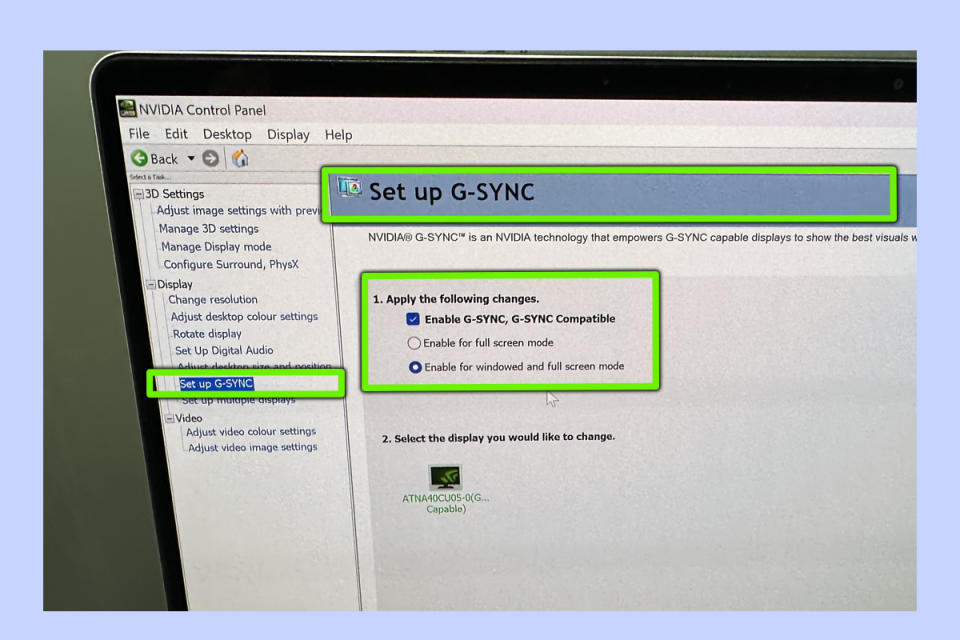
4. Ensure the “Enable G-Sync” box is ticked
(Image: ? Future)
Under the “Apply the following changes” option, make sure “Enable G-SYNC, G-SYNC Compatible” is ticked. You then have the option of choosing between “Enable for full screen mode” and “Enable for windowed and full screen mode”. Opt for the latter to give yourself as much flexibility as possible.
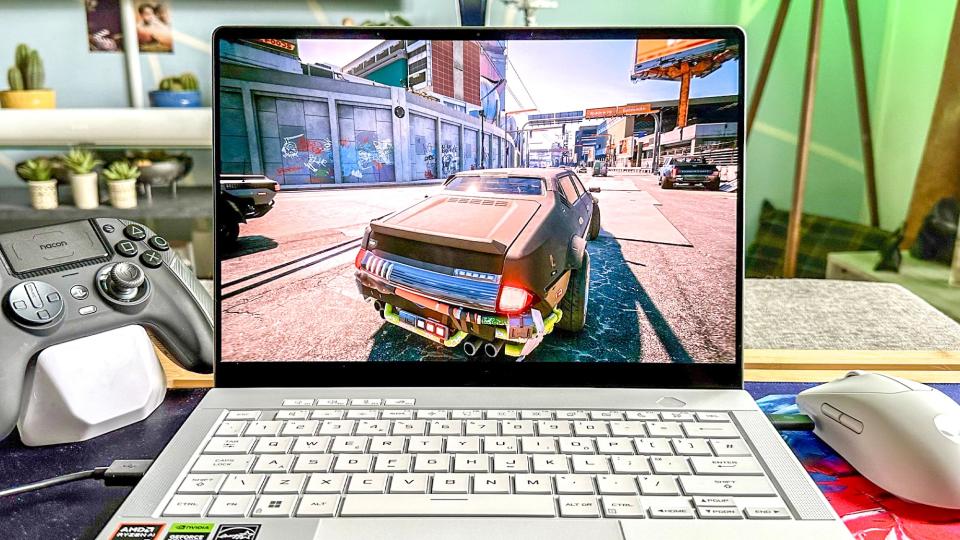
5. Enjoy playing your favorite games in smoother style
(Image: ? Tom's Guide)
With G-Sync now enabled, you can boot up pretty much any modern, moderately demanding PC game and you should instantly feel the benefit of smoother frame rates and reduced stuttering as your laptop’s refresh rate is directly syncing up with the frame rate output of your GPU.
Well done, you’ve just enabled G-Sync on your gaming laptop… well, provided you have a compatible system with a Nvidia GPU, of course. As someone who obsesses over frame rates way too much, I’ve been in love with this display technology for years. It can make a massive difference in demanding PC games like Cyberpunk 2077 and Red Dead Redemption 2. It’s legit one of the best features the graphics card manufacturer has ever developed.
In the need of more PC gaming tips? Check out how to add non-Steam games to Steam, ensure you unlock this PS5 controller hack to make it a better gamepad and read up on 7 ways to get your gaming setup pristine.
